I honestly don't remember the last time I finished 3 projects in a day, so I'm feelin' pretty good about today. It was definitely a lazy day, though. After working 8 days in a row, then 4 days of temperatures in the 90s, I more than welcomed a day all to myself with temperatures in the mid 60s. I spent probably about 10 hours of my day crocheting today, and it just wouldn't be me if my posts weren't made around 3 AM ;)
1.
Gypsy Head Scarf
This took all of an hour and a half, and looks really nice. The yarn I used was Lion Brand's Tweed Stripes in the "Caribbean" colors. The pattern called for a ch of 144, but I did 154 and I still felt as though it was a tad short (though, I like my head scarf ends to go like 5 or 6 inches past my shoulders). This just touched my shoulders. Like I said, though, definitely happy with the results, and how quickly it went.
2.
Sushi Roll Scarf
I have actually been working on this for about 2 weeks now, but finally managed to finish it today. This is actually a wedding gift for someone I've only met a handful of times, but whose wedding I'll be attending later this month. The only reason I did a handmade gift was because, well, first of all, those are the only gifts they're accepting, and they're refusing to accept store-bought gifts, but have set up a donation to a charity if anyone feels like they have to spend money on them. I loved that so much, that I vowed to make something for them (read: her) if for nothing else than to show my gratitude about how she's handling her wedding.
All in all, it was a fun project at first, but when I got to the 36" of white for the 'rice' I got really bored, and subsequently frustrated with how bored I was getting. By the end, I was happy to be done. The project is a cute idea, but I think it was a little too simple for how ambitious I've been feeling lately when it comes to my crocheting.
3.
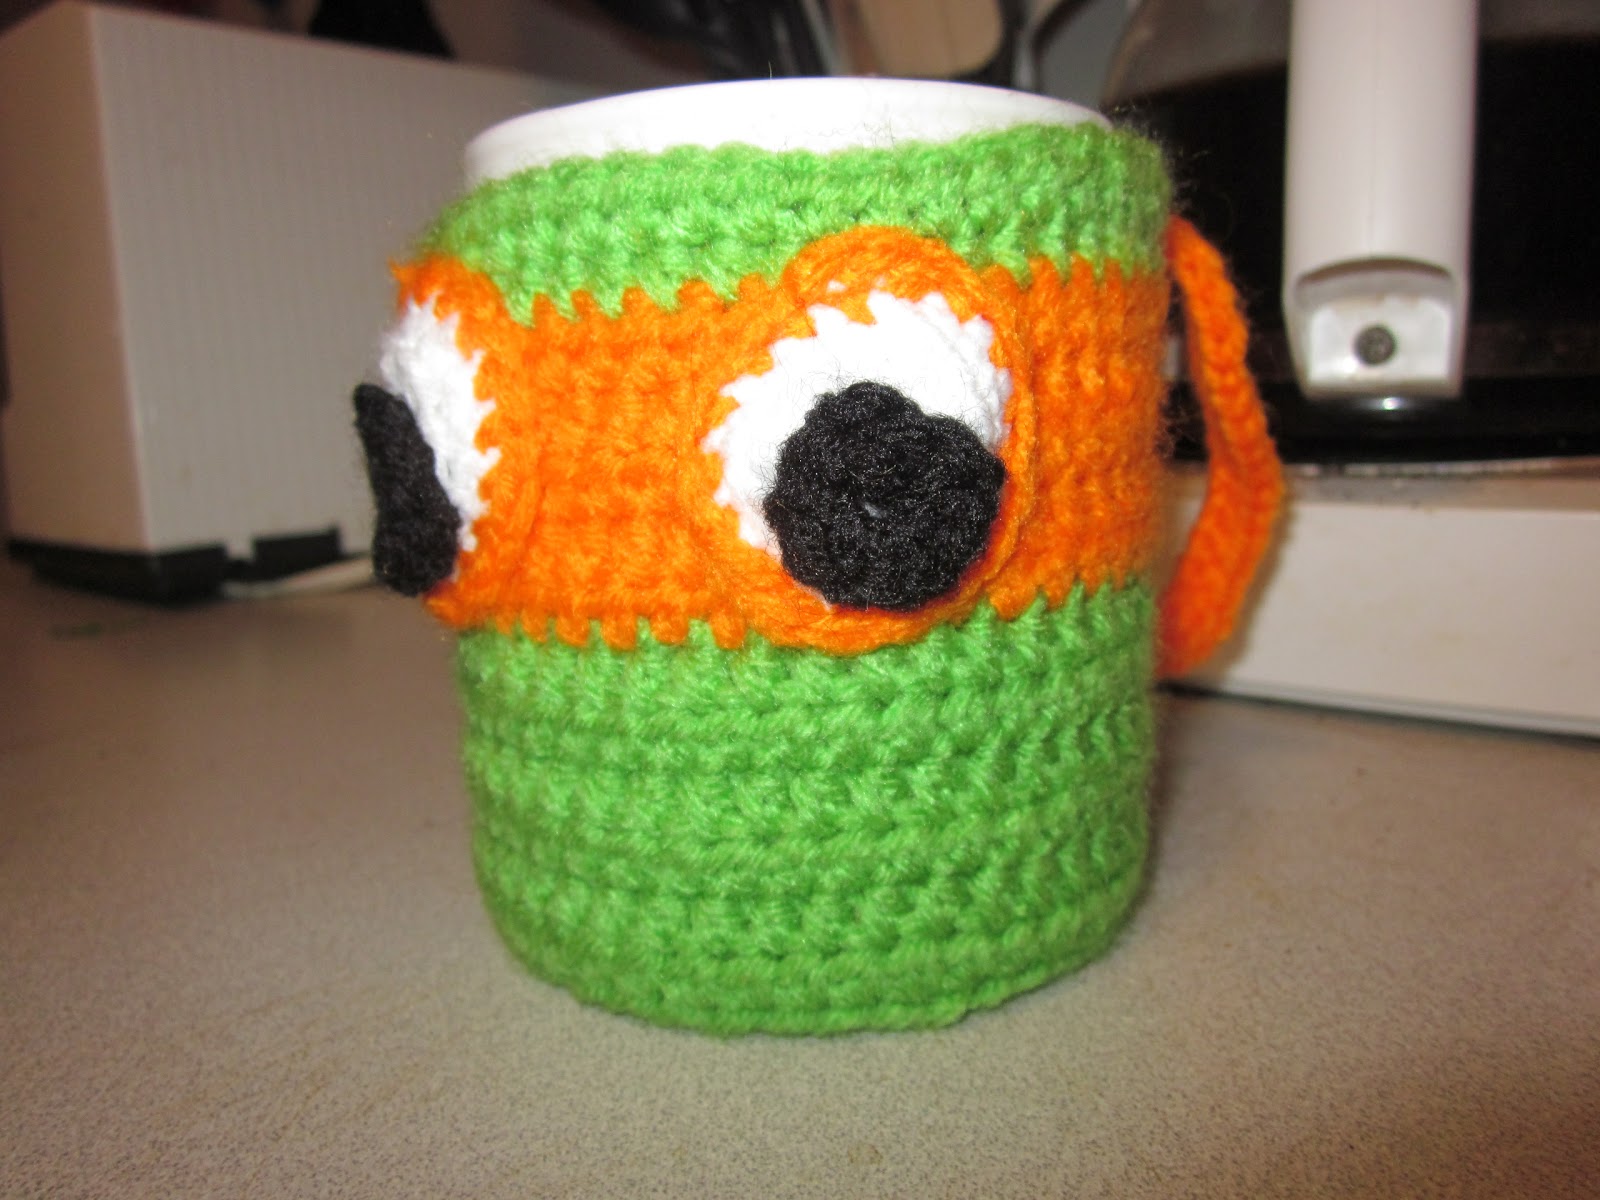
Turtle Power Mug Cozy
First of all, this concept is awesome. What wasn't awesome, was thinking "Hey! Here's an easy 2 hour project!" and then spending roughly 7 hours on it. I think part of the problem was that the mugs the original pattern-writer used were smaller than the mugs I use. While her pattern totals 16 rounds, mine is 23...so I definitely think something was off. I edited the pattern for those whose mugs are 3.75" high.
(I'm copying and pasting most of her original pattern, but will put my changes in
bold.)
Materials:
-Worsted weight yarn in green, white, black, and orange (substitue red for Raphael, purple for Donatello, or blue for Leonardo).
-G Hook for cozy and whites of eyes
-E Hook for pupils (I used an H hook the whole way through)
-Tapestry needle
Gauge:
Base rounds 1-7 = 3 inches = Base of a standard coffee mug
Special Stitches:
hdcdec: Half double crochet decrease (yo, insert hook in next st, yo pull up loop, yo, insert hook in next st, yo pull up loop, yo, pull through all 5 loops on hook)
Base
worked in continuous rounds
R1: With green and using G hook, ch 2, 6 sc in second ch from hook (6sc)
R2: 2 sc in each sc around (12sc)
R3: *2sc in next st, sc* 6 times around (18sc)
R4: *2sc in next st, 2sc* 6 times around (24sc)
R5: *2sc in next st, 3sc* 6 times around (30sc)
R6: *2sc in next st, 4sc* 6 times around (36sc)
R7: *2sc in next st, 5sc* 6 times around (42sc)
R8: 1 sc in each sc (42 sc)
Sides worked in rows back and forth (I worked the 1st part of these in rounds (before the opening for the handle), mostly due to mis-reading the pattern, and it still worked out.)
R9: ch 1 (does not count as stitch now and throughout), in back loop only hdc in each st around. ss to first hdc. ch 1, turn (42hdc)
R10: Working in both loops, hdc in each st around. ss to first hdc, ch 1, turn. (42 hdc)
R11: Working in both loops, hdc in each st around. ss to first hdc, ch 1, turn. (42 hdc)
R12: hdcdec over next 2 sts, 38hdc, hdcdec over last 2 sts, ch 1, turn.
Do not join to first stitch of this row. (40 hdc)
R13: hdcdec over next 2 sts, 36hdc, hdcdec over last 2 sts, ch 1, turn. (38hdc)
R14 - 15: hdc in each st around. (38hdc)
R16: hdc in each st around, finish off, cut green. (38hdc)
R17: join orange with ss, ch 1, hdc in each st around, ch 1, turn. (38hdc)
R18 - 20: hdc in each st around, ch 1, turn. (38hdc)
R21: hdc in each st around, finish off, cut orange. (38hdc)
R22: join green with ss, ch 1, hdc in each st around. (38hdc)
R23: join green with ss, ch 1, hdc in each st around, finish off, cut green. (38hdc)
Ties
Using
H hook join orange with ss at end of
R20, ch 30, sc in second ch from hook and in next 3 sts, hdc to end of ch, ss to end of
R21, cut orange. (4sc, 25hdc)
Repeat tie on opposite end of mug.
Eyes
R1: With white and using
H hook, ch 2, 6sc in second ch from hook.
Do not join to first st. (6sc)
R2: 2sc in each st around, ss to first st, cut white. (12sc)
R3: *2sc in next st, sc* 6 times around (18sc)
R4: Join orange with sc in any st, sc in each st around, ss to first st, leave long tail for sewing and cut orange.
This last row will want to curve a bit. That's ok. It will flatten when you sew it to the sides of the cozy.
Pupils
R1: With black and using
H hook, ch 2,
10sc in second ch from hook, ss to first sc, leave long tail for sewing and cut black. (
10sc)
Sew pupils to eyes using black tail from pupil.
Fold cozy in half, place one eye on orange headband to left of fold and the other eye to the right leaving a small space between. Sew eyes to headband using orange tail from eyes.
Weave in ends.
Just to clarify, I did not create this pattern, I have only modified it. For the original pattern scroll up and click the link that says "Turtle Power Mug Cozy".
(Giant words are there thanks to a mean concerned woman who accused me of stealing her pattern on Ravelry...but that's a long story for a different day. I just want to make sure I cover my ass so no one else gets mad.)