Showing posts with label crocheting. Show all posts

Friday, May 31, 2013

What I've Been Up To: Hair, Feet, Pancakes, and Other Junk.

It's been a strange month or two since I posted. I got a new job as a caregiver (it's awesome). While I've been the happiest I've EVER been, it's left me very little time or energy to do the things I like to do, especially with the 50 hours weeks I've been pulling for almost the entirety of May. However, in that time, I've done a few things that I wanted to share with you all.

1. Hair!

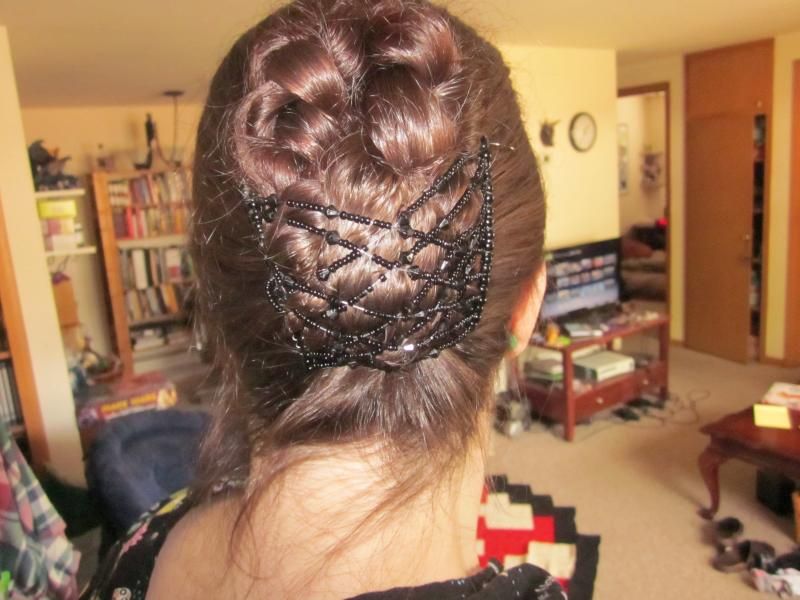
My job is pretty fast paced, and the ponytail I've been wearing for the last 10 years just hasn't been able to keep up with me. My hair is a few feet long, and doesn't feel too great sticking to my neck while I'm spending most of my time in an overly-heated building to accommodate all my newly-acquired, but very old, friends. I found a couple things that keep my hair up without actually having to put any work into it.


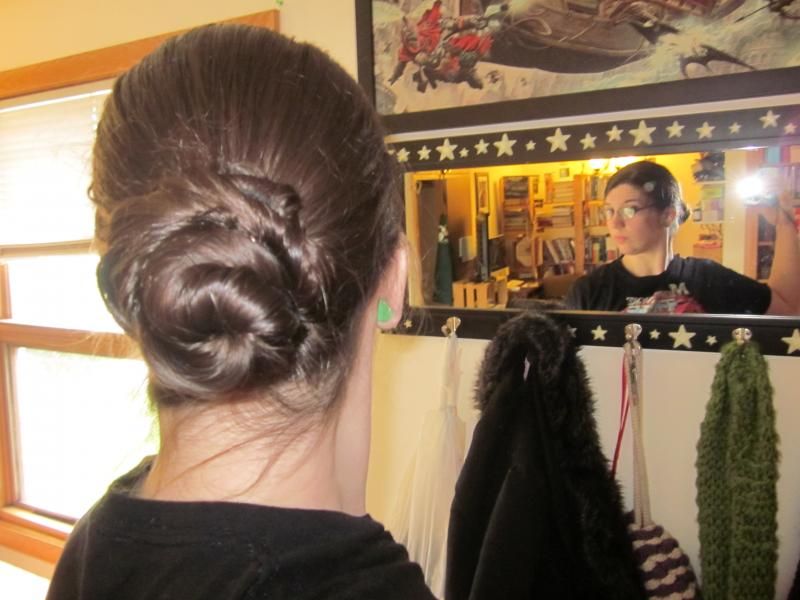
This is an "Up Zing" by Scunci. It's beads strung on elastic, with two combs on each side. I braid my hair, then put it in an elongated bun, then put this over it. I look snazzy, and it's yet to fall out! I got the medium, though, and with all the hair I've got I think a large might work better, since after a couple weeks it started to kind of start pushing into the back of my head (Ouchie.)


I'm kinda dumb, and forgot what this thing is called, but it's basically a wire spiral. You put your hair in a bun, then spiral this thing onto it, so it makes a neat and twisty looking bun. I haven't worn this one to work yet, because it's not as sturdy as the Up Zing, however, it works well enough for days off during summer, to keep the hair off my neck while I'm doing things outside.

2. Feet!

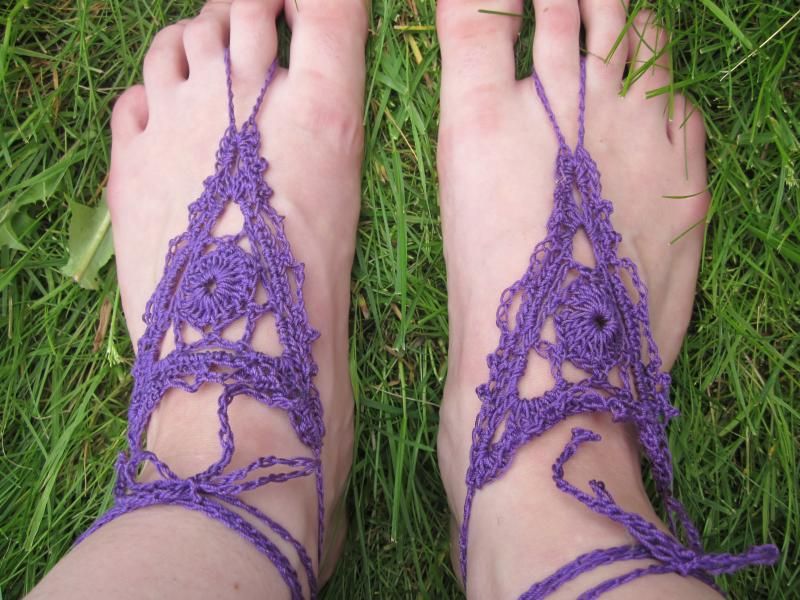
I've always liked the idea of barefoot sandals, but I'm really not the 'barefoot type'. My Dad's Girlfriend, Tracy, is though- and with her birthday coming up on the 8th, I figured a few pairs of these would be the perfect, quick gift for her. They are, of course, a great warm weather project, too, since the materials for it are so light, and the project is really small. They look great, and I think after making these for her, I might just take a little time to make a pair for myself!

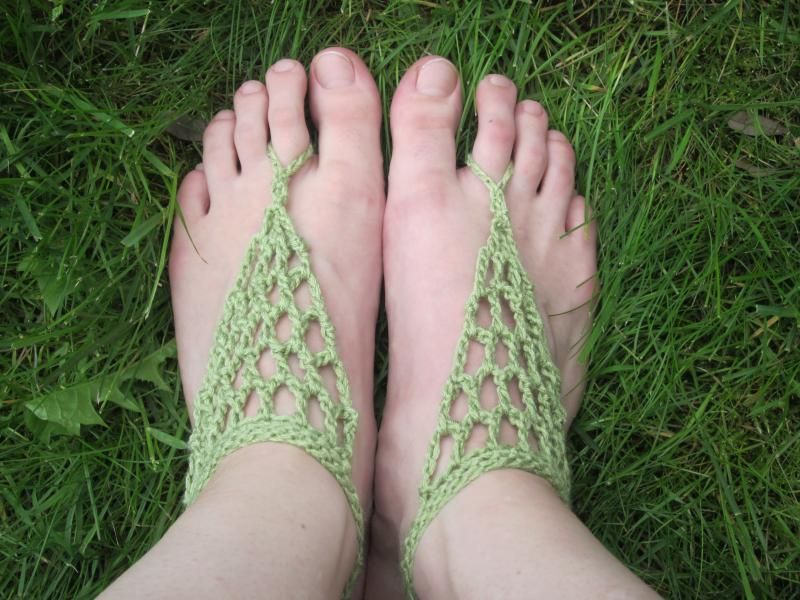
The first pair I made were the Barefoot Sandal by Lion Brand Yarn.


These are just a small mesh triangle with a small band that closes with a button behind the ankle. I think these are kind of cool, but not my favorite. I think they're kind of plain, and fastening a button behind your ankle sounds a lot easier than it actually is. If I made these again, I would instead make the strap about 4 feet longer so that they can be wrapped and tied multiple times around the ankle instead of buttoned. As far as barefoot sandals, and gifts, go- these took about an hour (maybe less), and are a perfect super quick last minute gift. They might also work with flats!

The second Pair I made were the Crocheted Barefoot Sandals, a Free Ravelry Download. 


 photo IMG_5530_zps020ed9f1.jpg

 Despite how they look, these sandals are only 2 separate pieces, not 8 motifs. Working all as mostly one piece made them a lot easier than they look, and I think these might be my favorite. I love the color I chose, they remind me of cherry blossoms! I think these are prefect for spending a day in the backyard reading and gardening.

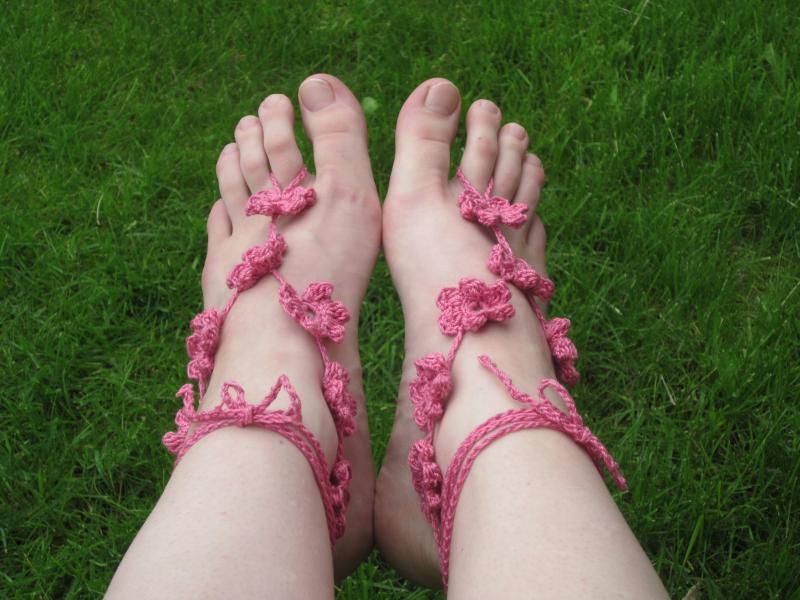
The last pair I made for Tracy were the Goddess Barefoot Sandals, from Gleeful Things.


 photo IMG_5544_zpsa3b3efc7.jpg

I love finding small projects to make with thread, and I think this one turned out beautifully. These are another pair that I think could work nicely with a pair of flats. I love how Feminine they are, and the Indian influences on the motif make them very elegant. The size 10 thread makes them the lightest of all 3 pairs, and with only 6 rounds, they came together a lot faster than you would think.

3. Pancakes!

My favorite restaurant out here in Madison, WI is a place called Monty's Blue Plate Diner. I have completely run it into the ground. Every time someone asks me where I want to go, Monty's is ALWAYS my answer. The funniest part? I only order one thing when I go there: Zucchini Potato Pancakes. I have ordered them every time I've gone since 2010, and I have yet to get sick of them. They are one of my favorite foods in the world, and I usually finish my entire plate in a few minutes.

So, imagine my excitement, when I went to my local library the other day and found the Monty's Blue Plate Diner Cookbook. I'm genuinely surprised I didn't pee my pants when I found the recipe for these pancakes in there.

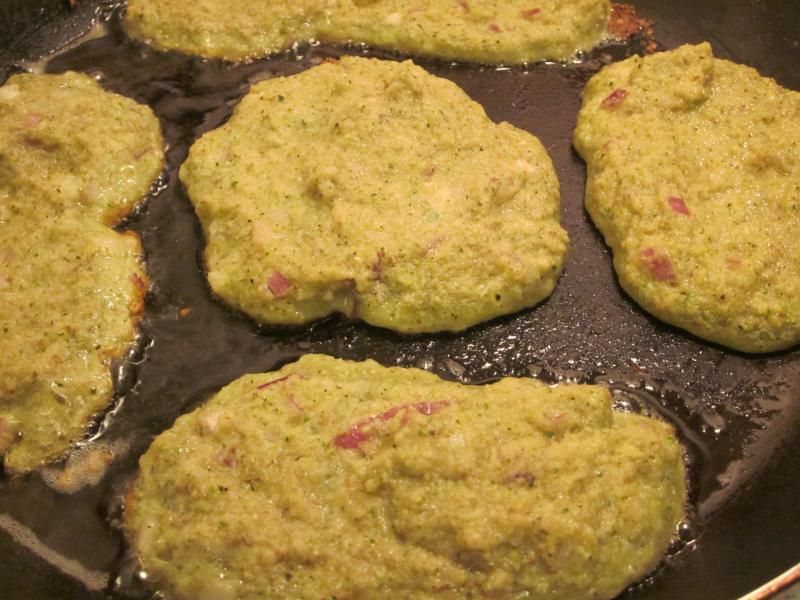
These pancakes are incredible. Savory, flavorful, indescribable. If you're looking for something different to make for breakfast, lunch or dinner, these went from sliced to served in under an hour, and were absolutely addictive. With a little bit of sour cream, you can't go wrong. My batter looked so strange when I was making it, but I absolutely could not stop eating them, they were so incredible. 
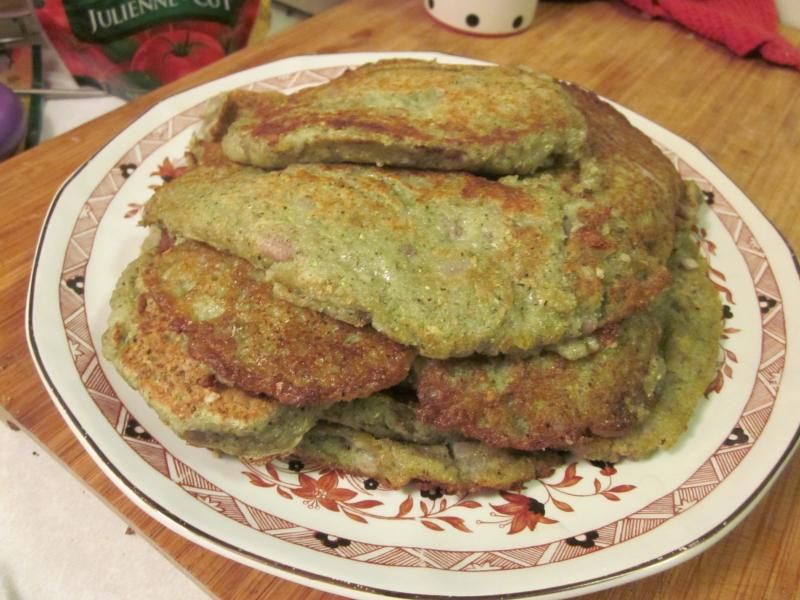

 photo IMG_5515_zpsb604571d.jpg
Green Pancakes! This isn't how they look at Monty's, but they managed to taste the same way.


 photo IMG_5513_zps62c3783d.jpg
I wish this picture was scratch-n-sniff, so you could understand how amazing they smell.
Got an hour, and about $7 for ingredients? Make your own:

Zucchini Potato Pancakes

Ingredients:

  • 4 medium zucchinis
  • 2 large baking potatoes
  • 1 medium onion, diced
  • 3 eggs
  • ½ cup flour
  • 1 tsp. Salt
  • 1 tsp. Black pepper
  • 3 TBS vegetable oil
  • 8 oz. Sour cream
  • 8 oz. Apple sauce

Instructions:

  • In a food processor or with a hand grater, grate the zucchinis and potatoes. Mix these with the diced onion in a bowl.
  • Make small handfuls and squeeze out the excess moisture. You may be surprised how much water is squeezed out.
  • In a separate bowl, combine the vegetables with the eggs, flour, salt and pepper. Mix thoroughly.
  • Scoop 2- to 3-oz. portions of the pancake mix and flatten with a spatula. In a large non-stick frying pan heated with vegetable oil, fry over low to medium heat for 10 minutes. When one side is browned, flip the pancake and fry the other side. The edges should be golden crisp.
  • Serve immediately with sour cream and applesauce.

Serves 4.


4. Other Junk!

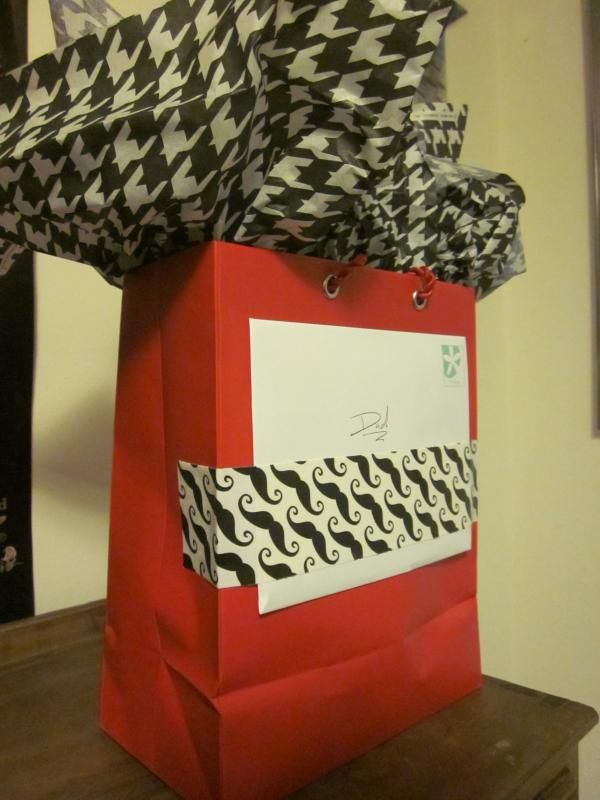
With Father's Day coming up, I got my Dad's present bought and wrapped. I liked the way I did it, so I thought I'd share it here.

 photo IMG_5520_zpsc6d1b1f8.jpg

What I did:

- Red gift Bag (Walgreens: $3)
- Houndstooth Tissue Paper (Walgreens: $2)
- Moustache Duct Tape (Got this as a present, but I've seen it at Target, Wal Mart, Walgreens, etc.)

Very manly :)

What I bought him:

- 5 Samples of Berres Brothers Coffee (Highlander Grogg, Caramel Chocolate, French Vanilla, Red Velvet Birthday Cake and Hazelnut Creme). Berres Brothers is a local coffee company out here in Wisconsin, so I suggest you all move to Wisconsin and drink their coffee. Highlander Grogg has become a staple in my house (It's a caramel, butterscotch, hazelnut coffee that smells and tastes like heaven and rainbows).

- Earl Grey Vanilla Rhubarb Jam (My Dad mentioned once that he always sees Strawberry-Rhubarb things, never JUST rhubarb, so when I saw this at a Farmer's Market, I picked it up for him.)

4.5: Other Junk Part 2!

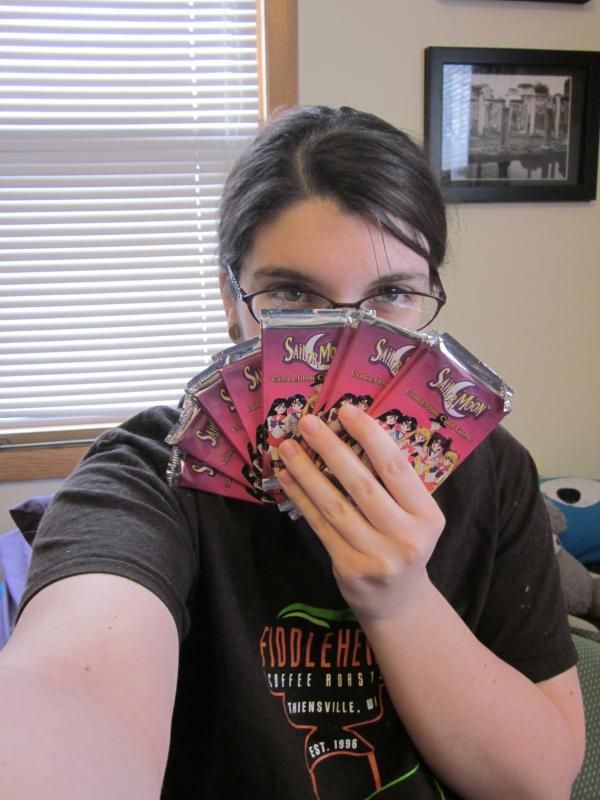
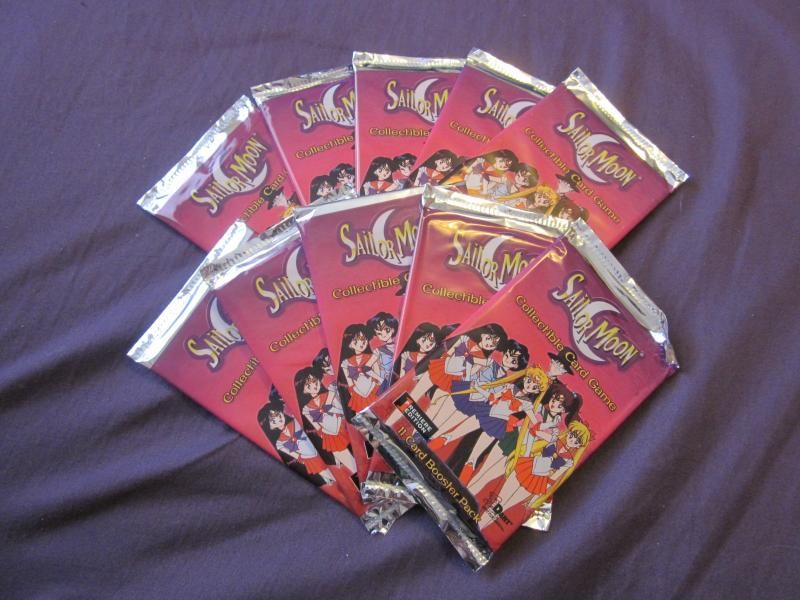
You guys know what's awesome? Sailor Moon. You know what else is awesome? Ebay? So what happens when you combine these two things?

 photo IMG_5466_zpscc7ff989.jpg


 photo IMG_5464_zps736dea13.jpg


 photo IMG_5463_zps94af285c.jpg


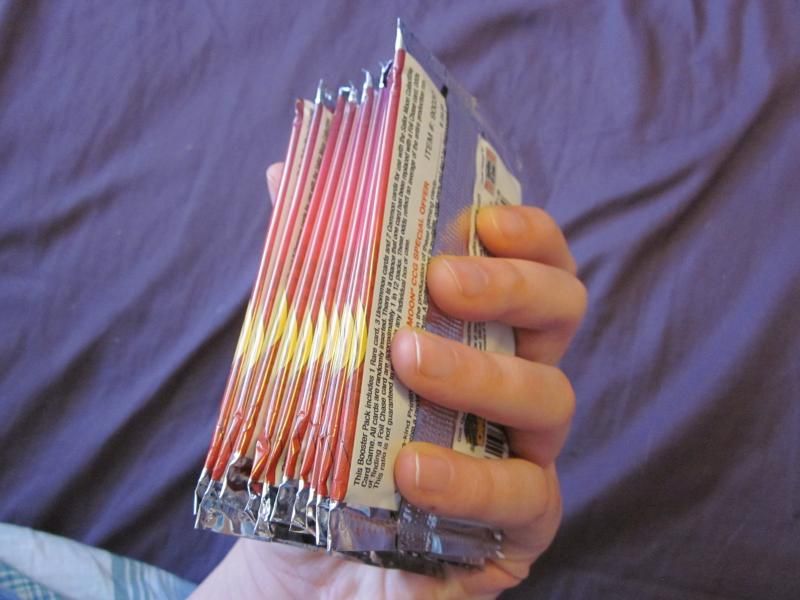
...You can get 10 Sailor Moon CCG Booster packs for $10.

Anyone wanna play with me? :P
Sunday, March 10, 2013

What I've been up to: Spyro, and something new!

A bout of unemployment has sent me into a creative hurricane. I've been making loads of stuff solely to put up on my Etsy shop, but a few things were made for me, and me alone.

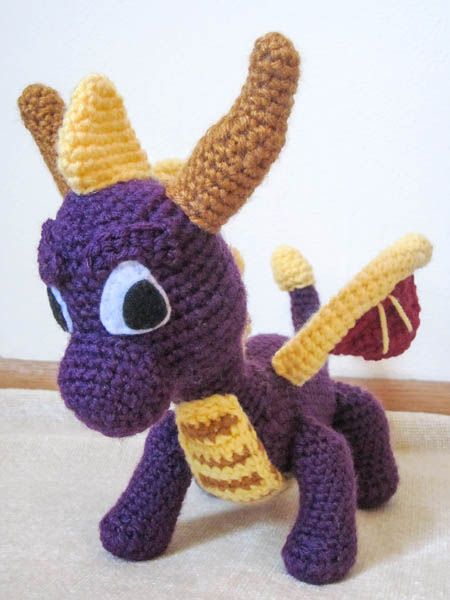
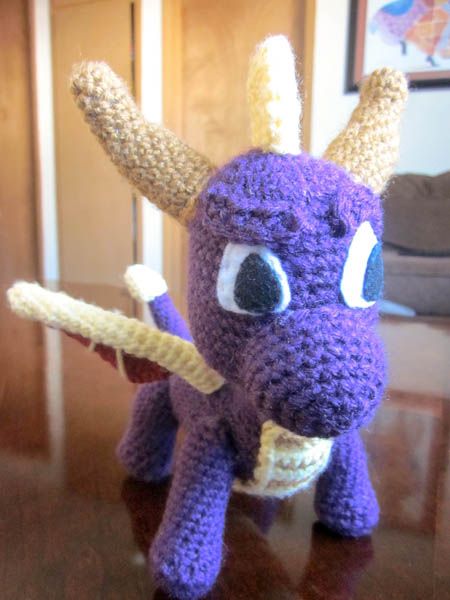
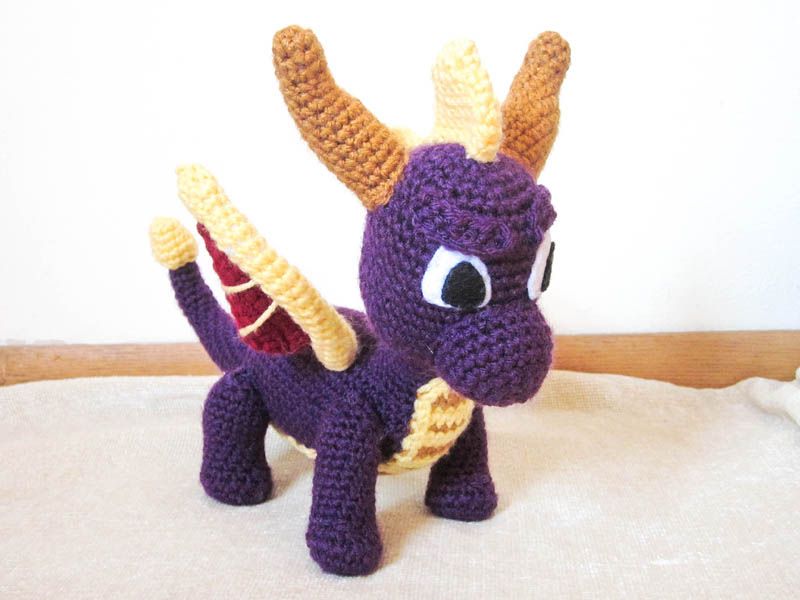
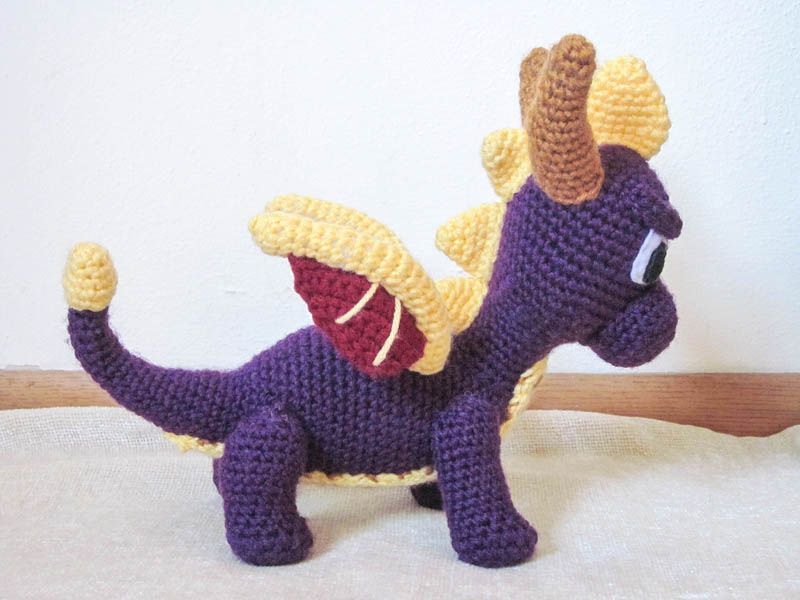
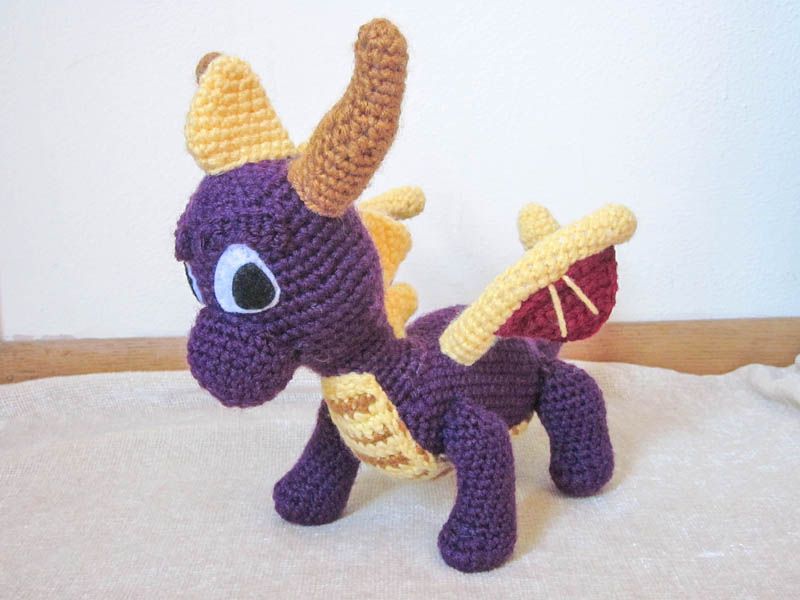
First up, a blast from the past: A Spyro plushie!


 photo Spyro4_zpsf821b0dd.jpg

There were a few years of my life where my memories are the most vivid. I was 9 - 11 years old or so, and I spent my days doing things like drawing my own sailor scouts, writing Gundam Wing fanfiction, playing Dragonball Z with my best friend, and of course, eating giant jawbreakers while playing Spyro.


 photo Spyro1_zps49f05436.jpg

When I say giant jawbreakers, I mean GIANT jawbreakers. They were about the size of a baseball, and took me a few days to finish (even for a candy-obsessed 10-year-old). I would often times break it with something, so I could fit rock-sized pieces in my mouth in order to hold my Playstation controller with both hands to fight gnorcs and save dragons. I have a grey 'video game chair' that I sat in, mere feet from the TV. It was a very small chair that rocked back and forth and sat right on the ground. These glorious days can be summed up with Jawbreakers, Spyro, and leaning back in this chair like I didn't give a care in the world.


 photo Spyro2_zps975f5d67.jpg

When I came across this pattern, my heart leapt for joy. To be able to have a tangible thing to not only hold, but to make! To be able to look at and taste the sugar of the giant jawbreakers, and remember the Virginia air wafting into my room as I wasted my day trying as hard as I could to beat Metalhead.


 photo Spyro3_zpsf9a9696a.jpg

This pattern can be found here (along with a pattern for Ember from "A Hero's Tail", though I haven't made her), and I have to say that it is absolutely worth the money. It's written very well, and looks amazing. It is time-consuming, but doesn't actually use up that much yarn. I didn't have to change a single thing, and Spyro looks amazing, and stands up nicely. There is some use of wire (to make his wings and tail poseable), and a lot of attaching of limbs. If you're up for a challenge, and need something comforting, then this is definitely the project.


 photo Spyro5_zps800bb876.jpg

My next project....IS NOT A CROCHET PROJECT!!


 photo omggggggg_zps467ab43a.gif

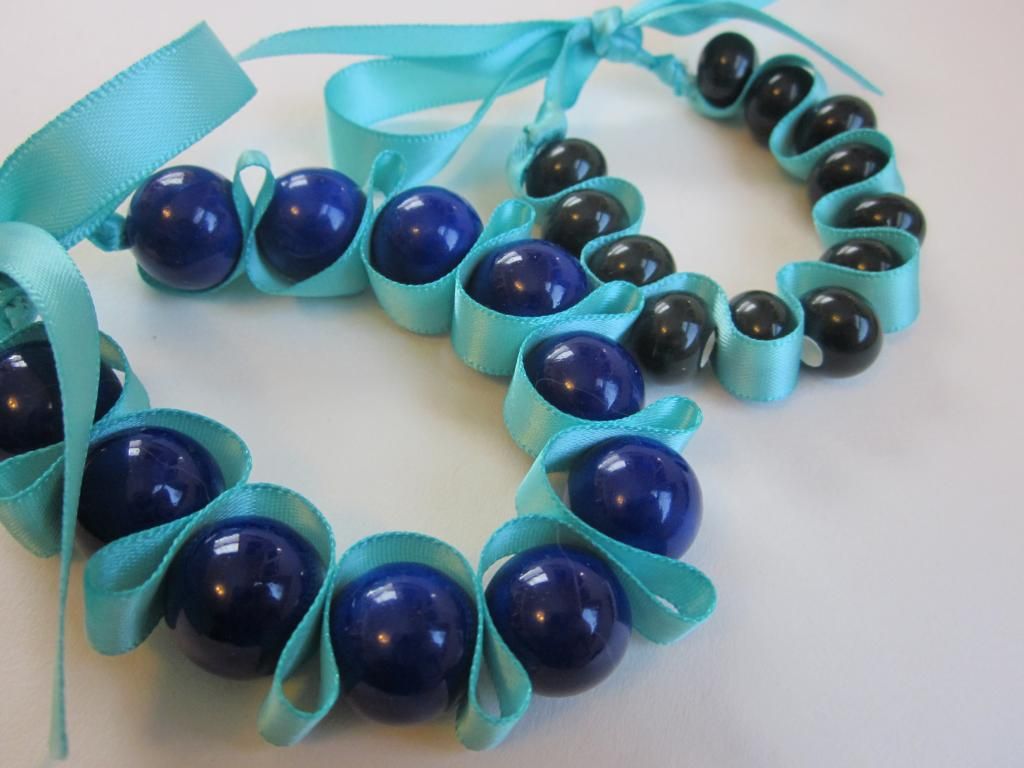
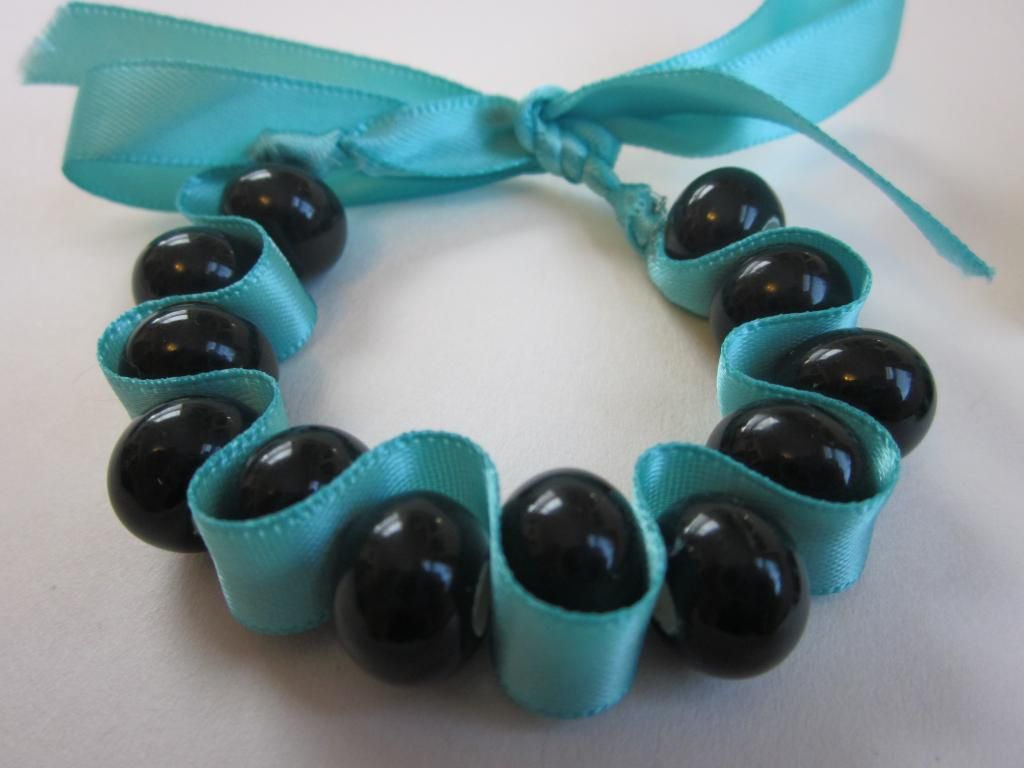
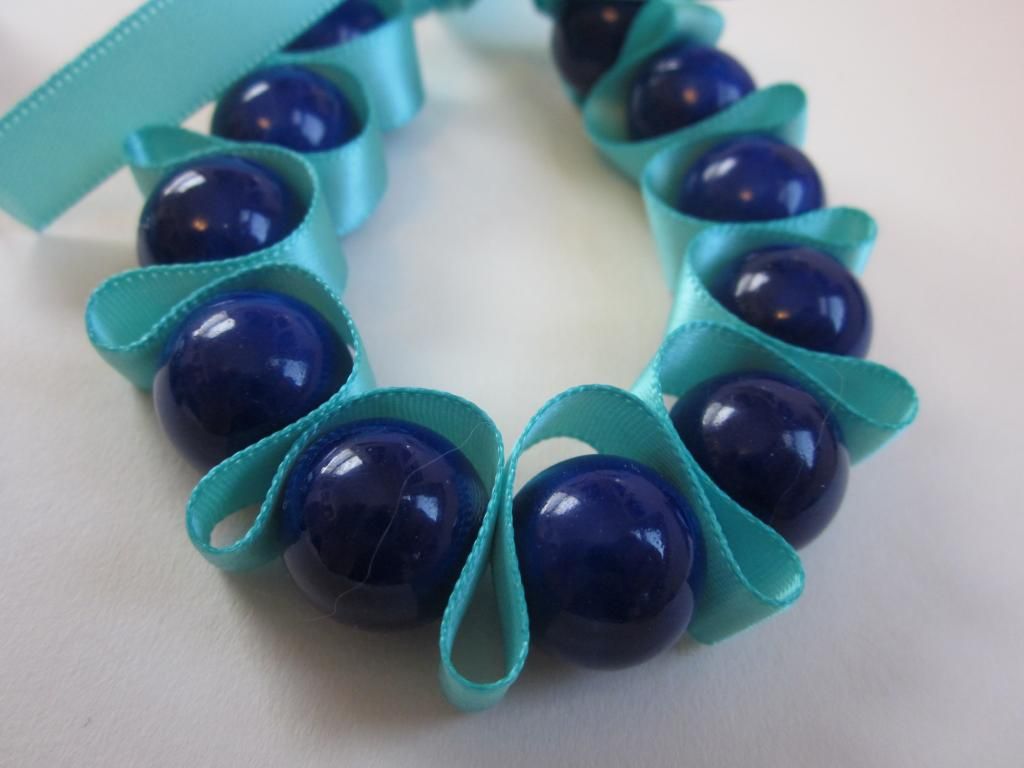
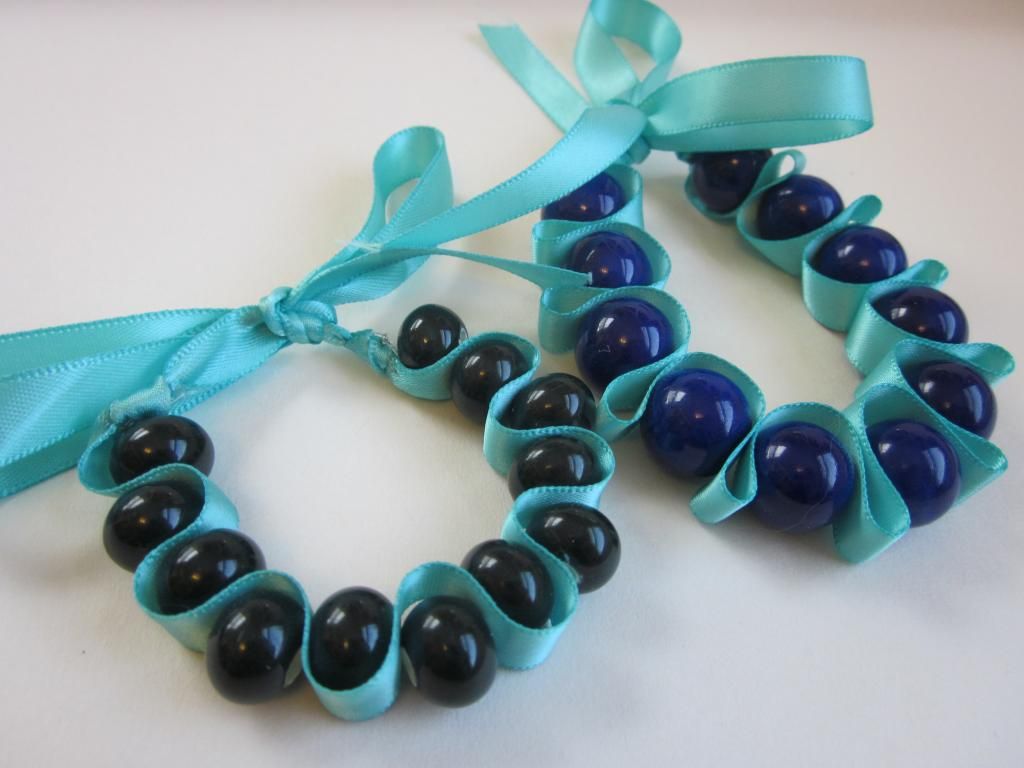
Yes, after months of longingly looking at overpriced ribbon bracelets being sold in stores, I finally decided to give into the ribbon jewelry craze.

Despite these bracelets having all the qualities I look for in jewelry (which is ribbon, and anything else that makes me feel like a mermaid and/or princess) I've held off on buying any, because I always felt like I could make it myself. As it turns out- I was right!


 photo IMG_5330_zps895d794d.jpg

After crocheting in all of my free time (which is...all of my time), for the last two weeks, I knew I needed to find something different to do before I became completely and utterly burnt out on crocheting. Luckily, I had seen this tutorial on Pinterest awhile back, and had even bought the supplies for it. Unfortunately, the tutorial had kind of overwhelmed me, and the beads and ribbon didn't do much more than collect dust for awhile.


 photo IMG_5329_zps942d2e09.jpg

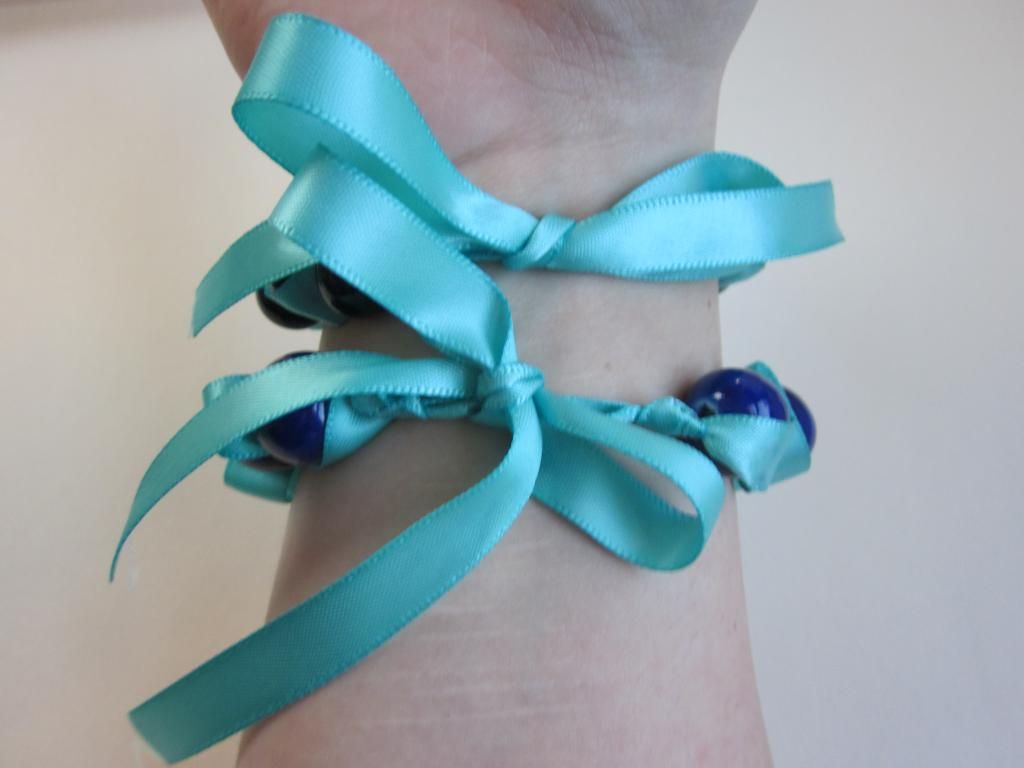
However, after a particularly yarn-heavy day, I decided to give it a shot. I was so pleasantly surprised! These bracelets were the perfect combination of simple and repetitive, while also being challenging and engaging. The result was absolutely gorgeous, and the use of elastic makes putting them on and taking them off very easy. 


 photo IMG_5328_zpsa00b1287.jpg

I am, in fact, so happy with the results of these bracelets that I went out to Michael's yesterday, and bought more strands of glass pearls, as well as another spool of ribbon. Michael's sells the glass pearls in 7" strands for only 99 cents, and longer strands of smaller beads for the same price (a ribbon necklace would be amazing, too!). They also have nicer stone strands, but my wallet was just feeling a bit too light for that.


 photo IMG_5327_zps9d9a19e2.jpg

The tutorial can be found here. I did the "wave" and "pleat" patterns, since I was a bit too chicken (and short on supplies) to make the "fold". I'm not too keen on that design, though, so I wonder what other designs I could come up with...?


 photo IMG_5333_zps9dd46f19.jpg
Fun fact: The bigger the bow, the more you feel like a princess.

Next time I come around I'll talk about chocolate, perler beads (SO MANY PERLER BEADS), fingerless gloves, how I can't stop making them, and why it's a problem.

Friday, March 1, 2013

One Skein Weekend: Drawstrings and Dragons Edition

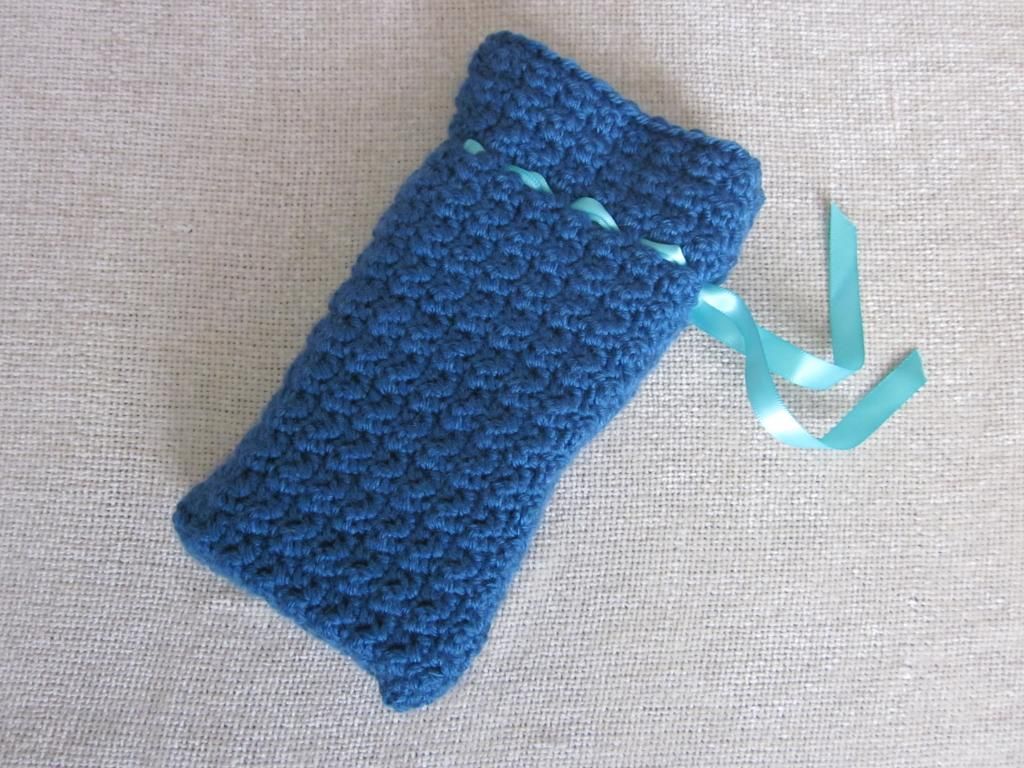
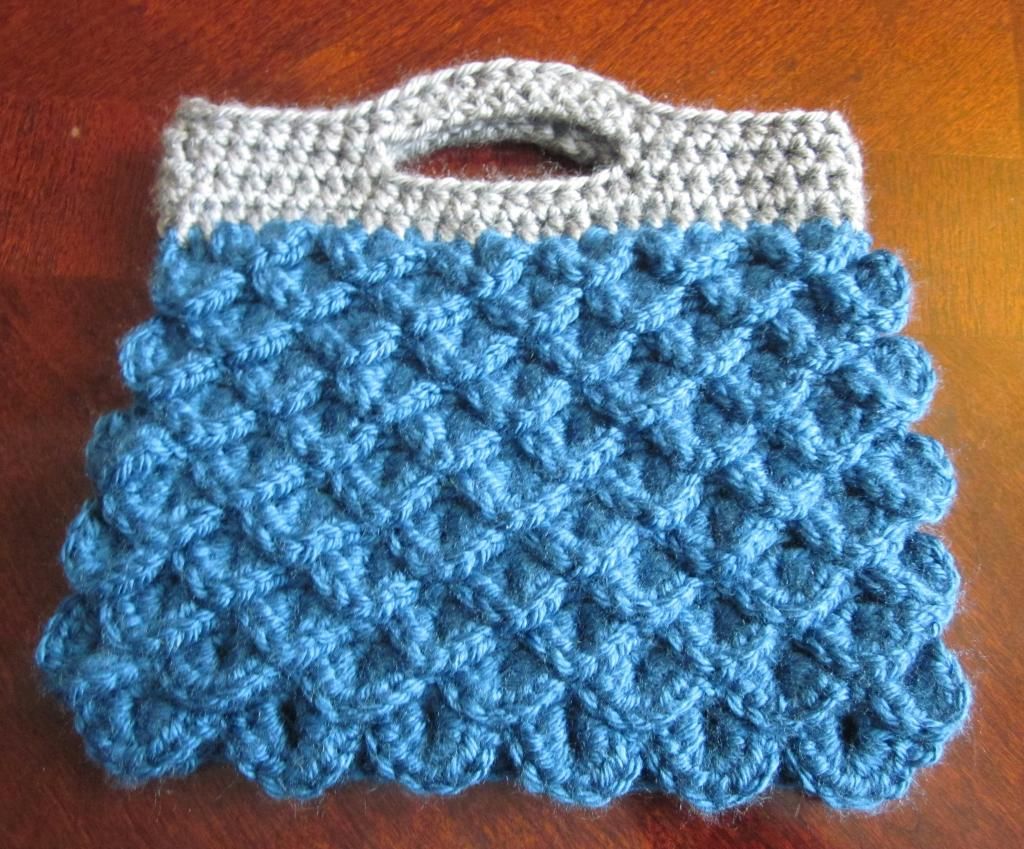
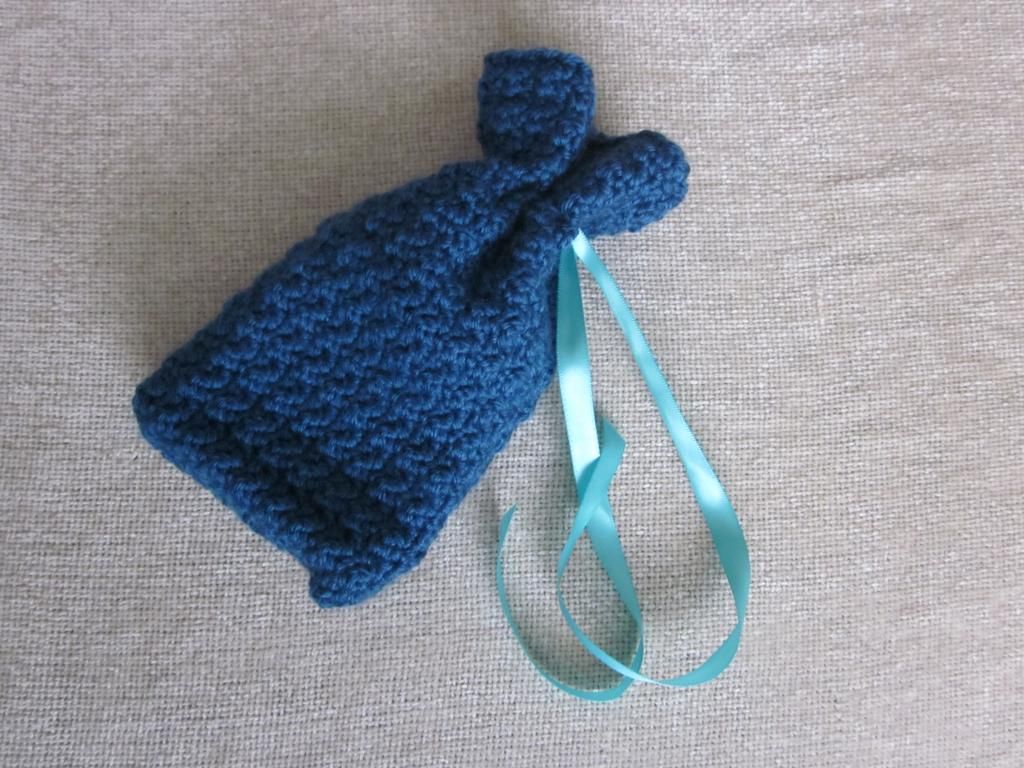
This "edition" of One Skein Weekend is one I'm pretty excited about. I made a purse using crocodile stitch, and a small drawstring bag intended for Tarot cards (although it can be used for just about anything).


 photo IMG_5246_zps82e764a8.jpg

 photo IMG_5223_zps73e5d260.jpg

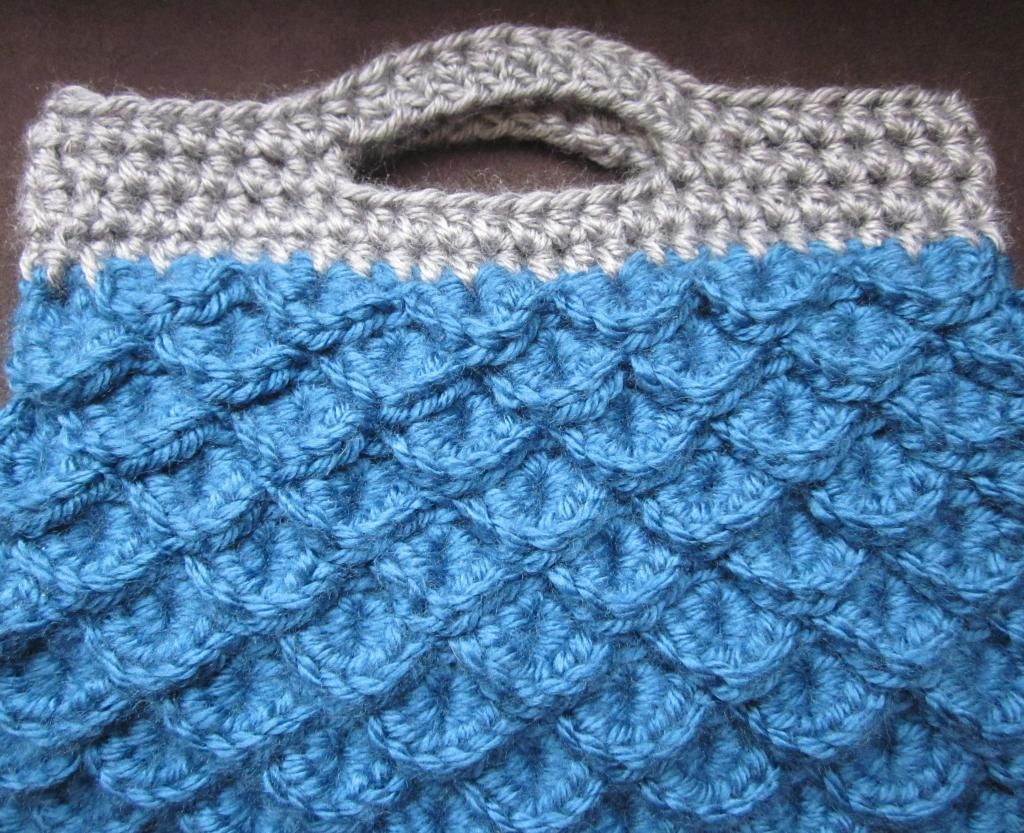
Anyone who knows me, or has been to my house, knows how I feel about dragons. The crocodile stitch is irresistible to me because it reminds me so much of dragon scales, and using crocheting to be able to flaunt and express my love for them makes me smile every time.

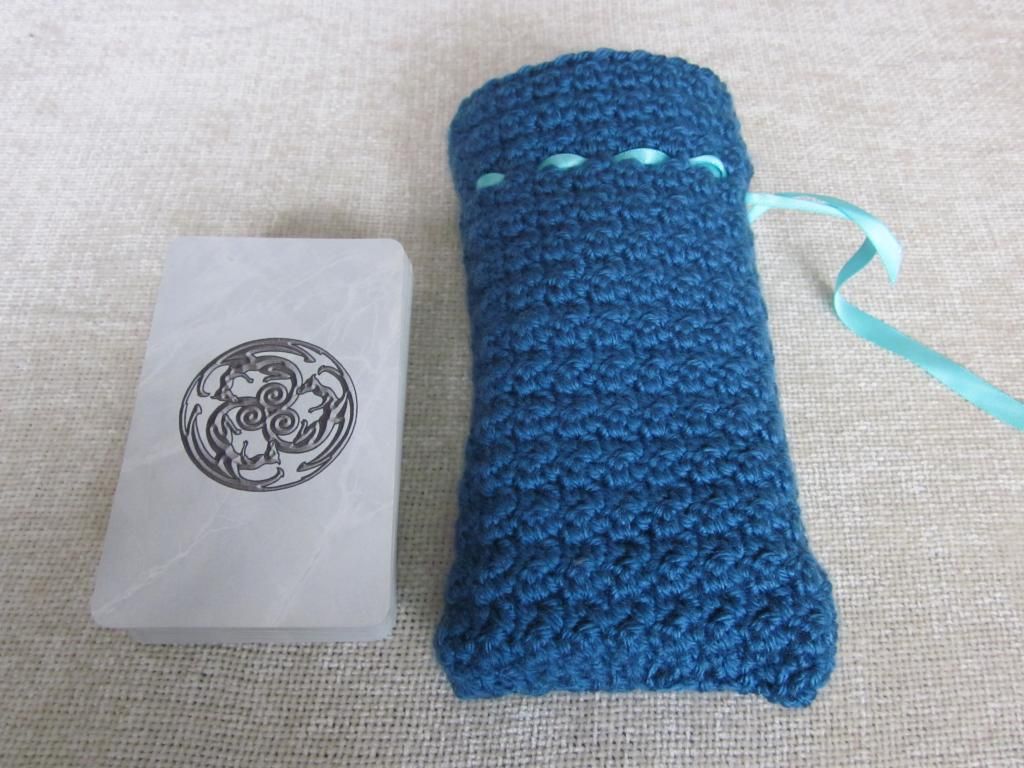
I have also been a Tarot card enthusiast for a long time, having acquired my first deck of Tarot cards when I was about 12. I really enjoy having such a beautiful bag that I made myself, and can store my favorite deck of Tarot cards in (which, you guessed it, is the Celtic Dragon Deck).

These two projects, while both being bags, serve different purposes, and are both so magical, that they somehow feel as though they go together.

Let's get started.

First, let's talk about the yarn:

Yarn: Bernat Satin
Color: Teal
Yardage: 200 Yards
Weight: Worsted
Price: (Not sure, it was a gift)
Extra stuff: A couple feet of ribbon, A few yards of scrap yarn in a contrasting color (I used Caron Simply Soft in Gray.)

First up is the Crocodile Stitch Clutch (The pattern can be found here.)
 

 photo IMG_5221_zps7b0b0e9b.jpg

I made a few changes to Sara's pattern. First up, I added 4 more rows, to equal two more rows of crocodile stitch. I also made the handle out of 9 fsc instead of 9 ch (to add some extra width without doing a fifth row of CC). And for the back, I did a total of 29 ch to start, instead of 33.

I love the combination of sapphire and silver, so when this purse was finished I couldn't help but to think about how much it reminded me of treasure lost in the ocean. I have always had an affinity for the ocean, and the "scales" simultaneously reminded me of waves, and dragon scales.

I also love her version of the crocodile stitch, where she uses hdcs instead of dcs, so the stitches are tighter to prevent any smaller items from falling out. This pattern is beautiful, elegant, and the shimmery teal color makes it perfect for the midwesterner who still misses the ocean.

And, although this looks like it took a long time, it went really quick. Only doing 6 or 7 scales per row makes it go very quick, and the hdcs of the back work up quickly. Had it finished in a few hours.

Next up is the StarGazer Tarot Bag (which can be found here.)


 photo IMG_5247_zps37a74cd2.jpg

I made this bag for the first time back in January of 2012, and at that time I used a very expensive yarn I bought with a gift card (because I'm too cheap to spend my own money on nice things). After I made the Crocodile Stitch Clutch, this project felt like it was the right amount of yarn to use up the rest of my skein. So, without thinking, I found the pattern again, and started to stitch it up, when I was hit with a very odd sense of deja vu. Looking towards my Tarot cards, I realized that this is the same color I used for the other one! While my expensive yarn drapes a little differently, using Bernat Satin has the same shimmer, and works up even quicker.

I only did 22 rows before the beaded row, and 5 instead of 7 rows AFTER the beaded row. If my gauge was smaller, I probably could have gotten away with doing all the rows, and still coming to the end of my skein, but using an H hook and omitting 5 rows, It worked out nicely that I had only a yard or two of yarn left. In fact, because of my large gauge, I probably could have made the foundation chain even shorter, since I can fit a deck of tarot cards in there with a lot of walking room left. If you ARE using one skein of yarn for both of these projects, and want to make this one true to pattern, you can always make the Crocodile Stitch Clutch true to pattern instead of adding two rows, and you will definitely have enough leeway.


 photo IMG_5256_zps9c4b5079.jpg

As I said, though, this can make a nice drawstring bag in general, and can work as a dice bag, or a small drawstring bag for whatever trinkets needs you may have, so gauge isn't the most important.

I worked this up in a little over an hour, so it makes a great last minute gift, or a good way to get out of a crochet rut. The pattern is just single and double crochets, so it's really easy, too.

If you're looking for other things to do with a skein of yarn, here's my other One Skein Weekend Post:

-First Edition (AKA Radioactive Hobo Pirate Edition)

Saturday, January 26, 2013

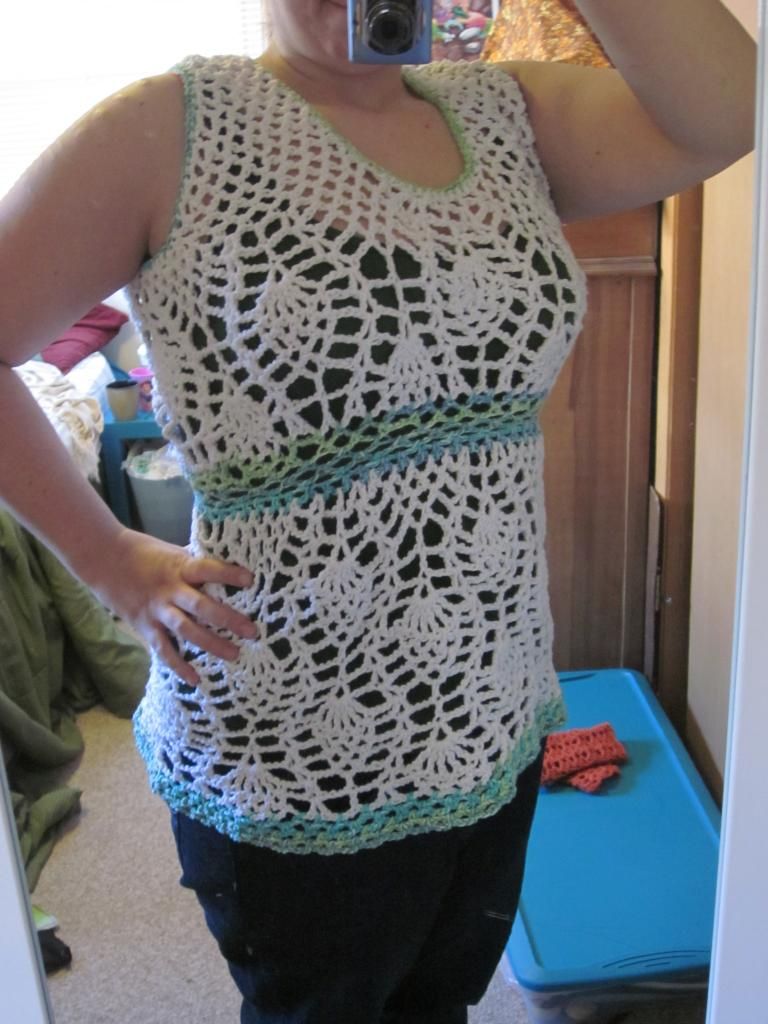
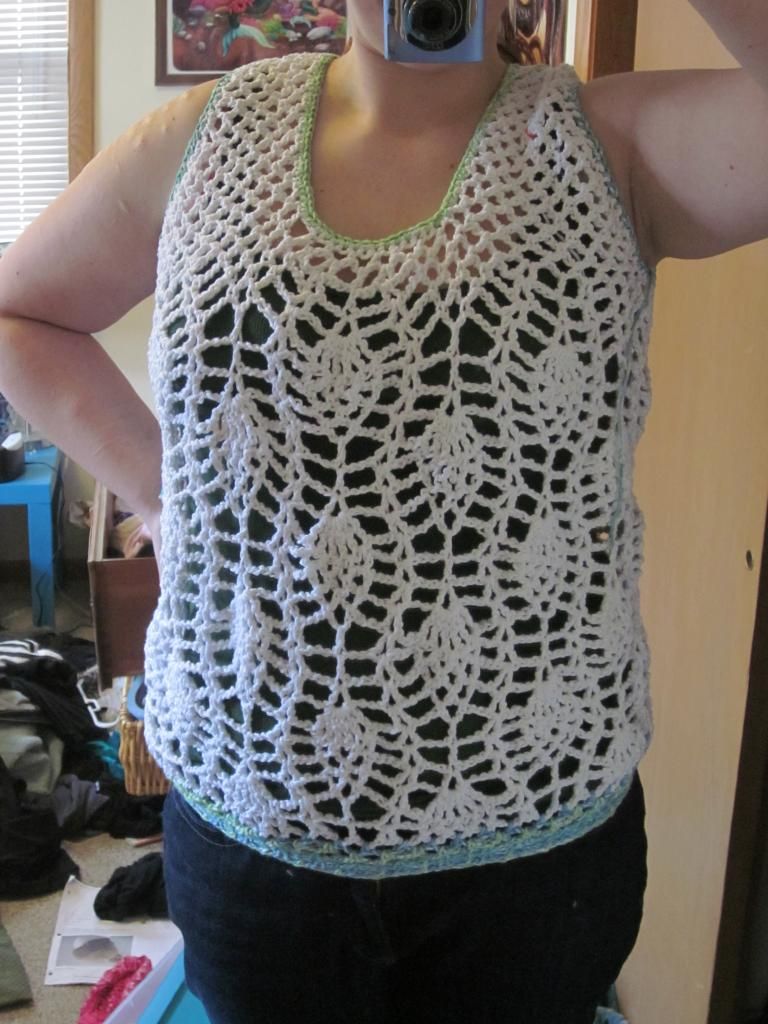
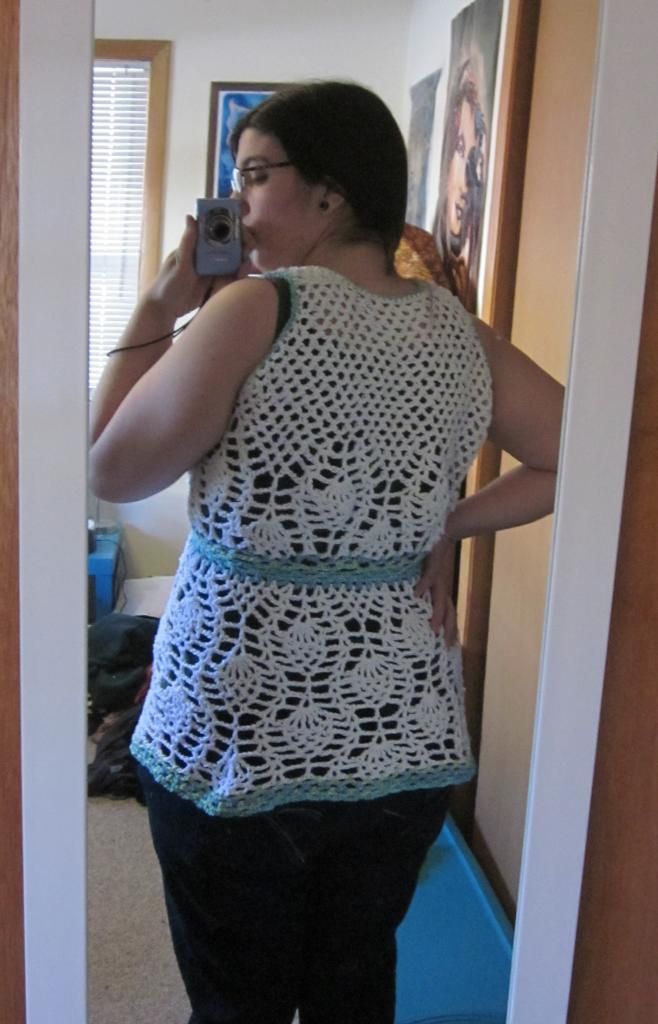
Before & After: The Tale of The Sparkly Pineapple Shirt

It all started in Kohl's. I had just gotten paid, and eager to spend all my money, went out to buy some (much needed) clothes. Mostly for work, I picked up jeans, looked at button up shirts, and even bought my first pair of leggings, but when I ended up in the clothing section to buy shirts I felt lost and confused. It had been so long since I bought clothes in an actual store (Thank you, TeeFury). From section to section I wandered. Some clothes seemed to be for 14-year-olds, and all the other clothes seemed to be for 40-year-olds. Annoyed, infuriated, and worst of all, holding an armful of nothing but work clothes, I made a declaration to "Just crochet all of my own shirts."


 photo IMG_5124_zps1a7208d8.jpg
Everything looked awkward. Everything felt awkward. Even the models in the pictures, and the clothing on the mannequins didn't look appealing to me. Nothing was making sense. I was going to make my own clothes. 

I was half joking, but by the time I got home, and ended up alone on Ravelry for a good hour or two, I had looked through all kinds of shirt patterns. I was so excited, the very next day I went out and bought some cotton yarn, then started on a simple-looking shirt, Light and Lacy by Doris Chan.

I had finished it in an astounding 3 days. It worked up so fast, I was suddenly even more excited by my decision to make all of my clothes. The only problem? It fit about as well as an oversized grocery bag.

I told myself it was okay, that I had never made a form-sitting shirt before. At my size, I've never been a Small before, but it turns out that maybe I should have made a small for this shirt (I made the Medium). It was so baggy on me, that as I wore it, I swore it made me look 30 pounds heavier. I told myself it was okay, but I didn't even have the motivation to tie in the ends. I set it on my dresser, and feeling defeated, went to bed.


 photo IMG_5121_zps49b47d27.jpg
The "Before"

The next morning, I don't know if I had a dream, or if the answer was really just that simple all along, but I woke up so enthused, I knew I had figured out a way to fix my shirt to make it look better.


 photo IMG_5138_zps35f054a7.jpg

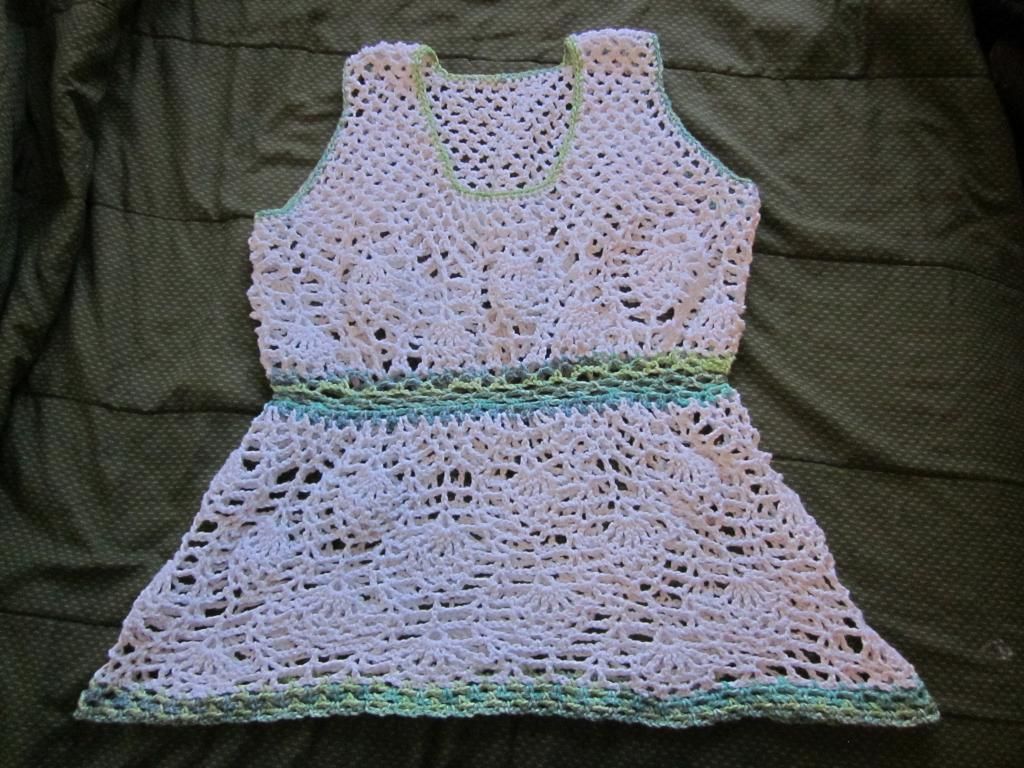
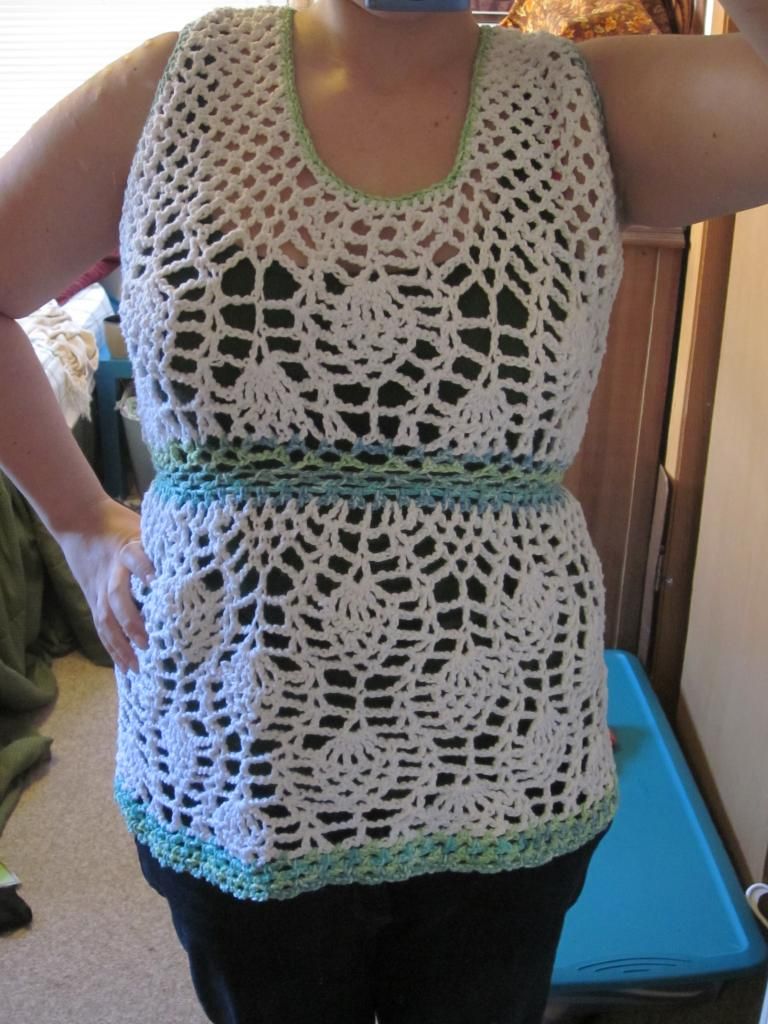
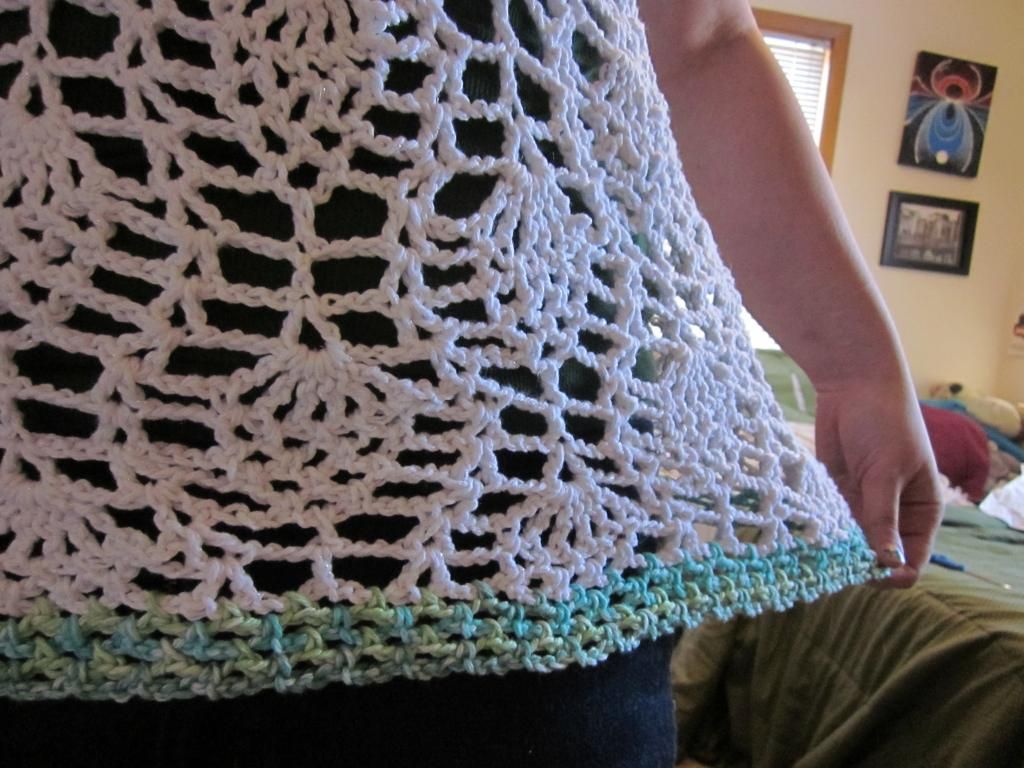
After much debating, and cringing, I (painfully) ripped out about 75% of my work, then made a band by decreasing the chain mesh.I was really happy that this had been a fast project, because even after ripping out most of my work, it still only took another 3 days to completely finish it. I could make two of these a week if I really wanted to supplement my wardrobe.

By making a band in the middle significantly smaller than the rest of the piece, this pulled it in a bit, then I increased it enough to have it bellow out again. It went from Potato sack to flattering A-Line piece.

(If you are looking for the technical things I did, and how to do this yourself to this shirt, you can look at the notes on my Ravelry Page.)


 photo IMG_5123_zps65bf3f9f.jpg
Ta da! New shirt!

I love it so much now, I can't wait to wear it! Although, with it being made of cotton, and in such sparkly and bright colors, I can't imagine wearing it any other time of year besides late spring and summer.


 photo IMG_5130_zps5439172b.jpg
This was also nice, because now instead of just "dealing" with the style of a shirt (the way I would ahve if I had just bought a shirt the other day), I'm now actually looking forward to something. On top of that, I had so much fun working with the colors. The white, although you can't see it, is actually a "Holiday" yarn, so it has metallic tinsel throughout, and the blue-green stripes are Lily Sugar N' Cream "Country Stripes", a yarn I've had in my stash forever, but didn't know the perfect thing to use it on. The sparkles and the stripes give it an awesomely light oceany feel to it that I am so excited to wear around when the weather is warmer.


 photo IMG_5128_zpse593e644.jpg

I have a lot of plans to make more clothes, of course. I even picked up a book from the library today, and without even noticing the author, I got it home, only to realize the patterns were from none other than Doris Chan herself. After finding Light and Lacy, I went through all her patterns to find that I love her style! I guess I can officially consider myself a fangirl, and I look forward to expanding my wardrobe over the next few months. With such a great start, how could I not be excited?

Sunday, January 20, 2013

What I've been up to: New Years Edition

The first three weeks of 2013 have gone by mostly uneventfully. I've been listening to, and even reading, a lot of books, and I still have my crochet hooks stuck into many projects. I've been trying to challenge myself, as well as finish things I started awhile back and never managed to finish. Here are a few things I've done since the new year came around.

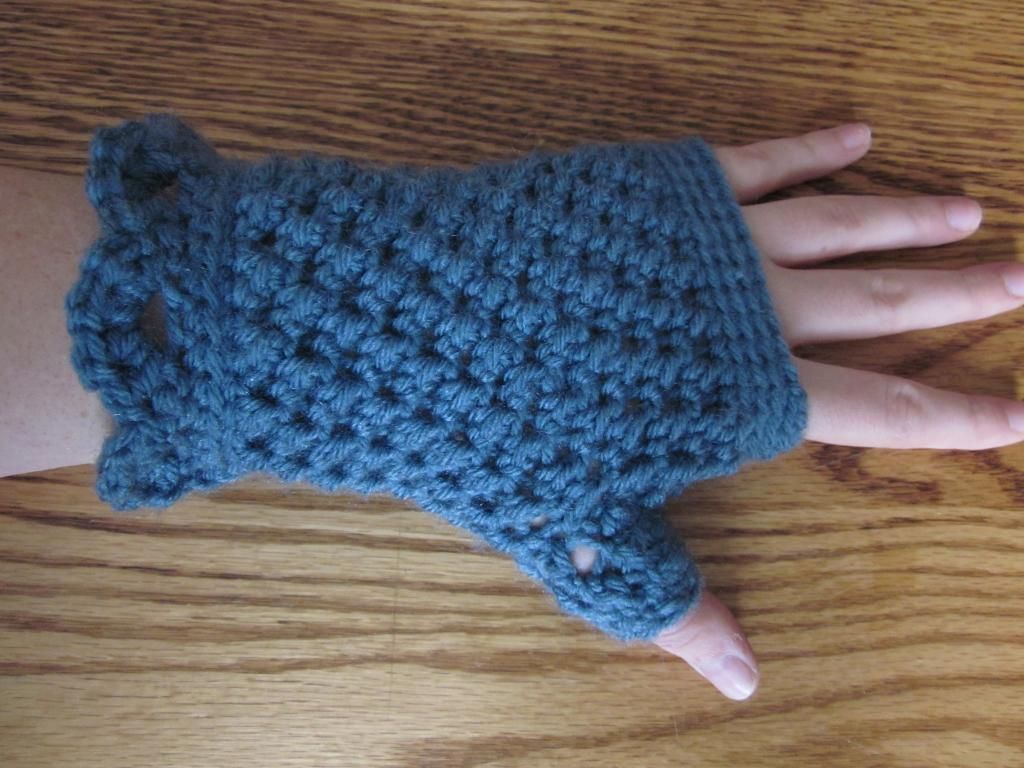
1. Butterfly Stitch Fingerless Gloves.

 photo IMG_5033_zpsdcaa7836.jpg

I spent literally 9 hours straining my eyes on January 1st making these. Having no real New Years resolutions, I was feeling kind of insecure and all I could think was about how I felt like I should at least greet the new year with a challenge. I had the pattern for these in my Ravelry queue for awhile, but had been too intimidated to make them- so they seemed like the perfect challenge for a new year.

A challenge they were indeed. It certainly took a lot of patience and focus, but I managed to finish both of them before bedtime. They look really awesome, and add a nice antique/vintage touch to my outfits. The "Dusty Blue" was the perfect color for them, too. It almost feels like a faded blue in an old picture.

The butterfly stitch was easy enough, it was just fiddling with things such as the size and the thumbhole that gave me a real challenge. Lots of improvising happened, but they both fit and look nice, and isn't that what really matters?

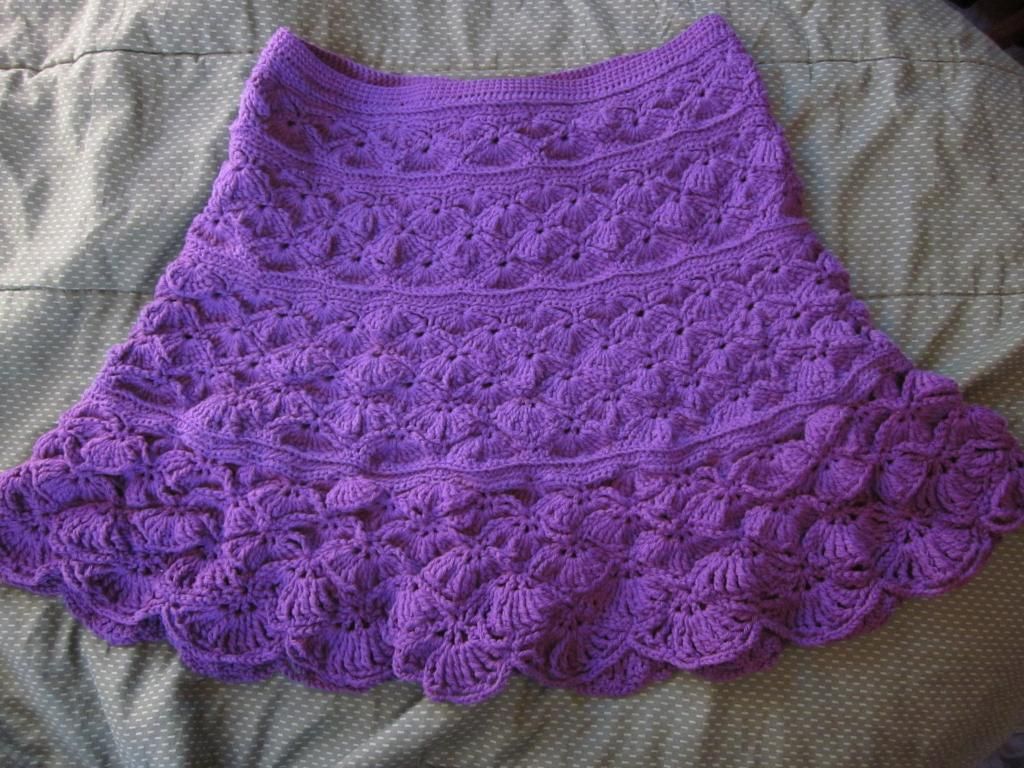
2. Senorita Skirt


 photo IMG_5076_zpsf90f9ae1.jpg
I found this pattern in the May/June 2012 Issue of Crochet Today, and I did in fact start it back in June. Unfortunately, I have a tendency to get bored really easily with repetitive patterns. Despite the fact that the shells in this pattern changed from row to row, I still found myself exhausted by shells 75% of the way through. Long story short, I put this down for nearly six months before deciding to dedicate a day to finishing it up.

After I finished it, I was pretty mad at myself. I LOVE THIS SKIRT. I love how it fits, I love how I managed to make it the perfect size, and I love how it flares out. The day after I finished it, I went out to buy some faux-cabled sweater tights so I wouldn't have to wait until summer to wear this. If only I hadn't put it down for 6 months to do 2 hours worth of work, I could have been wearing this all along! What an awesome (and seasonably versatile) addition to my wardrobe.

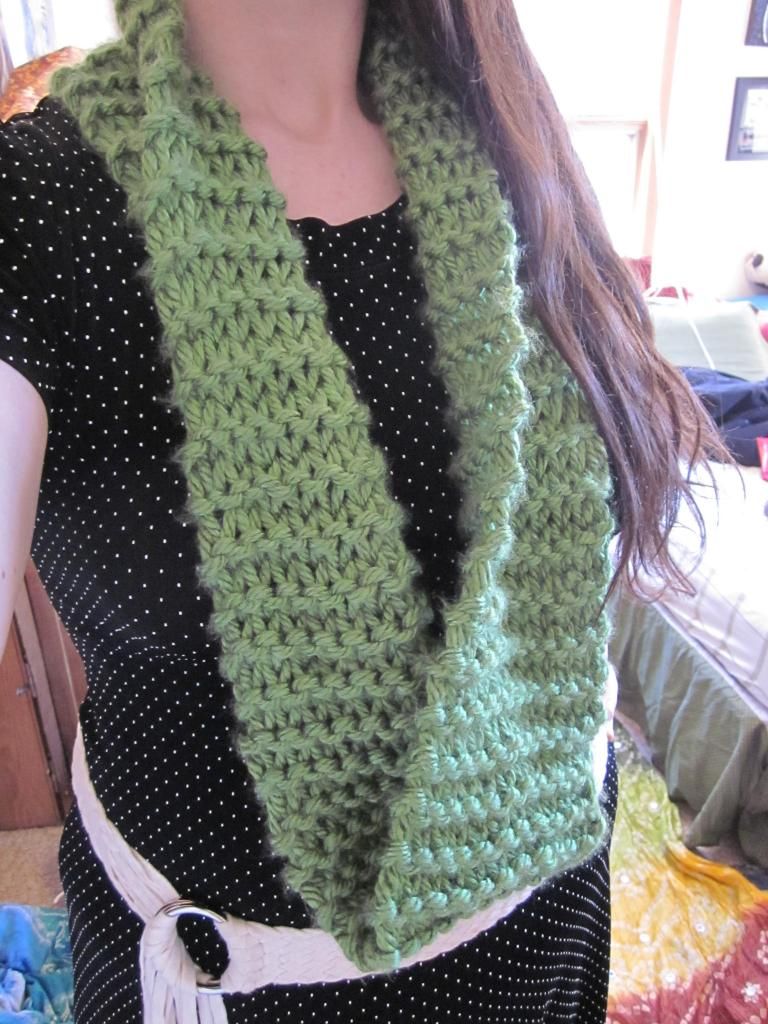
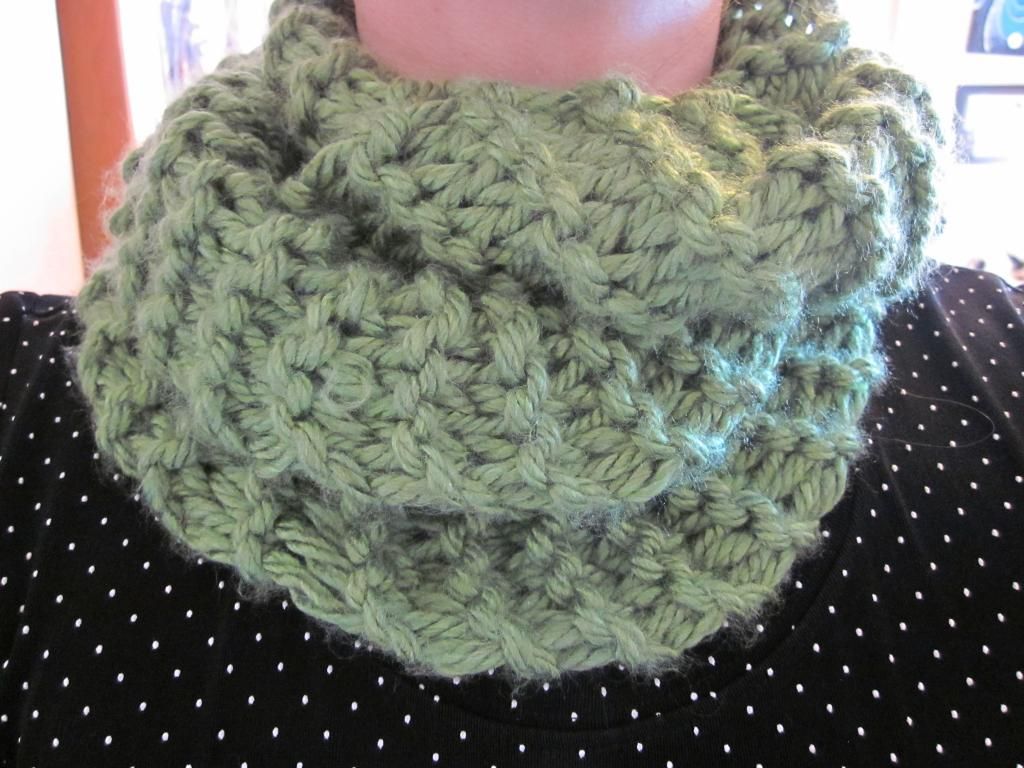
3. I KNITTED THIS COWL.


 photo IMG_5100_zps084448d9.jpg

Here's the doozy, guys. I knitted something. I was so proud of myself when I finished this last night at 1 AM, that instead of folding it up and putting it somewhere safe, I squished it against myself like a security blanket to sleep beside.

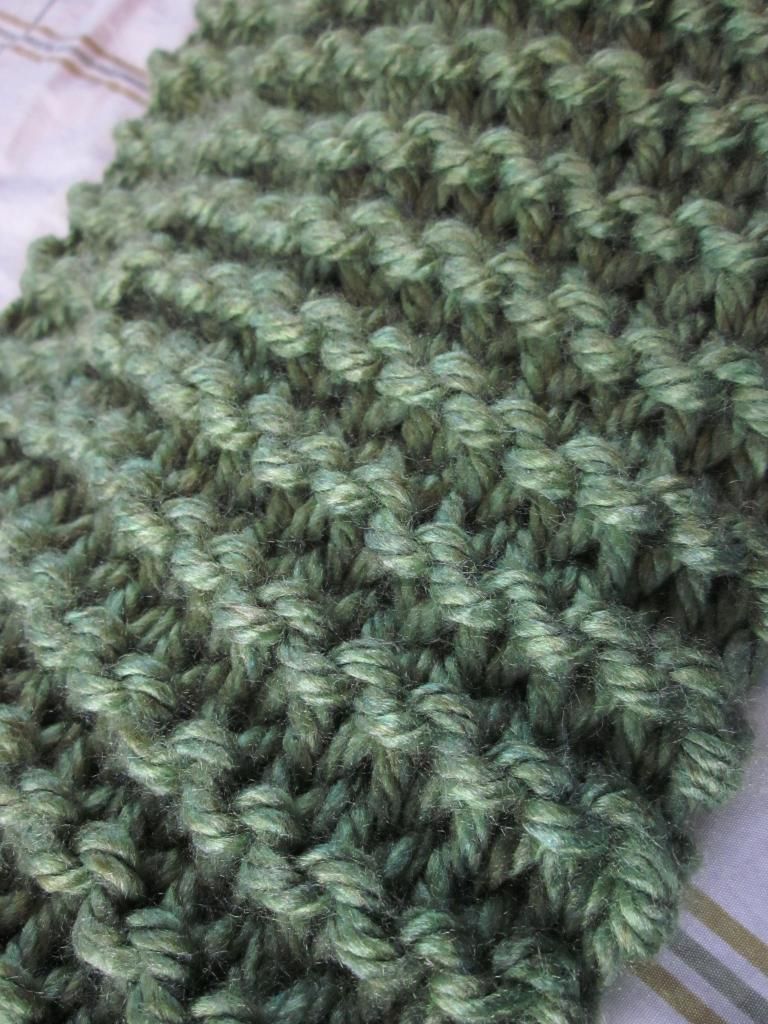
For months I have been trying to knit, only for my stitches to slide off of my needles and my day to end in a frustrating yell-a-thon. This time, though, instead of trying the same thing I've tried and failed with 100 times, I switched it up a bit. I got some GIGANTIC yarn (To be exact, Lion Brand's Hometown USA in Oklahoma Green), and then I dug out my Size 19 needles and went to town!


 photo IMG_5104_zps48b69675.jpg
With the giant yarn and dangerously big plastic needles, I only had a couple stitches drop off, which I managed to slip back on. The experienced knitter could certainly find my mistakes, but all in all, I'm really happy that I manged to cast on, bind off, and everything in between to make a soft, fluffy, functional cowl. I used a garter stitch, because I liked the texture it gave to an otherwise plain cowl, but hopefully I will find something I want to make with Stockinette stitch next.

I was so happy to not have my stitches fall off, and get an idea for the tension the yarn should be at, that I genuinely can't wait to knit again. I kept thinking about getting glasses. I remember thinking about how hard I thought school used to be, how all school equalled to me was headaches and squinting, then how much glasses improved my experience. I feel like using metal needles made me think that knitting was this impossible thing that only really talented and smart people could accomplish, at least until I got the right tools, and now everything is so much clearer.


 photo IMG_5097_zps9dc6870b.jpg

What else have I been up to? Mostly just buying stuff I want to show off.


 photo IMG_5118_zpscfab77e1.jpg

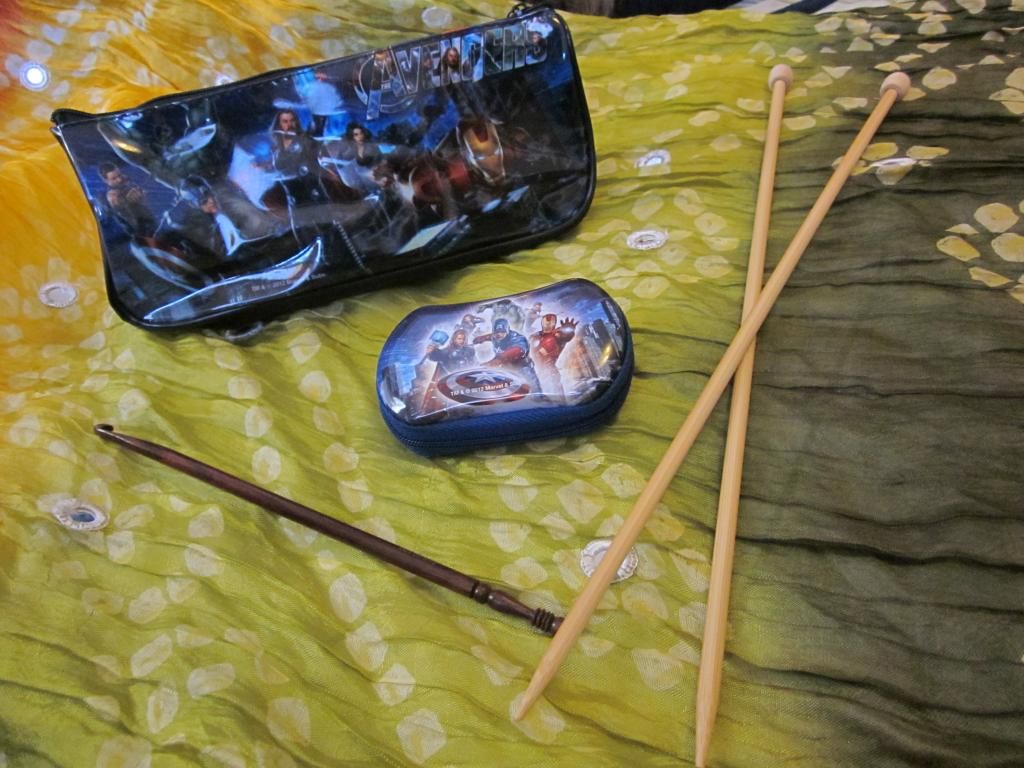
I used to have a "Crochet Dude" crochet hook case, but last week when the pockets for my tapestry needles ripped, and I opened it one day to find ALL OF MY TAPESTRY NEEDLES GONE, I decided I needed to fix this problem. At Michaels' I found a little Avengers Coin Purse that was Tapestry Needle Sized, along with a matching Avengers Pencil Pouch that was Crochet Hook sized. Best solution, or best solution?

As you can see, I also bought some bamboo knitting needles. I'm hoping these will solve the issue of dropping stitches once I graduate from gigantic needles to more normal sized needles.

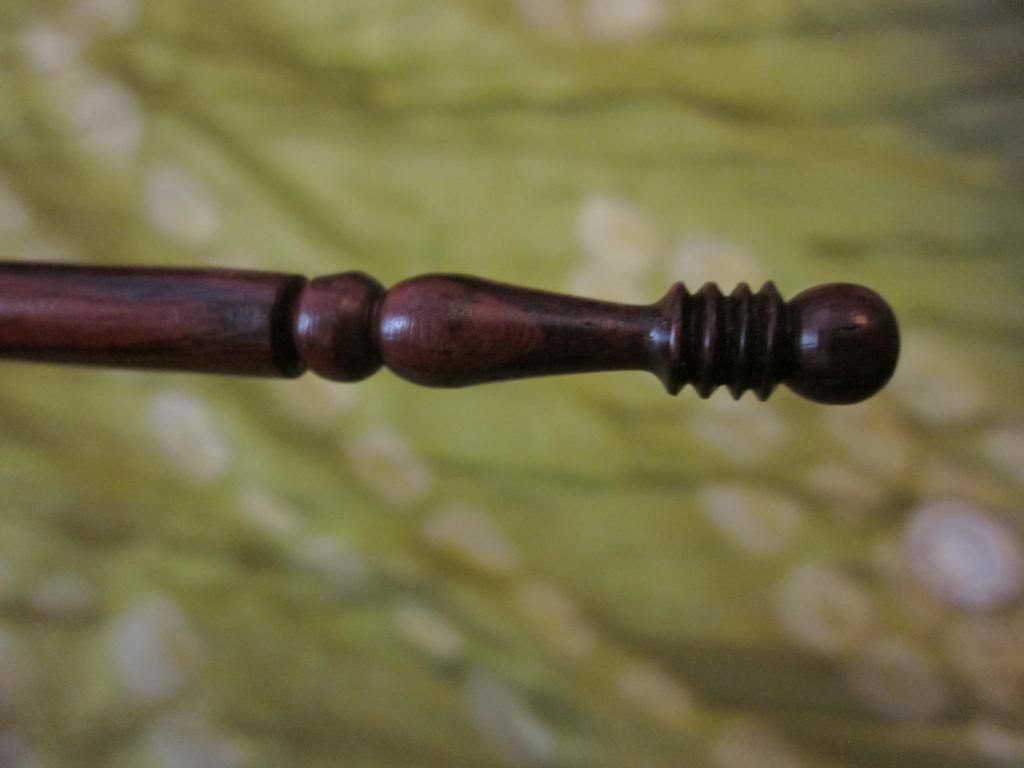
As you may also be able to see, I bought the (LAST!!) Rosewood crochet hook at Michael's. They were on sale for $6 (as opposed to $13), and while I'm not entirely sure what the benefits of a rosewood hook are, I do know that I like wasting money on nice things, and this seemed right up my alley.


 photo IMG_5119_zps5481b522.jpg
FANCY.

So what's in store? Well, I can tell you that one of my biggest projects is still consistently being picked up everyday, and I still have about 25 hours left on it (I can't waaaaaaaait to show that one off!), and considering how warm and fuzzy I feel when I think about my knitting needles, I can definitely tell you that there will be a lot more of that. Not to mention, my bamboo needles still need to be put to use!

Wednesday, November 14, 2012

One Skein Weekend (First Edition)

I've had quite a bit of free time on my hands as of late. It's bittersweet, because while I enjoy hanging out, crocheting, writing, and eating Klondike bars, I also like doing things like making rent, paying my bills, and having enough money to buy more Klondike Bars when I run out. Since my hours have been cut so significantly at work, and I'm juggling my free time with being really poor, I thought I'd try something out for my fellow poor people.

In an attempt to help us out, I'm going to try a new thing I call One Skein Weekend. It's basically a few small projects that can be made with nothing more than a single skein of yarn. So if you have a full skein of yarn stashed away, or only want to spend less than $5 to keep yourself occupied over the period of a day or two, then maybe I can help you out. I am also, of course, only using patterns that are available for free, and will do my best to make things that make sense (So you don't have 4 hats in the same color, a bracelet made of wool, or a mug cozy made of thread, etc.).


Photobucket

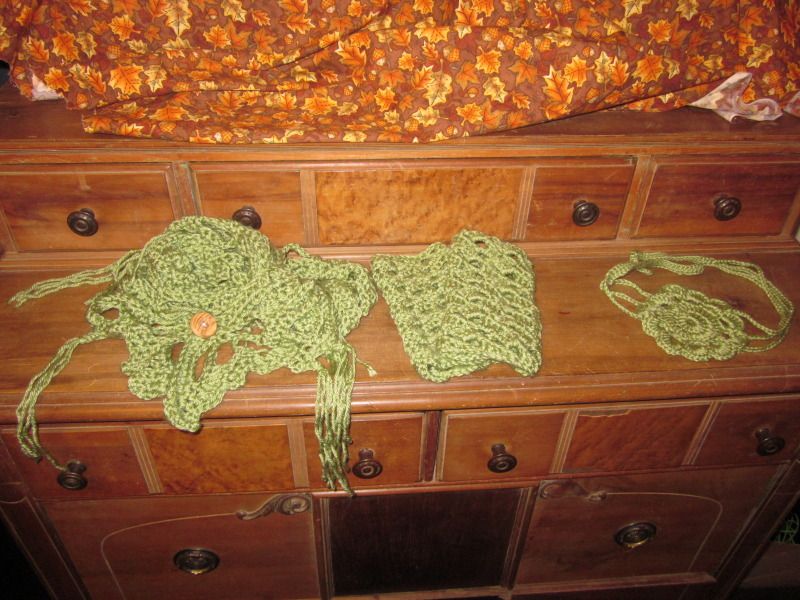
This week I made three projects that all go together nicely in kind of a Spanish Pirate theme; A Lace Shawl, Mesh Wristers, and a Flower Headband. So, let's get started.

Here's the stats of what exactly I used:


Yarn: Bernat Satin
Color: Fern
Yardage: 200 Yards
Weight: Worsted
Price: (Not sure, it was a gift)
Extra stuff: One button (50 cents from Wal Mart)

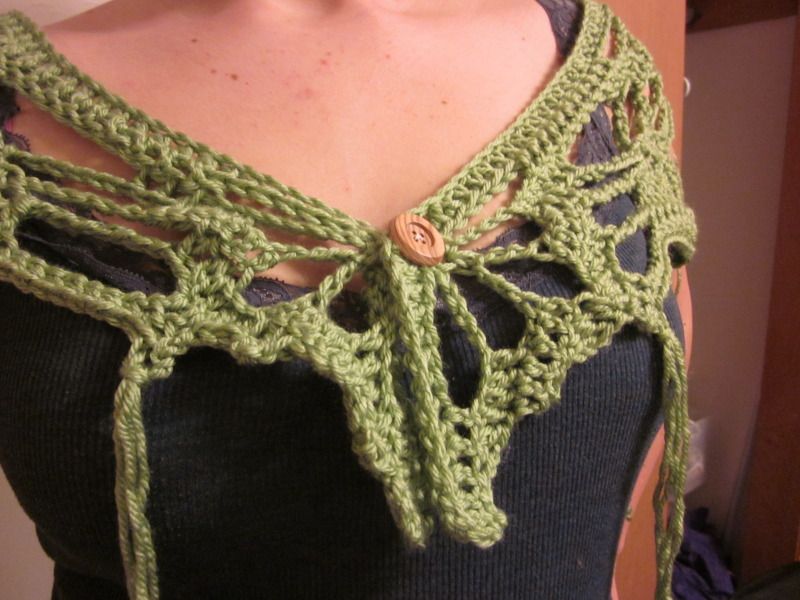
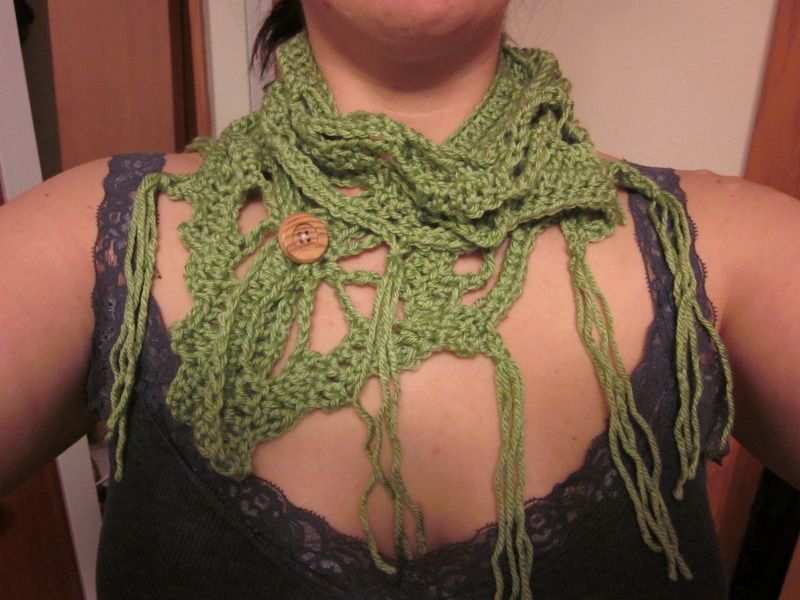
First up is the "Lace So Simple" Shawl (The pattern can be found here)


Photobucket

Photobucket

This is 7 rounds, and uses an N hook. Big hook, a few rows? Takes a few hours, and probably about half of our allotted yarn (including the long tassels). I also used a button on this so it stays on my shoulders easier, and also easily turns into kind of a cool, Bohemian style scarf, the button clasp adding a little extra personality.

The actual pattern calls for teardrop crystals to hang off of the picots, but just looping the tassles through the right places looks fine, and costs less.

I had a lot of fun with this one, and I think it looks really nice. the sheen of the green yarn I used adds an extra magical element, and it's really good for covering shoulders (something I spend my days and nights looking for!). I think as a scarf it's good for fall, and as a wrap it's good for spring, and I've been using it indoors when I'm at home, not quite cold enough for a blanket or sweater, but just want something over my shoulders. These are also elegant and bohemian enough to whip up for some last minute Christmas gifts.

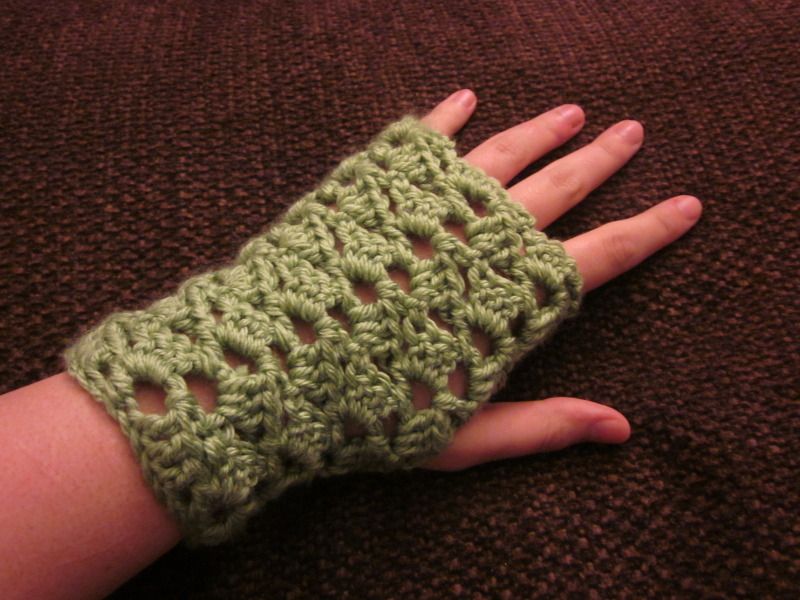
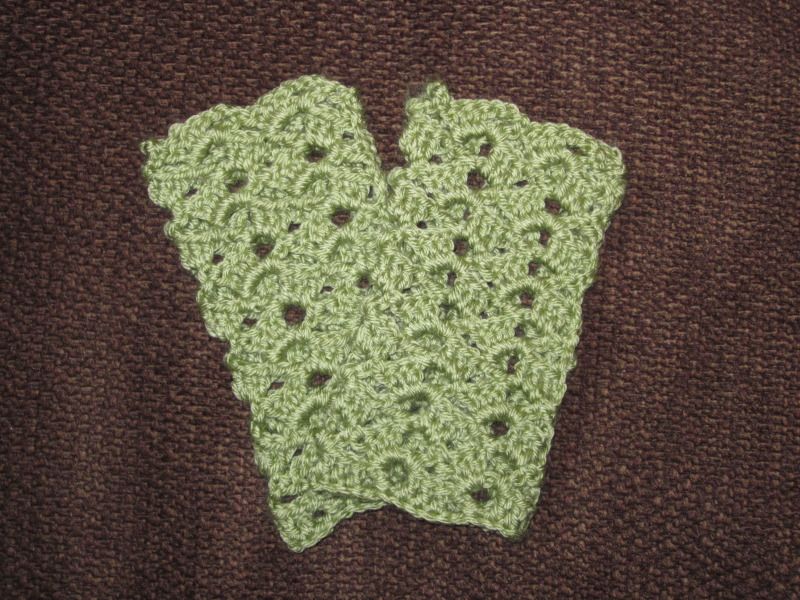
Next up are our Ivy Wristers (Pattern can be found here, as a free Ravelry download)


Photobucket

Photobucket

These use an I hook, and are the fastest wrist warmers I have ever made. I adapted the pattern a bit, with a starting chain of 35 instead of 29, and I did 12 rows instead of 10. They fit nicely, and are perfect for when my hands get chilly during NaNoWriMo (or blogging...yes, I am wearing them right now :)). Normally I'm a bit wary of the wrist warmer method of making a rectangle and folding it over, but this pattern is small enough that it works really well without being clunky, and actually fits the hand shape nicely.

The pattern itself took only a little while, and is just a quick motif repeated over and over and over again, making for an interesting pattern.

....Now~ ...

...Before you run off and make these, I have a bit of a disclaimer. Since I adapted the pattern to be bigger, I came VERY close to running out of yarn before finishing the final project. This is how much yarn I had left:


Photobucket

So, if you don't want to cut it that close, I recommend doing less than twelve rows. But, if you like to live on the edge, then go for it! Just be conservative with your yarn from here on out. Let me know how it goes for you!

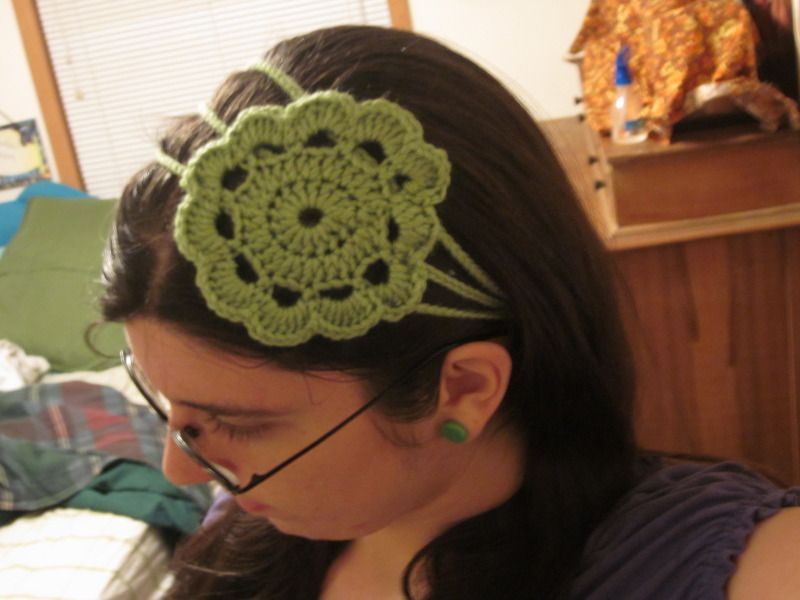
And finally, our flower headband (Pattern can be found here)


Photobucket

Photobucket

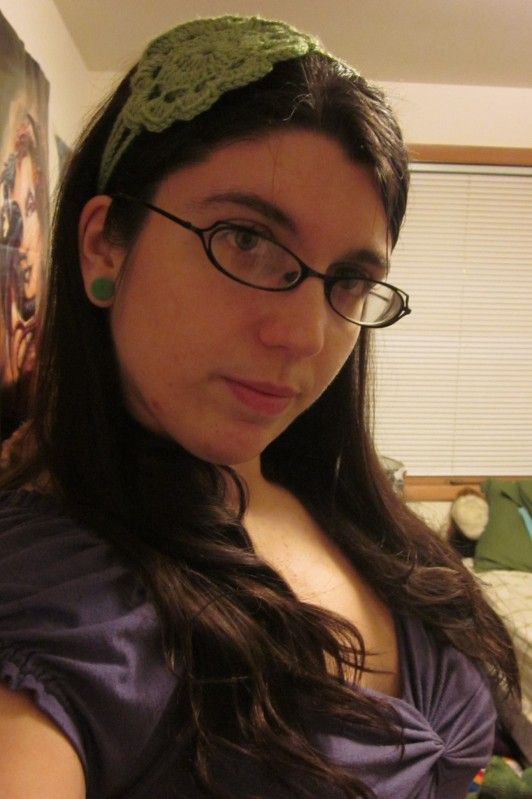
This was a super cute project, and was rather interesting to put together (sewing the large flower to the 3 chain headband). I used an H hook for the flower, and an F Hook for the chains (the F hook being very important to not running out of yarn :P). Despite how big the flower is, I was actually surprised at how cute it turned out. I don't feel like it's gaudy at all, I just don't know when I'm going to wear it! Hopefully I'll manage to get some use out of it.

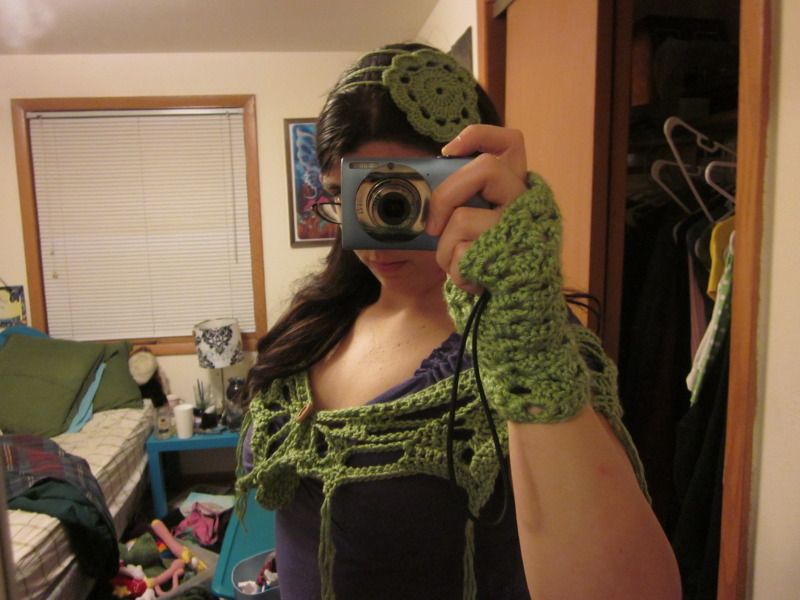
All together now!


Photobucket

So this is what it all comes together to be! Mine is a nice...radioactive hobo Spanish pirate theme :)

Isn't stash busting fun? I've been making a lot of little projects lately, and since I don't have any extra money to buy more yarn, my stash is certainly dwindling beautifully :P
Want more stash busters? Wanna see the other cool projects I've been working on? You know I'll be back with some kind of goodies soon enough.

Saturday, November 3, 2012

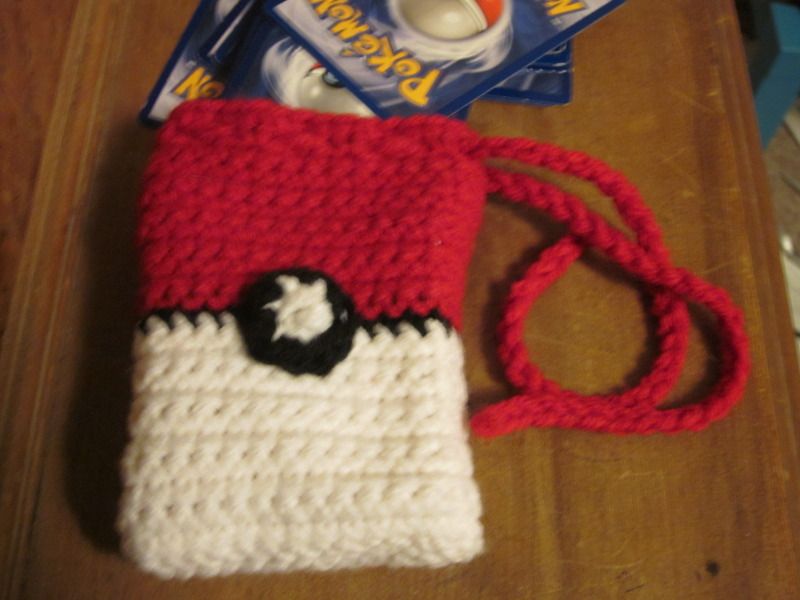
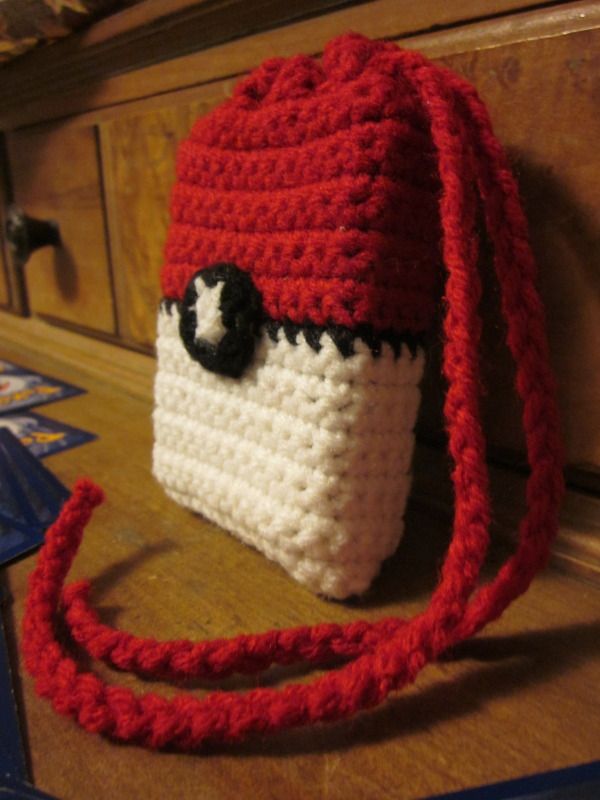
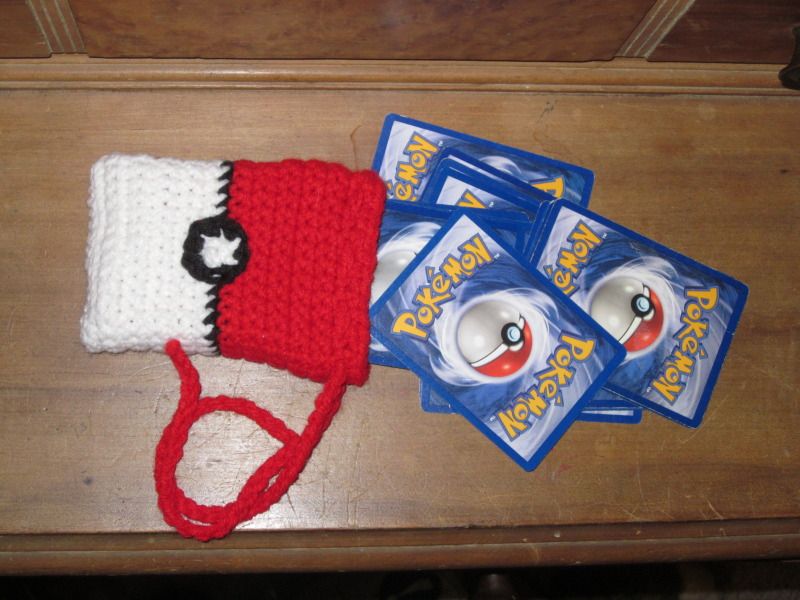
Pokeball Deck Bag

My relationship with Pokemon is kind of a strange one. I only have two very strong memories related to it, and as I was making the pattern and crocheting up this bag for Pokemon cards, they were the only things I could think about.


Photobucket

I was about 10 when I got into anime, and Sailor Moon was my drug of choice. Something about Pokemon didn't really appeal to me, and while my friends sat on the curb outside their apartment buildings trading cards, I didn't want to be left out, so I feigned interest.

I liked talking to my friends about the different kinds of Pokemon, and I remember sitting outside, in the middle of the hot Virginia summer, with my binder of all kinds of cards, trading cards with everyone else who had their binders of cards. This is the first memory I really treasure about Pokemon.


Photobucket

I never became obsessed, really. But I certainly had a place for Charmander in my heart.

As a stocking stuffer one Christmas, my Dad, not knowing the difference between Pokemon and all those other animes I was into, got me a sparkly little bouncy ball with Charmander in the center. As I crocheted this Pokeball, I could clearly remember standing in front of my Christmas tree that night, the lights wrapped around the tree sparkling, my face and hands warm from the heaters, and my Charmander bouncy ball firmly in my hand, and all I could think about was how badly I wanted to take care of him. So twenty seconds of a fragment of a memory of pretty lights and the smell of Christmas still hanging in the air is my 2nd nice memory of Pokemon.

This was all happening around the same time I spoke of in my last post, when I spent my days drawing Sailor Scouts, watching animes, writing fanfiction and just making my own universe. I've never felt more magical, and so even though Pokemon was never a vice of mine, it still holds a special place in my heart.

So, without further delay, here is that pattern for my Pokeball Pokemon card deck bag!


Pokeball Deck Bag
Pokemon and Pokeball (TM) Satoshi Tajiri
Original Pattern created by Pam Gabriel
Please do not sell products made from this pattern without permission.

This is a crocheted bag designed to hold decks for the Pokemon card game.

What you'll need:

  • H Hook
  • Less than a skein of worsted weight yarns in:
    • White
    • Red
    • Black

Abbreviations:

Chain (ch)
Single Crochet (sc)
Skip (sk)


How to do it:

With White, ch 31:

Row 1: sc in 2nd ch from hook, and in each sc across, ch 1, turn. (30 sc)
Row 2 - 10: sk next sc, sc to end of row, ch 1, turn. (30 sc)
Row 11: sk next sc, sc to end of row. (30 sc) (Do NOT ch 1 at end of this row.)

Finish off white.

Attach Black.

Row 12: Ch 1, sk next sc, sc to end of row. (30 sc)

Finish off black.

Attach Red.

Row 13: Ch 1, sk next sc, sc to end of row, ch 1, turn. (30 sc)
Row 14 - 22: sk next sc, sc to end of row, ch 1, turn. (30 sc)
Row 23 (Beaded Row): sk next sc, sc in next 2 spaces *ch 1, sk next sc, sc* Repeat * to end of row, ch 1, turn (16 sc, 14 ch1 spaces)
Row 24: sc in each ch1 space and in each sc. (30 sc)

Fasten off, leaving a long tail for sewing.

Weave in ends.

Use a whip stitch to sew the side and bottom together. Switch to white yarn when you get to the white part of the bag.

Drawstring:

Using red, make a chain of desired length, and weave through the holes made by the chain spaces in the beaded row.

Button:

With white:

Round 1: Ch 2, 6 sc in 2nd ch from hook. Finish off white.

Attach black.

Round 2: 2sc in each sc around (12 sc). Finish off, leaving a long tail.

Sew button to center of front side of bag.

Photobucket


So, how did it go? Was it big? Small? Do you even use Pokemon cards anymore? Are you using it as a bag for something else? Let me know!

Next time! More deck bags are in the works, along with a Sailor Moon challenge (on a few different levels), and who knows...maybe even a NaNoWriMo update.