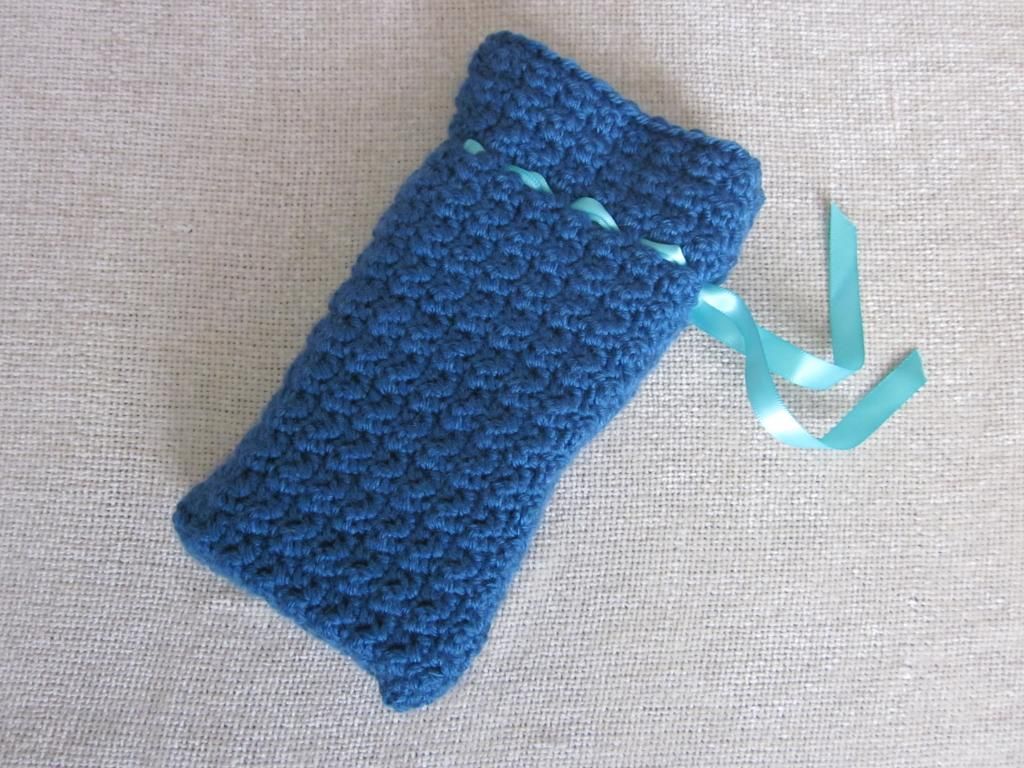
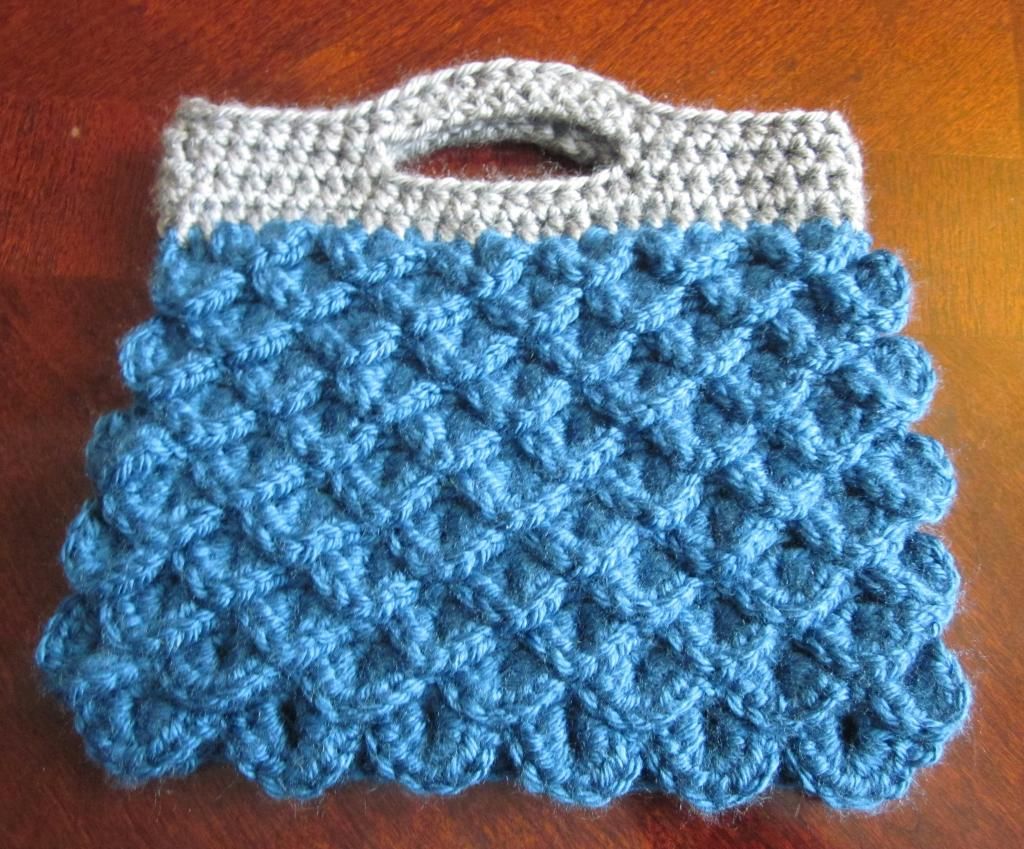
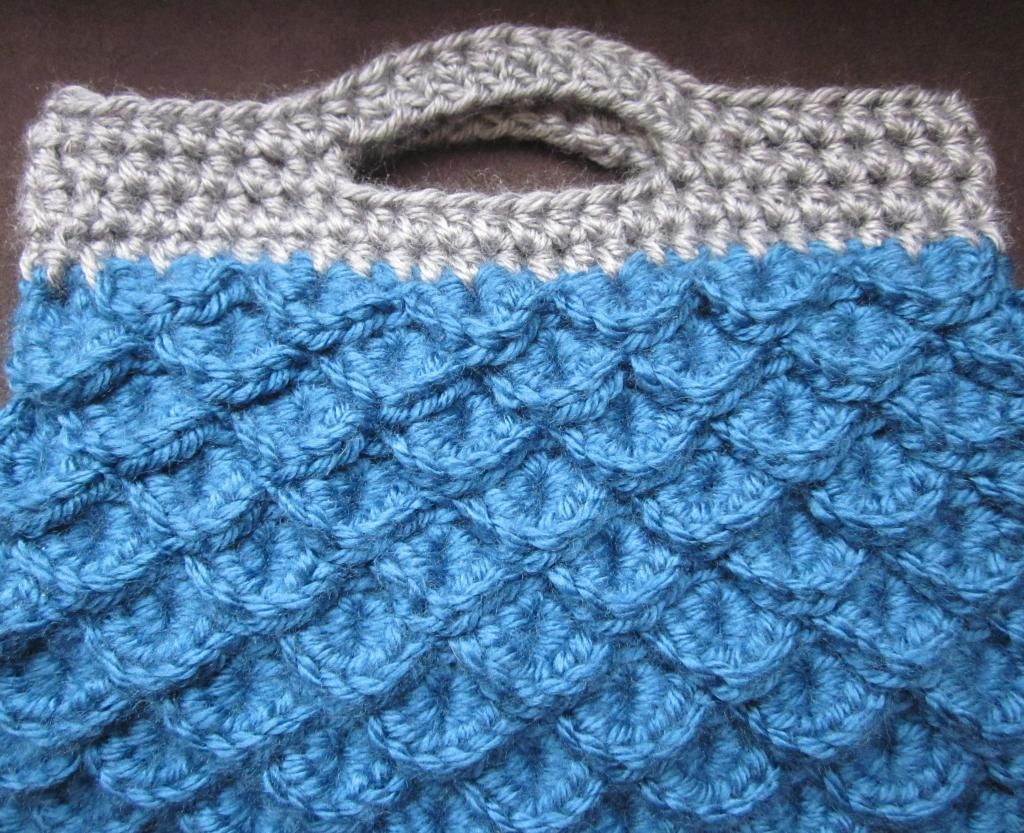
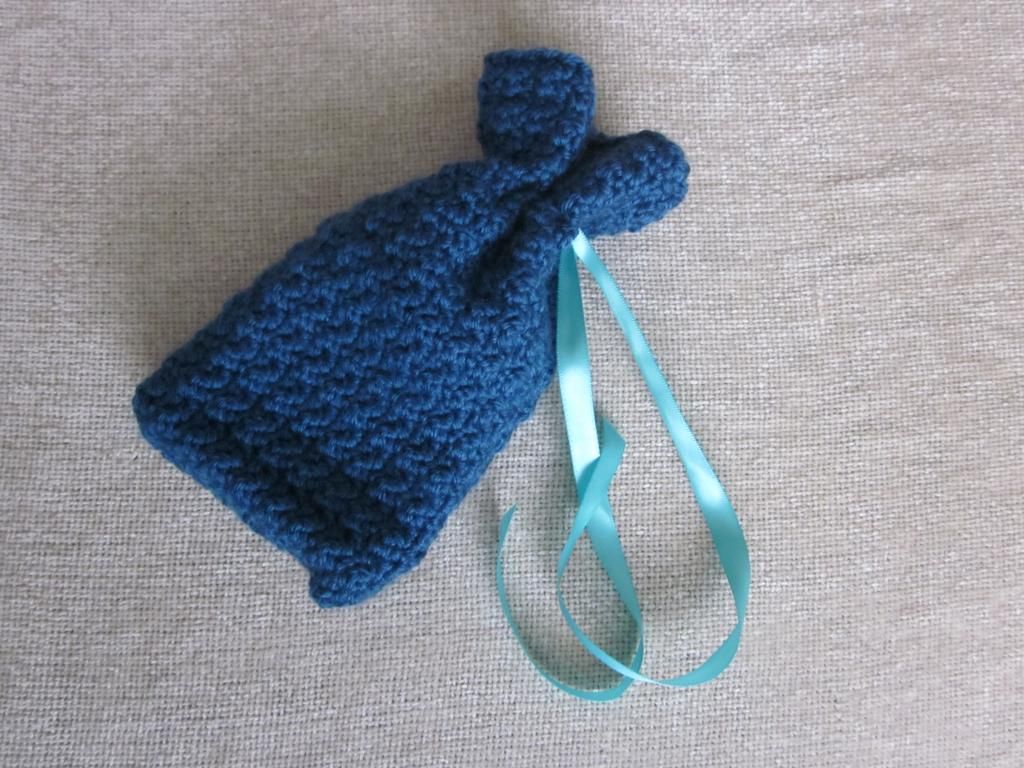
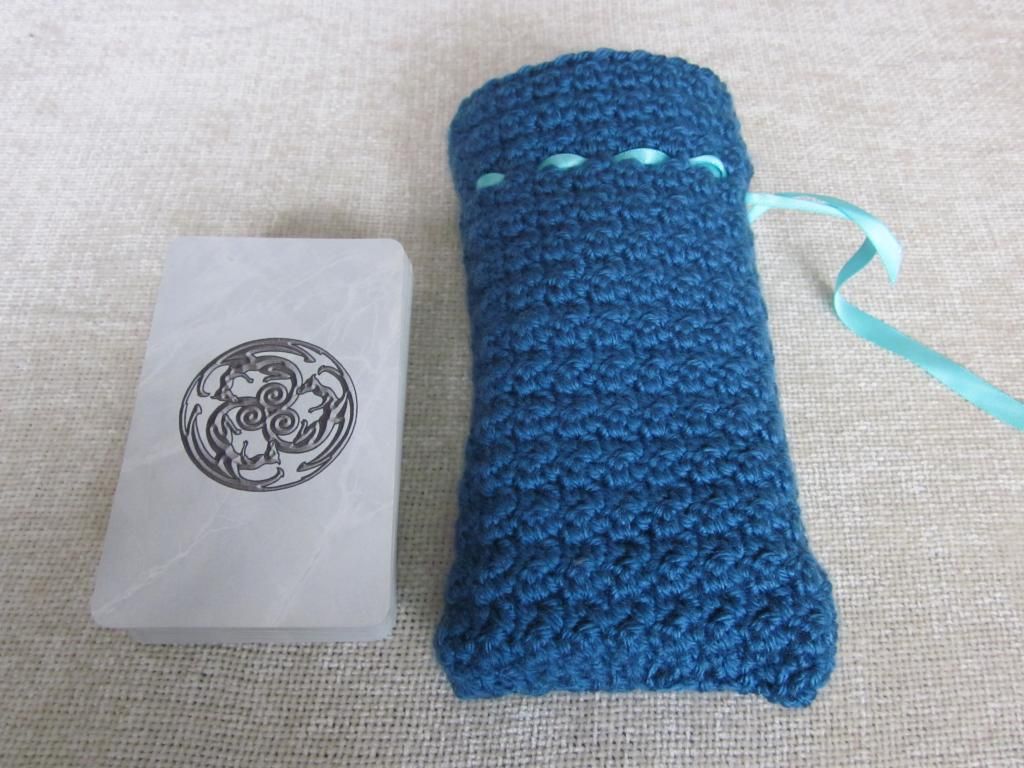
This "edition" of One Skein Weekend is one I'm pretty excited about. I made a purse using crocodile stitch, and a small drawstring bag intended for Tarot cards (although it can be used for just about anything).
Anyone who knows me, or has been to my house, knows how I feel about dragons. The crocodile stitch is irresistible to me because it reminds me so much of dragon scales, and using crocheting to be able to flaunt and express my love for them makes me smile every time.
I have also been a Tarot card enthusiast for a long time, having acquired my first deck of Tarot cards when I was about 12. I really enjoy having such a beautiful bag that I made myself, and can store my favorite deck of Tarot cards in (which, you guessed it, is the Celtic Dragon Deck).
These two projects, while both being bags, serve different purposes, and are both so magical, that they somehow feel as though they go together.
Let's get started.
First, let's talk about the yarn:
Yarn: Bernat Satin
Color: Teal
Yardage: 200 Yards
Weight: Worsted
Price: (Not sure, it was a gift)
Extra stuff: A couple feet of ribbon, A few yards of scrap yarn in a contrasting color (I used Caron Simply Soft in Gray.)
First up is the Crocodile Stitch Clutch (The pattern can be found here.)
I made a few changes to Sara's pattern. First up, I added 4 more rows, to equal two more rows of crocodile stitch. I also made the handle out of 9 fsc instead of 9 ch (to add some extra width without doing a fifth row of CC). And for the back, I did a total of 29 ch to start, instead of 33.
I love the combination of sapphire and silver, so when this purse was finished I couldn't help but to think about how much it reminded me of treasure lost in the ocean. I have always had an affinity for the ocean, and the "scales" simultaneously reminded me of waves, and dragon scales.
I also love her version of the crocodile stitch, where she uses hdcs instead of dcs, so the stitches are tighter to prevent any smaller items from falling out. This pattern is beautiful, elegant, and the shimmery teal color makes it perfect for the midwesterner who still misses the ocean.
And, although this looks like it took a long time, it went really quick. Only doing 6 or 7 scales per row makes it go very quick, and the hdcs of the back work up quickly. Had it finished in a few hours.
Next up is the StarGazer Tarot Bag (which can be found here.)
I made this bag for the first time back in January of 2012, and at that time I used a very expensive yarn I bought with a gift card (because I'm too cheap to spend my own money on nice things). After I made the Crocodile Stitch Clutch, this project felt like it was the right amount of yarn to use up the rest of my skein. So, without thinking, I found the pattern again, and started to stitch it up, when I was hit with a very odd sense of deja vu. Looking towards my Tarot cards, I realized that this is the same color I used for the other one! While my expensive yarn drapes a little differently, using Bernat Satin has the same shimmer, and works up even quicker.
I only did 22 rows before the beaded row, and 5 instead of 7 rows AFTER the beaded row. If my gauge was smaller, I probably could have gotten away with doing all the rows, and still coming to the end of my skein, but using an H hook and omitting 5 rows, It worked out nicely that I had only a yard or two of yarn left. In fact, because of my large gauge, I probably could have made the foundation chain even shorter, since I can fit a deck of tarot cards in there with a lot of walking room left. If you ARE using one skein of yarn for both of these projects, and want to make this one true to pattern, you can always make the Crocodile Stitch Clutch true to pattern instead of adding two rows, and you will definitely have enough leeway.
As I said, though, this can make a nice drawstring bag in general, and can work as a dice bag, or a small drawstring bag for whatever trinkets needs you may have, so gauge isn't the most important.
I worked this up in a little over an hour, so it makes a great last minute gift, or a good way to get out of a crochet rut. The pattern is just single and double crochets, so it's really easy, too.
If you're looking for other things to do with a skein of yarn, here's my other One Skein Weekend Post:
-First Edition (AKA Radioactive Hobo Pirate Edition)
This blog was born from my inability to express myself through anything besides the things I create with my hands. From baking to writing, I love expressing myself, and maybe even teaching and inspiring other people to do so along the way.
Showing posts with label yarn. Show all posts
Showing posts with label yarn. Show all posts
Friday, March 1, 2013
Saturday, January 26, 2013
Before & After: The Tale of The Sparkly Pineapple Shirt
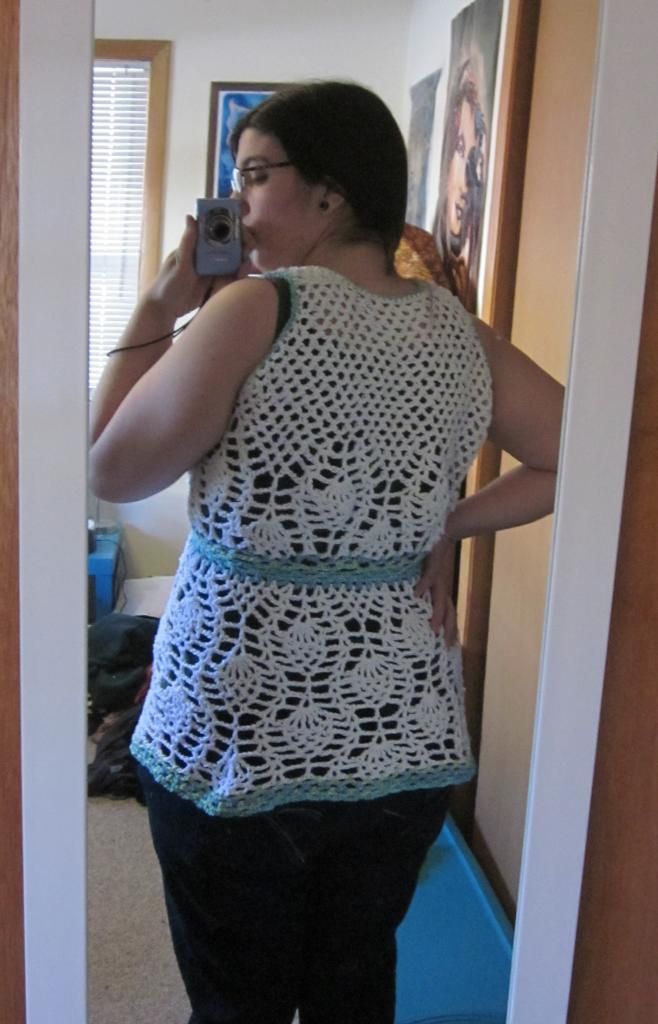
It all started in Kohl's. I had just gotten paid, and eager to spend all my money, went out to buy some (much needed) clothes. Mostly for work, I picked up jeans, looked at button up shirts, and even bought my first pair of leggings, but when I ended up in the clothing section to buy shirts I felt lost and confused. It had been so long since I bought clothes in an actual store (Thank you, TeeFury). From section to section I wandered. Some clothes seemed to be for 14-year-olds, and all the other clothes seemed to be for 40-year-olds. Annoyed, infuriated, and worst of all, holding an armful of nothing but work clothes, I made a declaration to "Just crochet all of my own shirts."
Everything looked awkward. Everything felt awkward. Even the models in the pictures, and the clothing on the mannequins didn't look appealing to me. Nothing was making sense. I was going to make my own clothes.
I was half joking, but by the time I got home, and ended up alone on Ravelry for a good hour or two, I had looked through all kinds of shirt patterns. I was so excited, the very next day I went out and bought some cotton yarn, then started on a simple-looking shirt, Light and Lacy by Doris Chan.
I had finished it in an astounding 3 days. It worked up so fast, I was suddenly even more excited by my decision to make all of my clothes. The only problem? It fit about as well as an oversized grocery bag.
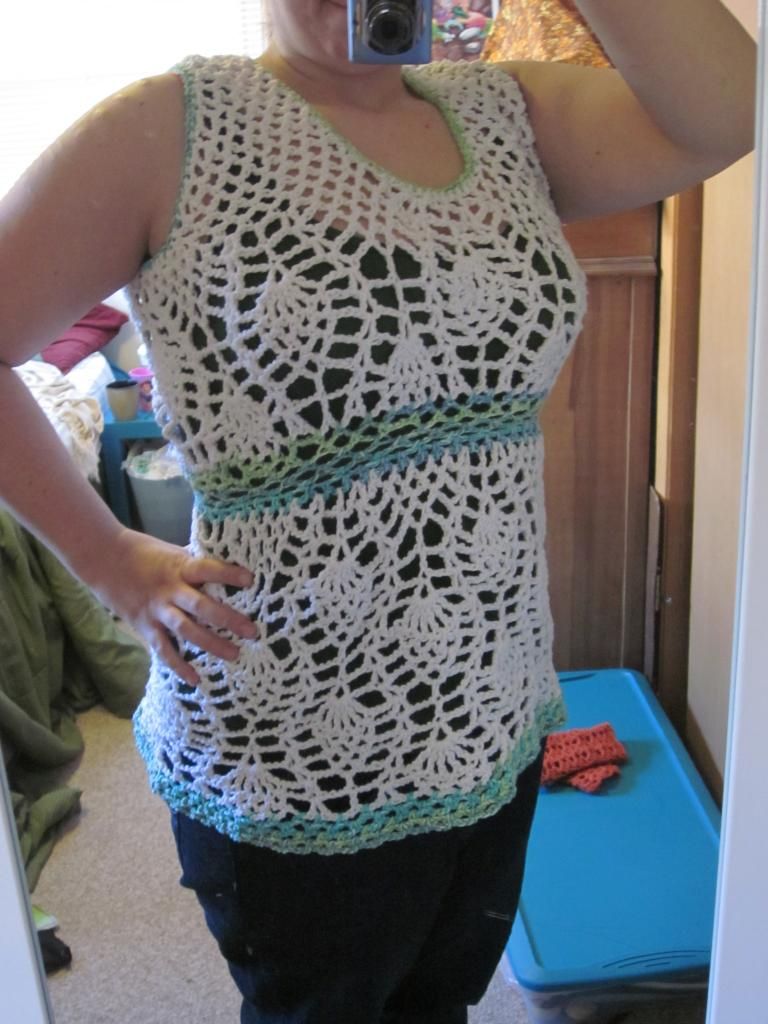
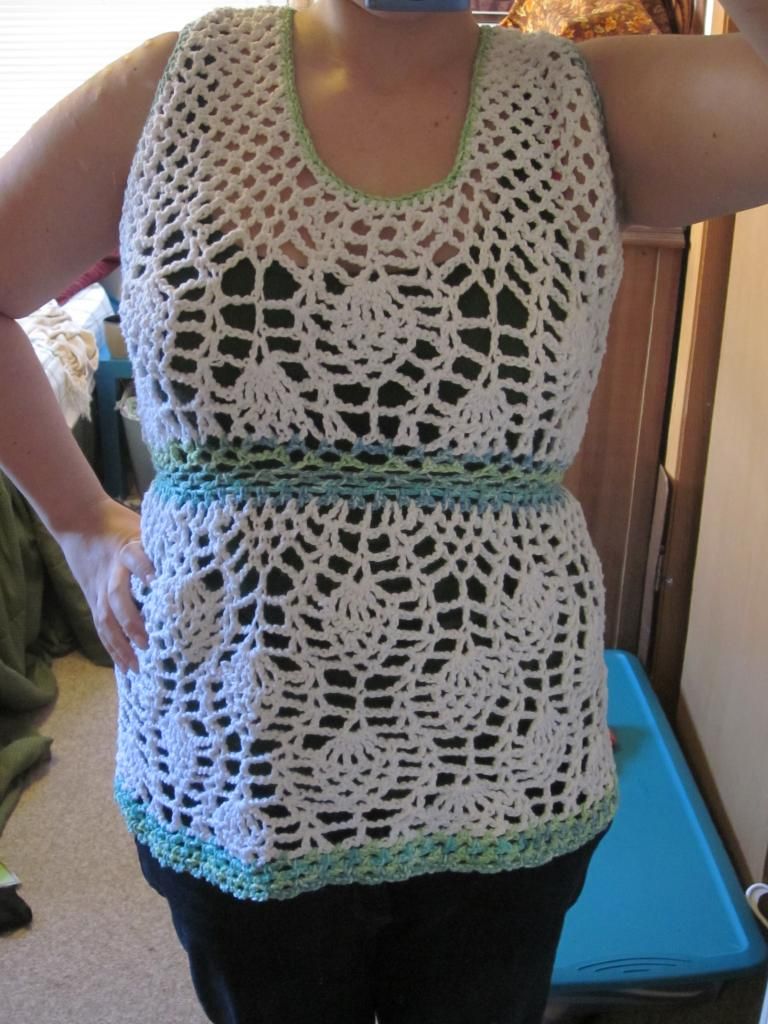
I told myself it was okay, that I had never made a form-sitting shirt before. At my size, I've never been a Small before, but it turns out that maybe I should have made a small for this shirt (I made the Medium). It was so baggy on me, that as I wore it, I swore it made me look 30 pounds heavier. I told myself it was okay, but I didn't even have the motivation to tie in the ends. I set it on my dresser, and feeling defeated, went to bed.
The next morning, I don't know if I had a dream, or if the answer was really just that simple all along, but I woke up so enthused, I knew I had figured out a way to fix my shirt to make it look better.
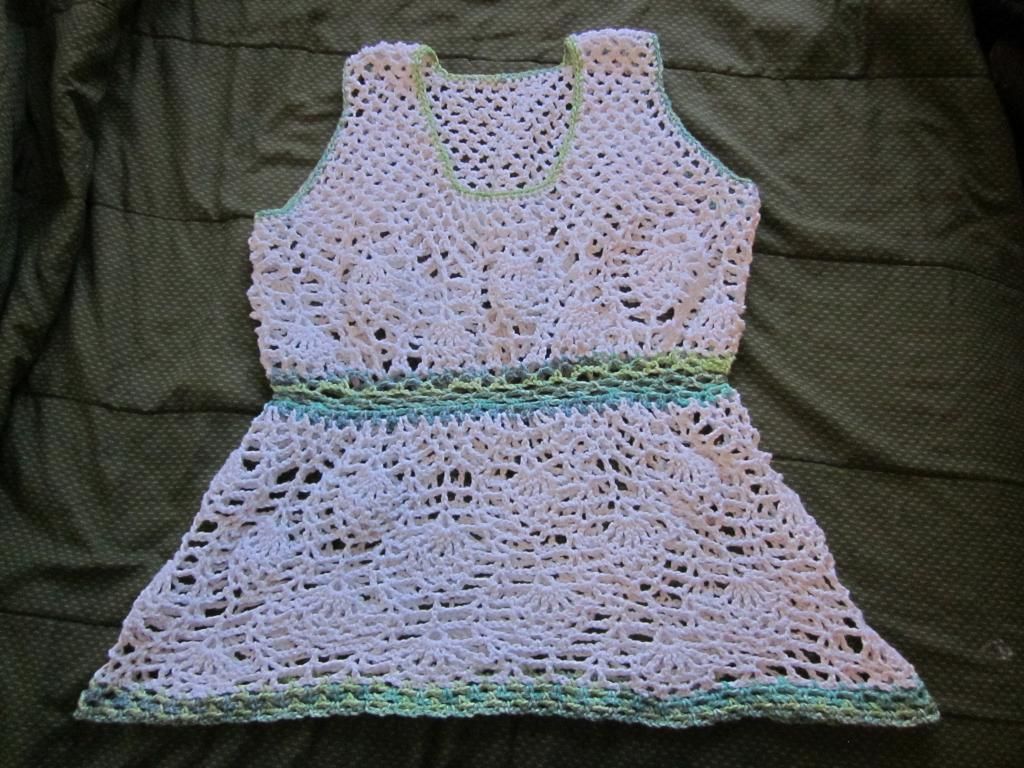
After much debating, and cringing, I (painfully) ripped out about 75% of my work, then made a band by decreasing the chain mesh.I was really happy that this had been a fast project, because even after ripping out most of my work, it still only took another 3 days to completely finish it. I could make two of these a week if I really wanted to supplement my wardrobe.
By making a band in the middle significantly smaller than the rest of the piece, this pulled it in a bit, then I increased it enough to have it bellow out again. It went from Potato sack to flattering A-Line piece.
(If you are looking for the technical things I did, and how to do this yourself to this shirt, you can look at the notes on my Ravelry Page.)
Ta da! New shirt!
I love it so much now, I can't wait to wear it! Although, with it being made of cotton, and in such sparkly and bright colors, I can't imagine wearing it any other time of year besides late spring and summer.
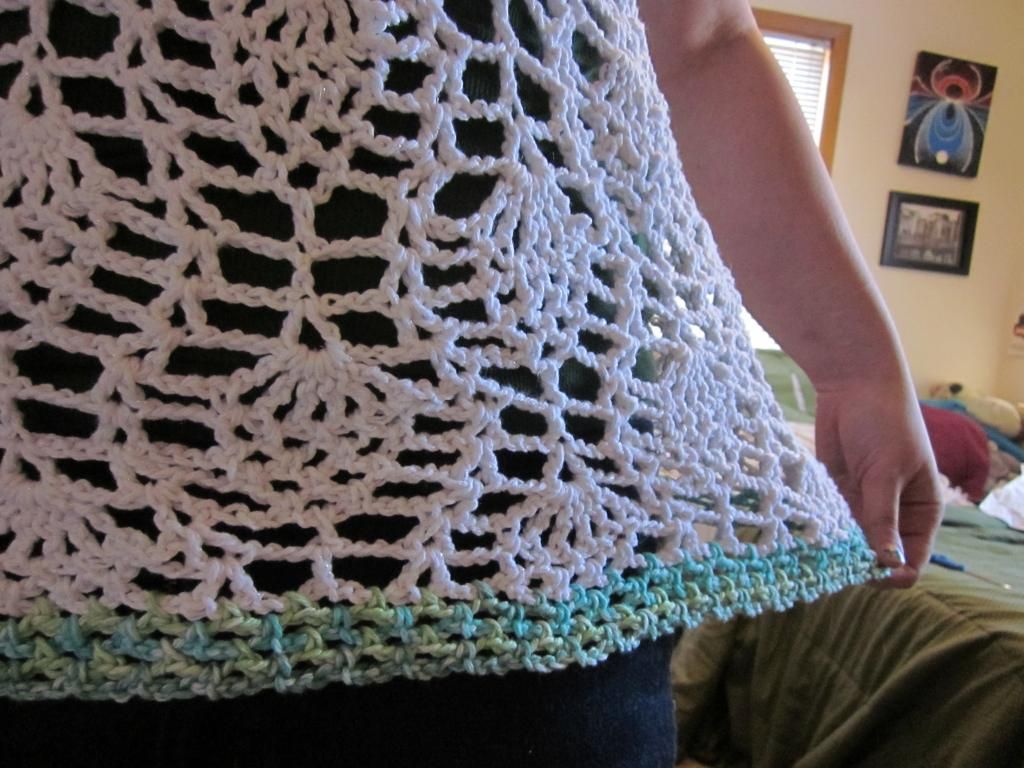
This was also nice, because now instead of just "dealing" with the style of a shirt (the way I would ahve if I had just bought a shirt the other day), I'm now actually looking forward to something. On top of that, I had so much fun working with the colors. The white, although you can't see it, is actually a "Holiday" yarn, so it has metallic tinsel throughout, and the blue-green stripes are Lily Sugar N' Cream "Country Stripes", a yarn I've had in my stash forever, but didn't know the perfect thing to use it on. The sparkles and the stripes give it an awesomely light oceany feel to it that I am so excited to wear around when the weather is warmer.
I have a lot of plans to make more clothes, of course. I even picked up a book from the library today, and without even noticing the author, I got it home, only to realize the patterns were from none other than Doris Chan herself. After finding Light and Lacy, I went through all her patterns to find that I love her style! I guess I can officially consider myself a fangirl, and I look forward to expanding my wardrobe over the next few months. With such a great start, how could I not be excited?
Everything looked awkward. Everything felt awkward. Even the models in the pictures, and the clothing on the mannequins didn't look appealing to me. Nothing was making sense. I was going to make my own clothes.
I was half joking, but by the time I got home, and ended up alone on Ravelry for a good hour or two, I had looked through all kinds of shirt patterns. I was so excited, the very next day I went out and bought some cotton yarn, then started on a simple-looking shirt, Light and Lacy by Doris Chan.
I had finished it in an astounding 3 days. It worked up so fast, I was suddenly even more excited by my decision to make all of my clothes. The only problem? It fit about as well as an oversized grocery bag.
I told myself it was okay, that I had never made a form-sitting shirt before. At my size, I've never been a Small before, but it turns out that maybe I should have made a small for this shirt (I made the Medium). It was so baggy on me, that as I wore it, I swore it made me look 30 pounds heavier. I told myself it was okay, but I didn't even have the motivation to tie in the ends. I set it on my dresser, and feeling defeated, went to bed.
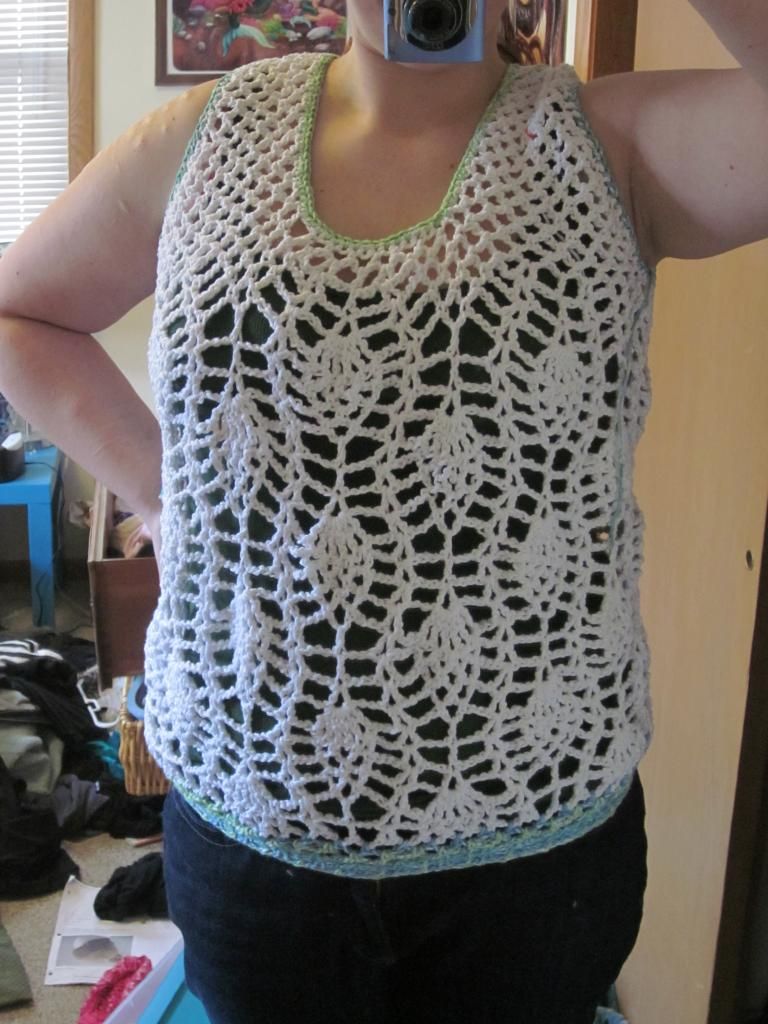 |
| The "Before" |
The next morning, I don't know if I had a dream, or if the answer was really just that simple all along, but I woke up so enthused, I knew I had figured out a way to fix my shirt to make it look better.
After much debating, and cringing, I (painfully) ripped out about 75% of my work, then made a band by decreasing the chain mesh.I was really happy that this had been a fast project, because even after ripping out most of my work, it still only took another 3 days to completely finish it. I could make two of these a week if I really wanted to supplement my wardrobe.
By making a band in the middle significantly smaller than the rest of the piece, this pulled it in a bit, then I increased it enough to have it bellow out again. It went from Potato sack to flattering A-Line piece.
(If you are looking for the technical things I did, and how to do this yourself to this shirt, you can look at the notes on my Ravelry Page.)
Ta da! New shirt!
I love it so much now, I can't wait to wear it! Although, with it being made of cotton, and in such sparkly and bright colors, I can't imagine wearing it any other time of year besides late spring and summer.
This was also nice, because now instead of just "dealing" with the style of a shirt (the way I would ahve if I had just bought a shirt the other day), I'm now actually looking forward to something. On top of that, I had so much fun working with the colors. The white, although you can't see it, is actually a "Holiday" yarn, so it has metallic tinsel throughout, and the blue-green stripes are Lily Sugar N' Cream "Country Stripes", a yarn I've had in my stash forever, but didn't know the perfect thing to use it on. The sparkles and the stripes give it an awesomely light oceany feel to it that I am so excited to wear around when the weather is warmer.
I have a lot of plans to make more clothes, of course. I even picked up a book from the library today, and without even noticing the author, I got it home, only to realize the patterns were from none other than Doris Chan herself. After finding Light and Lacy, I went through all her patterns to find that I love her style! I guess I can officially consider myself a fangirl, and I look forward to expanding my wardrobe over the next few months. With such a great start, how could I not be excited?
Labels:
clothing,
crocheting,
Doris Chan,
pattern mods,
shirts,
yarn
Wednesday, November 14, 2012
One Skein Weekend (First Edition)
I've had quite a bit of free time on my hands as of late. It's bittersweet, because while I enjoy hanging out, crocheting, writing, and eating Klondike bars, I also like doing things like making rent, paying my bills, and having enough money to buy more Klondike Bars when I run out. Since my hours have been cut so significantly at work, and I'm juggling my free time with being really poor, I thought I'd try something out for my fellow poor people.
In an attempt to help us out, I'm going to try a new thing I call One Skein Weekend. It's basically a few small projects that can be made with nothing more than a single skein of yarn. So if you have a full skein of yarn stashed away, or only want to spend less than $5 to keep yourself occupied over the period of a day or two, then maybe I can help you out. I am also, of course, only using patterns that are available for free, and will do my best to make things that make sense (So you don't have 4 hats in the same color, a bracelet made of wool, or a mug cozy made of thread, etc.).
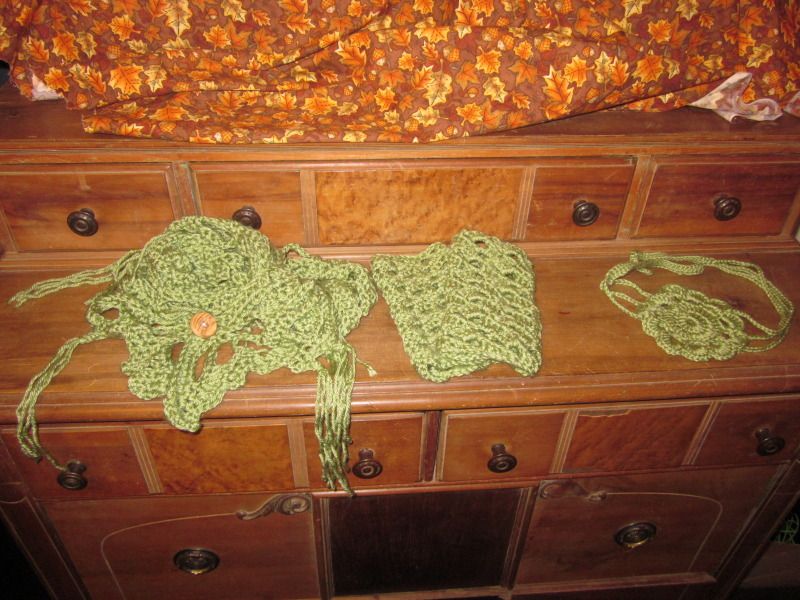
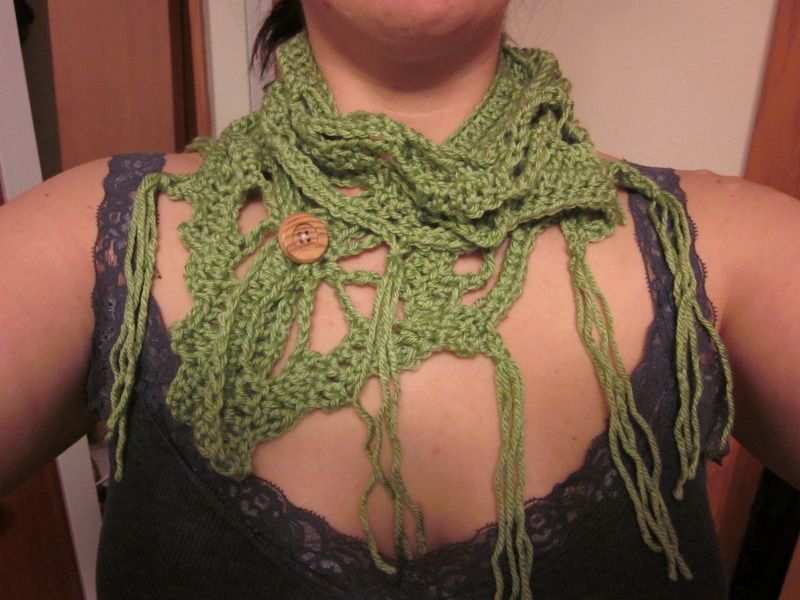
This week I made three projects that all go together nicely in kind of a Spanish Pirate theme; A Lace Shawl, Mesh Wristers, and a Flower Headband. So, let's get started.
Here's the stats of what exactly I used:
Yarn: Bernat Satin
Color: Fern
Yardage: 200 Yards
Weight: Worsted
Price: (Not sure, it was a gift)
Extra stuff: One button (50 cents from Wal Mart)
First up is the "Lace So Simple" Shawl (The pattern can be found here)
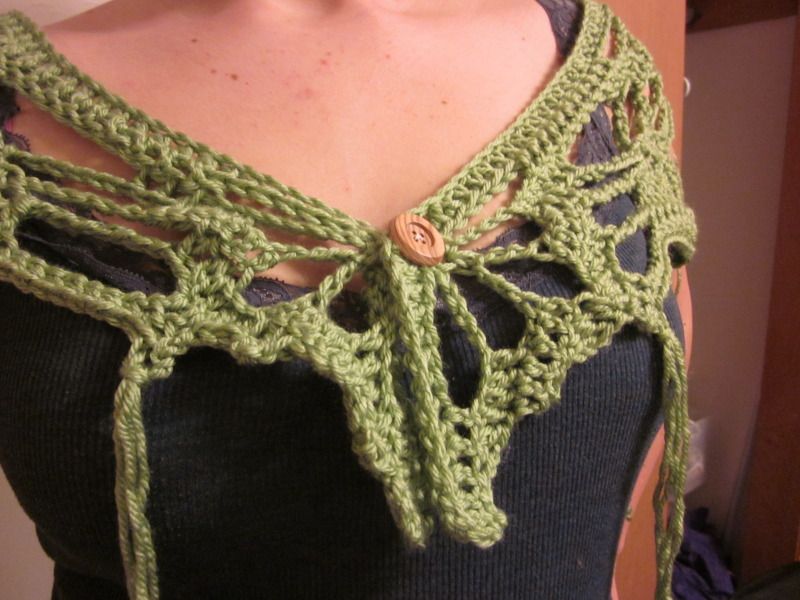
This is 7 rounds, and uses an N hook. Big hook, a few rows? Takes a few hours, and probably about half of our allotted yarn (including the long tassels). I also used a button on this so it stays on my shoulders easier, and also easily turns into kind of a cool, Bohemian style scarf, the button clasp adding a little extra personality.
The actual pattern calls for teardrop crystals to hang off of the picots, but just looping the tassles through the right places looks fine, and costs less.
I had a lot of fun with this one, and I think it looks really nice. the sheen of the green yarn I used adds an extra magical element, and it's really good for covering shoulders (something I spend my days and nights looking for!). I think as a scarf it's good for fall, and as a wrap it's good for spring, and I've been using it indoors when I'm at home, not quite cold enough for a blanket or sweater, but just want something over my shoulders. These are also elegant and bohemian enough to whip up for some last minute Christmas gifts.
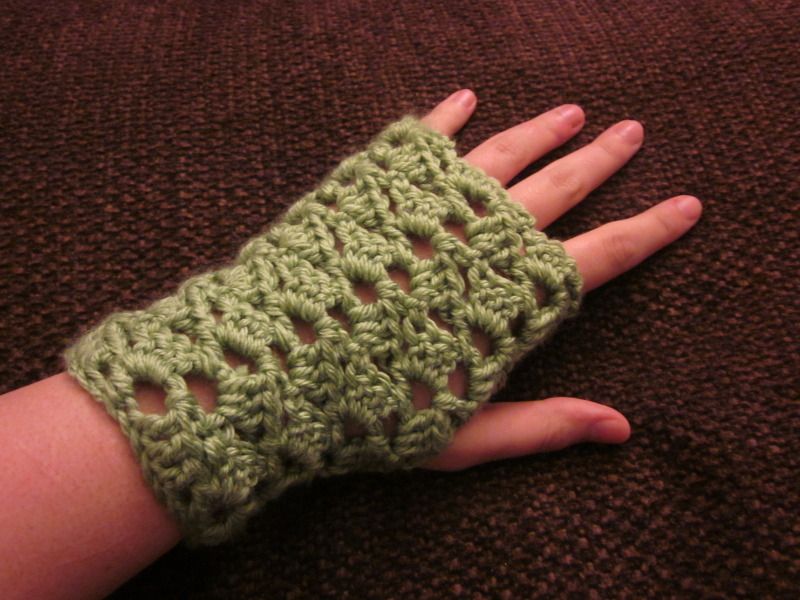
Next up are our Ivy Wristers (Pattern can be found here, as a free Ravelry download)
These use an I hook, and are the fastest wrist warmers I have ever made. I adapted the pattern a bit, with a starting chain of 35 instead of 29, and I did 12 rows instead of 10. They fit nicely, and are perfect for when my hands get chilly during NaNoWriMo (or blogging...yes, I am wearing them right now :)). Normally I'm a bit wary of the wrist warmer method of making a rectangle and folding it over, but this pattern is small enough that it works really well without being clunky, and actually fits the hand shape nicely.
The pattern itself took only a little while, and is just a quick motif repeated over and over and over again, making for an interesting pattern.
....Now~ ...
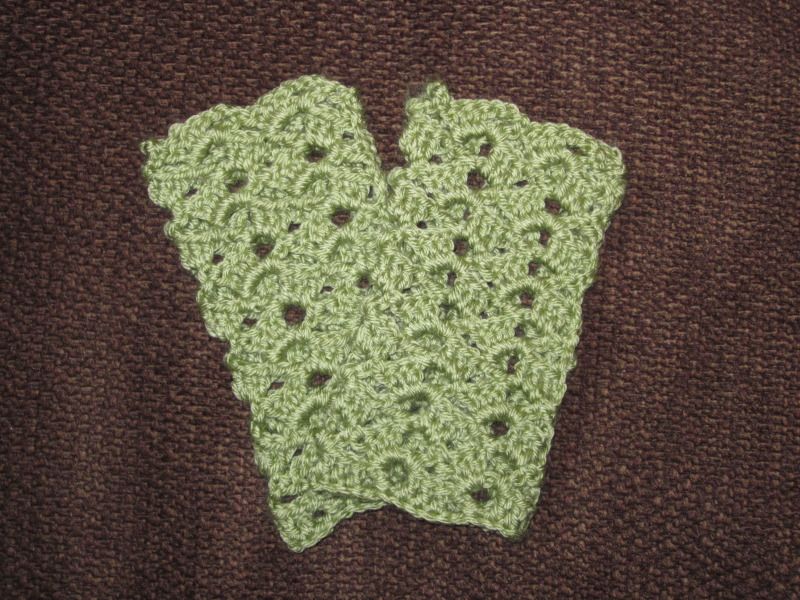
...Before you run off and make these, I have a bit of a disclaimer. Since I adapted the pattern to be bigger, I came VERY close to running out of yarn before finishing the final project. This is how much yarn I had left:
So, if you don't want to cut it that close, I recommend doing less than twelve rows. But, if you like to live on the edge, then go for it! Just be conservative with your yarn from here on out. Let me know how it goes for you!
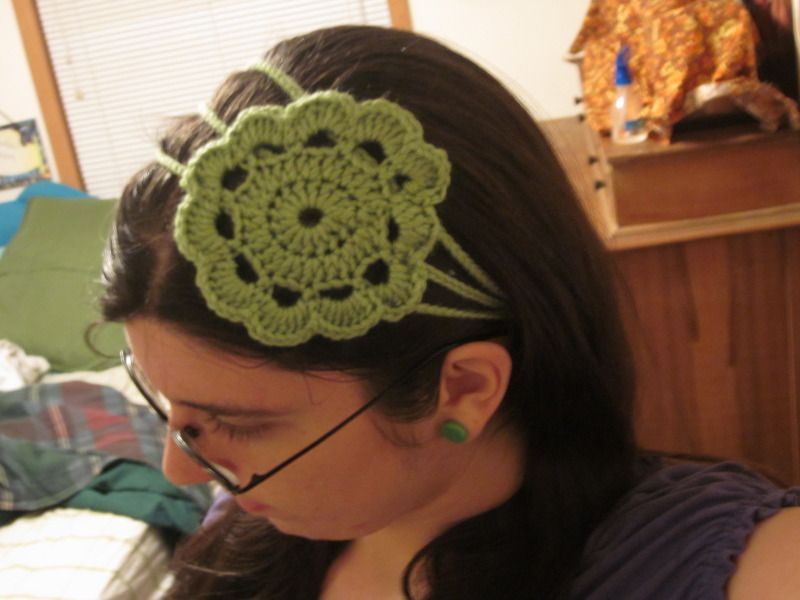
And finally, our flower headband (Pattern can be found here)
This was a super cute project, and was rather interesting to put together (sewing the large flower to the 3 chain headband). I used an H hook for the flower, and an F Hook for the chains (the F hook being very important to not running out of yarn :P). Despite how big the flower is, I was actually surprised at how cute it turned out. I don't feel like it's gaudy at all, I just don't know when I'm going to wear it! Hopefully I'll manage to get some use out of it.
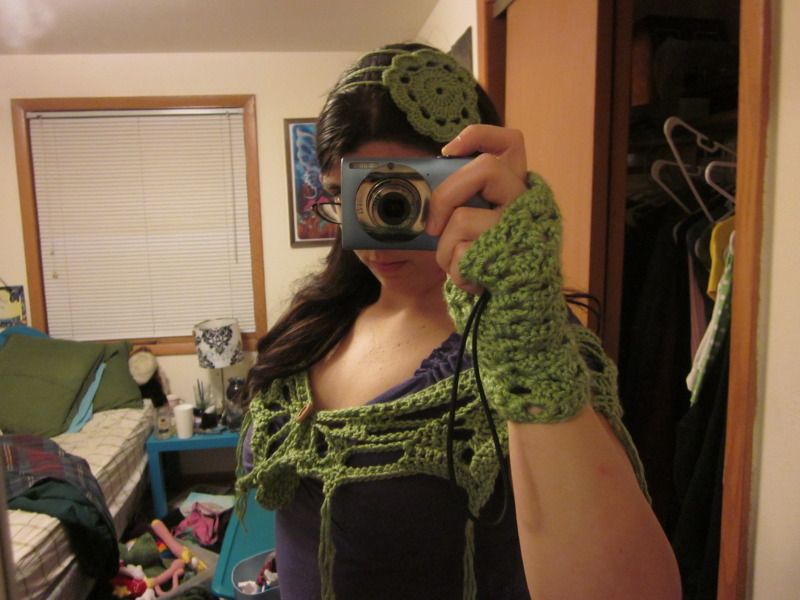
All together now!
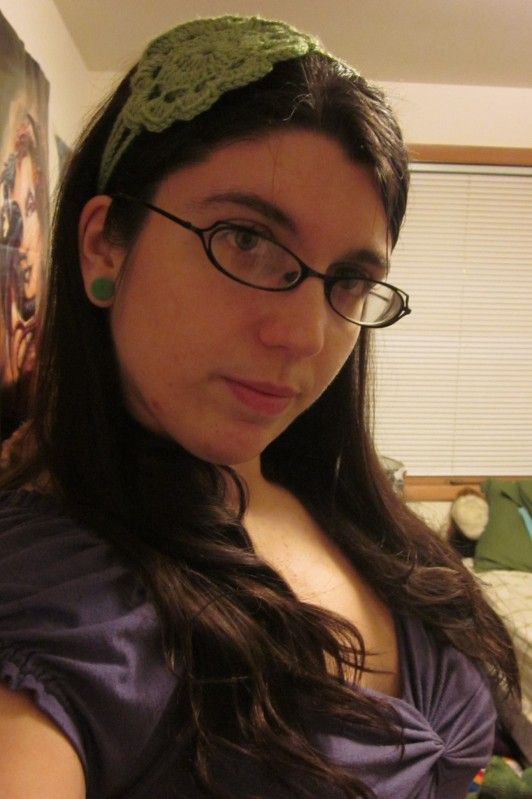
So this is what it all comes together to be! Mine is a nice...radioactive hobo Spanish pirate theme :)
Isn't stash busting fun? I've been making a lot of little projects lately, and since I don't have any extra money to buy more yarn, my stash is certainly dwindling beautifully :P
Want more stash busters? Wanna see the other cool projects I've been working on? You know I'll be back with some kind of goodies soon enough.
Labels:
crocheting,
easy,
flower,
gloves,
headband,
look what I made,
one skein weekend,
patterns,
scarf,
shawl,
simple,
yarn
Tuesday, May 8, 2012
Quick and Easy Crocheted Bangles
I don't really know what's been going on with me lately. The weather is in the 70's, and I've only yelled about it a couple times.
See, I like winter. I like putting on sweaters, and drinking hot cocoa, and crocheting with the biggest, fluffiest, fuzziest, softest yarns I can get my hands on, and then wrapping whatever it was that I just made around my neck a good 5 or 6 times, so I can go sit in front of a fireplace at my closest Starbucks. I like snow, and ice and wool socks.
I don't like summer. Summer, to me, is mosquitoes, and sweating, and all my friends saying "Let's eat our dinner outside!" So that I can be swarmed by mosquitoes, while I sweat, WHILE eating dinner. Nothing says 'joy' to me like picking gnats out of my mashed potatoes. Great.
This year seems a bit different, I haven't been bothered by the weather thus far, and I've been all too happy to go out and take walks. The weather has, however, been very inconsistent. Maybe I will look back on this reflection in a couple months when it's 80 degrees everyday, and think "Oh, if only I knew then what I know now..."
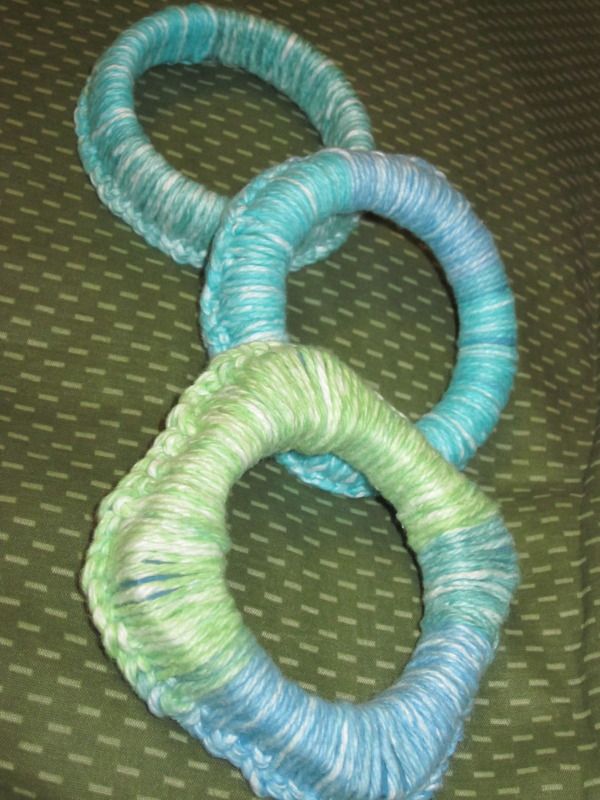
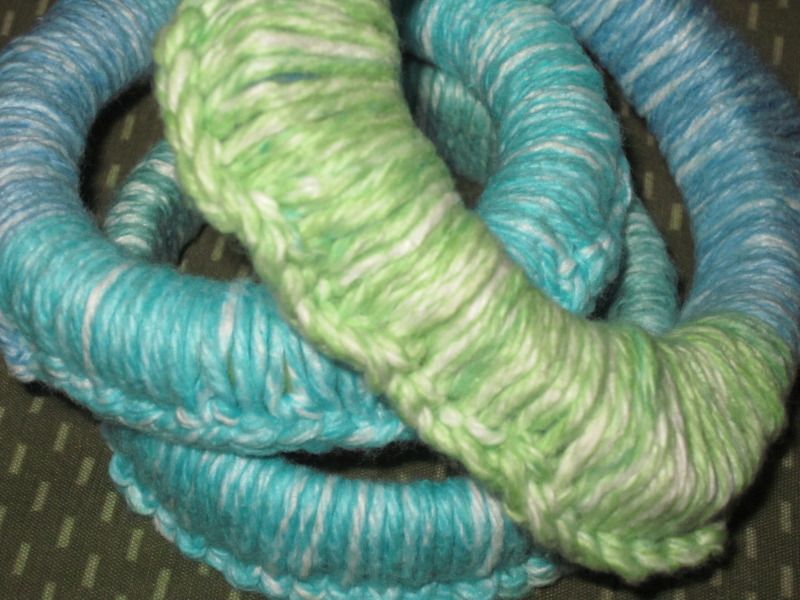
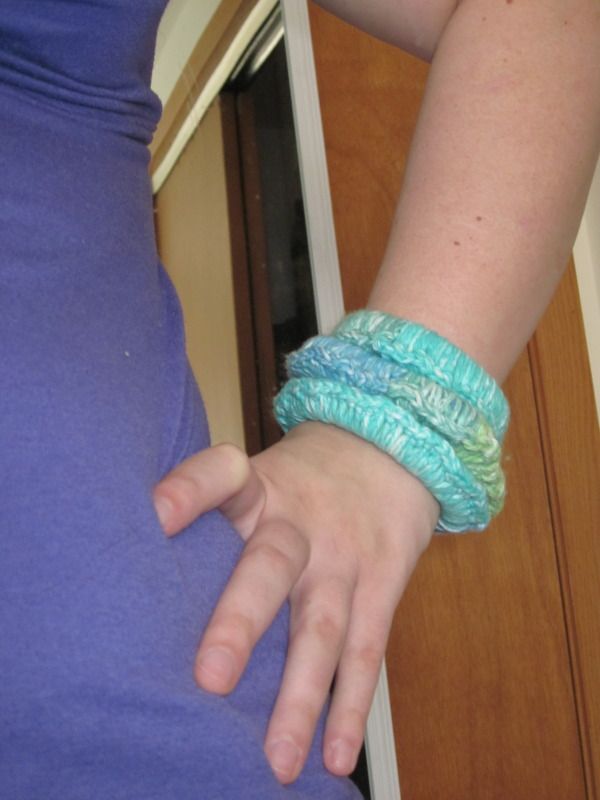
However, in the spirit of enjoying the weather, I put something simple and summery together. I was at Target the other day, and on a whim, nearly cleared out a section of clearance bangles (They were $1.20 each! At that price, how could I afford NOT to buy them? Amirite?!). Basically, I took cheap, semi-broken bangles and single crocheted over them with a light, cotton yarn (Lily Sugar n' Cream Stripes, the colorway "Country Stripes"). I LOVE this yarn. I'm already rather partial to cotton yarns, but this yarn reminds me so much of the Chesapeake Bay, where I used to live, my heart feels heavy as I write this out, and I don't know how good it is for my health to think about it too much. The yarn is 4 colors that all shined through over the 3 bangles I made, and are so reminiscent of the Bay waters, looking down at them makes me reminiscent enough to keep rambling (but I will spare you all). On top of that, it's light, so it won't be too hot to wear in the summer. My favorite part? Only using one yarn, and making 3 distinct and individual bangles.
Ah, I've been rambling more than usual. I'm actually hoping to do some real writing after this post, so my creative writing juices must just be spilling over. Also, my coffee is totally working (It's peanut butter coffee!)
*Ahem*
Here's how to do it:
What you need:
- Bangles! I used 3 kinds, a flat one, a round one, and a square one. The square one was weird, but works well enough. I will use the flat one as an example, since it is the simplest.
- Yarn, preferably cotton yarn so you can wear them in warm weather, but to each their own.
- Crochet hook. I used a size G hook, but I'm not entirely sure if this matters.
- Tapestry needle
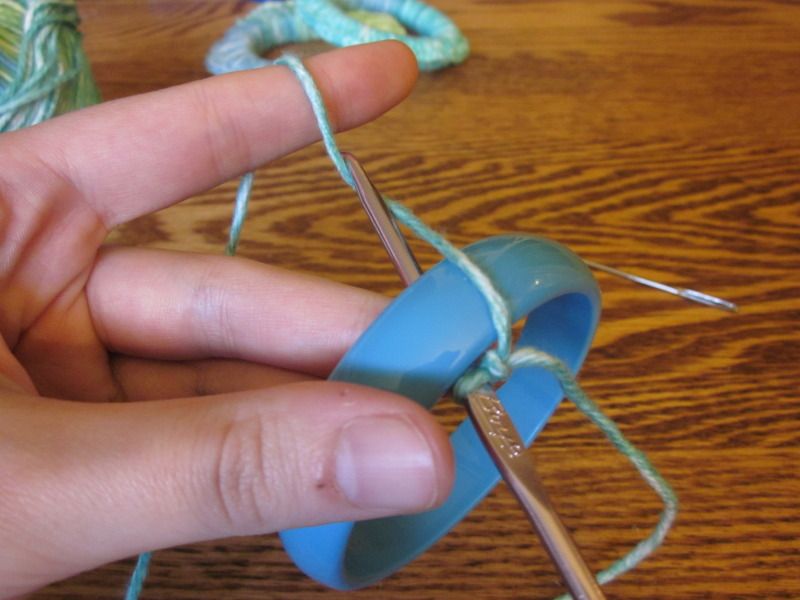
First, Slip stitch around the bangle, then ch 1.
Because of the thickness of the bangle, you will have to reach your hook out about an inch. Be more aware of tension, and it will turn out fine.
After your sl st ch 1, you will just do single crochets all around the band.
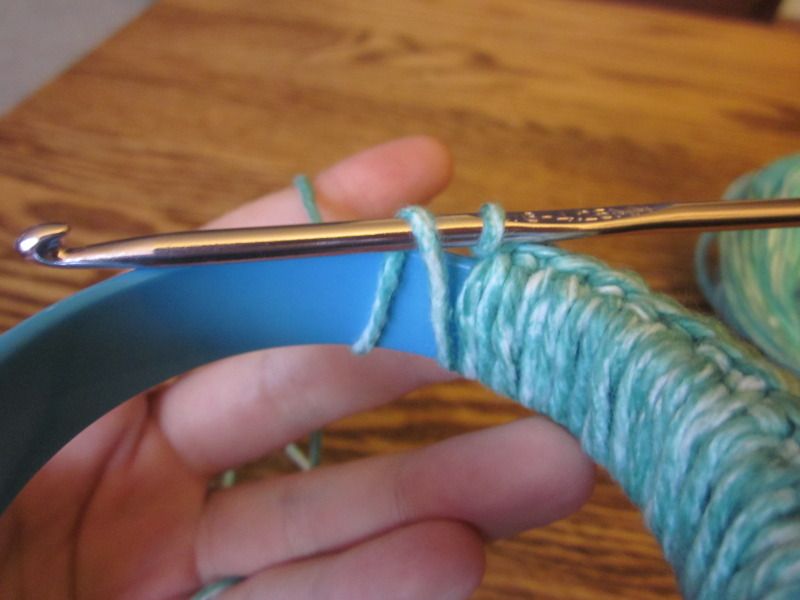 |
| Pull your loop up more than usual, to meet the top of the bangle |
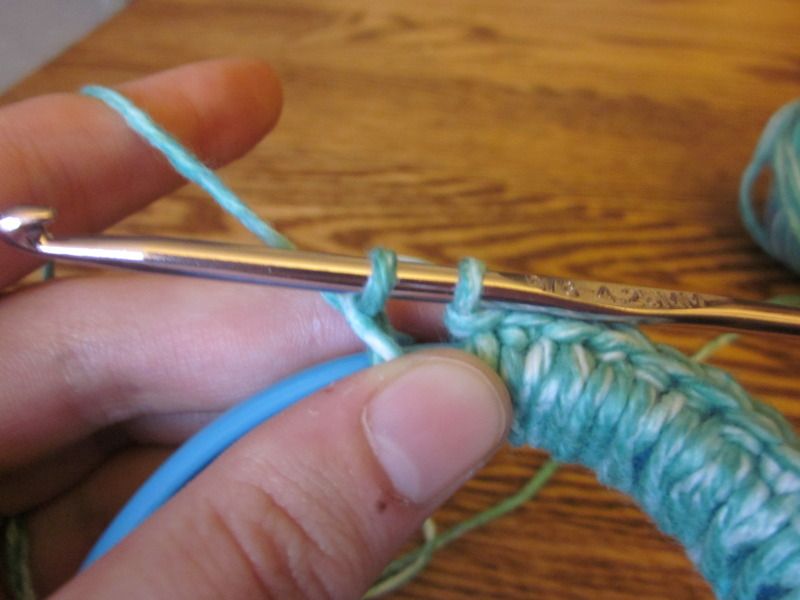 | ||
| Pull through one loop, then both loops. |
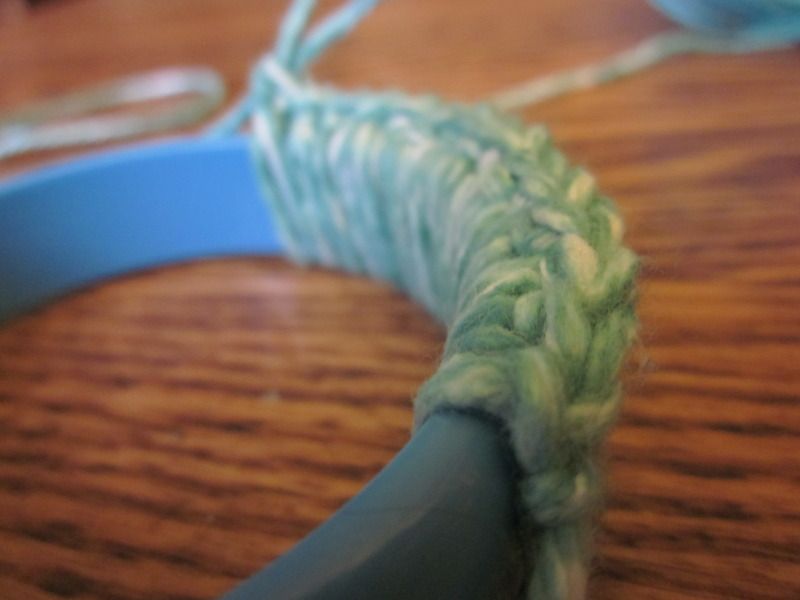
Single crochet all the way around. Be sure all the stitches are snug. When you are done. Sl st into 1st sc.
I then threaded both loose ends underneath all single crochets and cut them. Boom. Done.
These were so fun, and I actually REALLY enjoy wearing them! If you make some, I would love to see how they turn out.
Sunday, April 29, 2012
What I've Been Up To: 4 Finished Projects
Upon finishing my Mario Granny Square Rug, I decided to tie up some loose ends (heh.) with some other unfinished projects that had been looming about about for the last few weeks (or even months) before starting even ANOTHER big project. There is still a doily sitting in my Box of Estranged projects, but hey, no one really needs to know about that.
These are just a few noteworthy projects I've made recently. I've linked to the ones I can, but a couple of them are from either magazines or books (both of which I've mentioned).
1. Archipelago Handwarmers
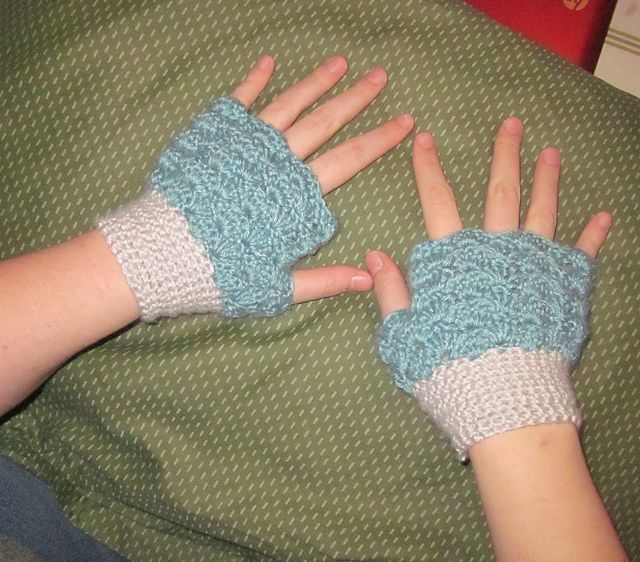
Okay, so they're actually called Ravenna Mitts, but the colors I chose were 'low tide' and 'sand', and since I happened to be making them to the tune-age of the Chrono Cross OST, well, the name just fit. I used some bamboo yarn I had gotten on sale at Michael's, and it ended up being (I think) just under 100 yards total. I've worn these a few times when typing (or crocheting, even), and I have to say that they're very lovely!
2. Cafe Wristers
These were a project in the most recent issue of Crochet Today magazine, and I literally started making them within 5 minutes of seeing them. I didn't even flip all the way through the magazine before I had my yarn and hook out. This color was a skein of Caron Simply Soft I bought back in December because I had a gift certificate to Jo Ann fabrics and I thought "IT'S SOFT. AND BLUE." Since it was lying around anyway, I decided to use it. I wish I had gone with something a *little* different, since I use so many blues, but the wristers came out nicely nonetheless.
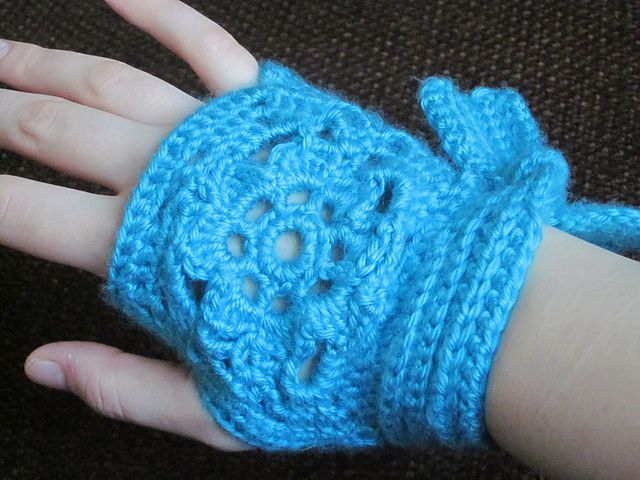
If you happen to have this issue of Crochet Today, or have just managed to stumble upon the pattern, my only suggestion is to make the ties quite a bit longer. I couldn't make a bow, I could only tie them once, and I'm sad to miss an opportunity for a cute wrist bow T^T
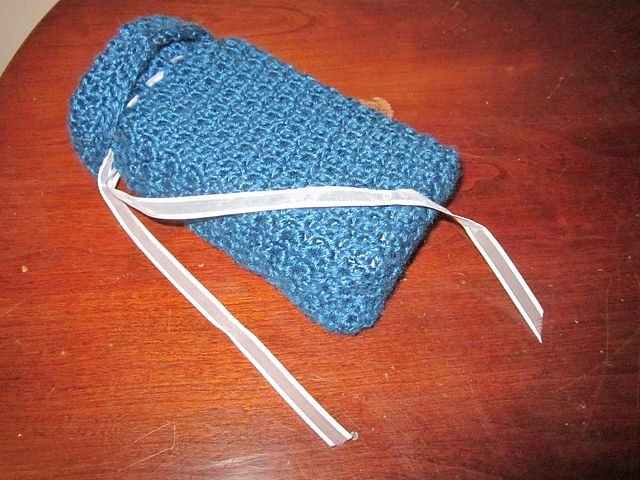
I've been reading Tarot for a handful of years now, and after buying my 3rd deck of Tarot cards almost 2 years ago, I was sad that they didn't really have a place to belong. My other decks stay in wooden boxes, but my newest deck was just wrapped in shoddy fabric. When I found the pattern for this, I decided to, once again, use some random yarn I had bought because of a gift card, and once again I thought. "OH. SHINY. BLUE.", and thus, this bag was born. I love the color, and it's a silk/bamboo yarn, so it's incredibly soft, and I'm certain my tarot cards are very warm and happy in there. As I recall, I didn't have to make even the slightest change to this pattern, and my cards fit perfectly. On top of that, it's super easy, pretty much just single and double crochets alternating. Love it.
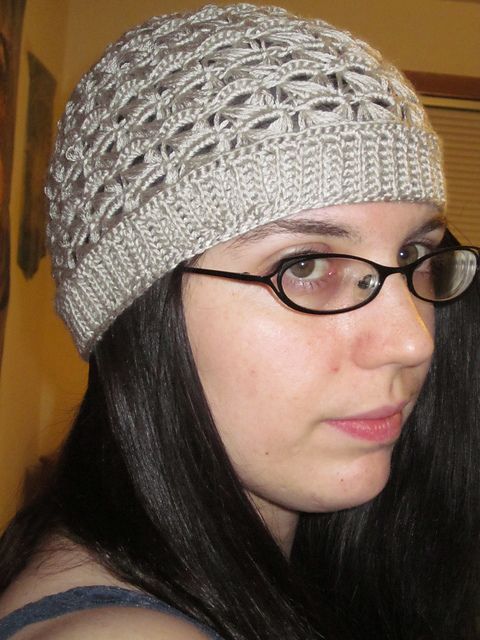
4. Misty Taupe Broomstick Lace Hat
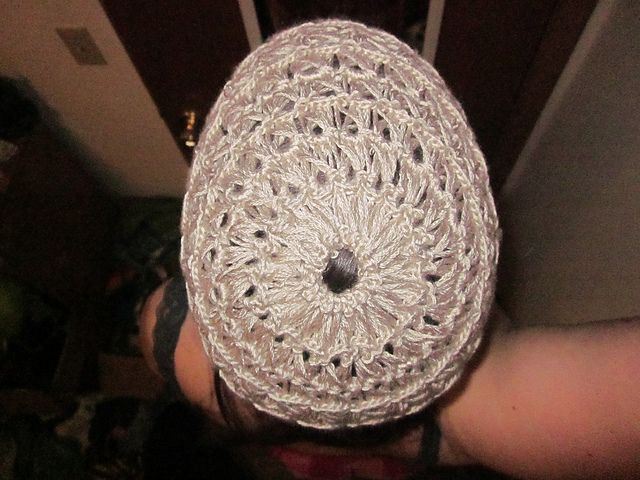
This was my first broomstick lace project, and also my first project from Kristin Omdahl's "Crochet So Fine". The band was supposed to be a sort of 'faux cable', but my skills are clearly not up to par with the book, so I alternated fpdc and bpdc to make a ribbed pattern. It's not as elegant as the book, but I'm happy with it.
I used a size 3 bamboo yarn infused with aloe, and I want to rub this hat on my face forever. The texture of the broomstick lace is not only amazing to the touch, but also keeps the head surprisingly warm. I was also pleasantly surprised at just how easy broomstick lace actually is. Wouldn't mind playing around with broomstick lace on other projects at some point.
As of right now, I'm just about halfway done with another huge project, it's a Doily Wrap, also from Kristin Omdahl's "Crochet So Fine", and I can't wait to share it with you guys...although probably not for another few weeks! The first few parts have taken me about a week, and I spent almost the entirety of today trying to figure out how to put all of them together via a very stressful session of trial and error. In the end, I managed to get it together, and I think it's going to look very nice when it's done :)
Friday, October 21, 2011
Cabin Fever Crochet
The days are getting shorter, the weather is getting cooler...you just have to love fall. But soon, there will be snow days, there will be days so cold it won't be sane to even think about leaving your house, but the serenity of the snow and the beauty of winter will certainly overwhelm you.
Well, at least that's my experience.
Here are three wintry projects to help you get through the season without going insane, and hopefully being able to focus on the beauty and comfort of winter, as opposed to the chapped lips, snow shovels and icy roads.
1. Snowflake Dishcloth
This was a fun little project that would make a great gift, or a nice decoration (although it's a 'dishcloth' I think it would work better as a doily). I was kind of overwhelmed at the sight of it, but it actually ended up being rather fun, easy, and quick. There were some things about the pattern I had issues with, so I improvised a bit, but it still ended up looking very lovely.
2. Openwork Cowl
This is another somewhat quick project, and I really enjoyed it. This is a pretty small cowl in comparison to other cowls, but that was kind of its charm for me. You can have a nice, fuzzy thing around your neck with only 1/5th the amount of work as a regular sized scarf. I used bulky, soft yarn to make it extra cozy.
3. Snow Day Fingerless Gloves
For this pattern I used Vanna's Choice (I used an entire skein of it, I only had about 2 feet of yarn left when I was done! Miraculous.), and Lion Brand Fun Fur for the bottom edge. These are super chunky, fuzzy, warm, and to be honest; a little addicting. After I made these I thought about putting them up for sale on Etsy, but I absolutely can not take them off (I am wearing them right now, of course). And I think they will be perfect typing gloves for when the house gets a little drafty in winter. I adore these things, and highly recommend making a pair for yourself.
Row 1: Ch 37, sc in 2nd ch from hook, dc in next ch, *(sc in next ch, dc in next ch), repeat from * across, turn.
Row 2: Ch 2, (does not count as 1st st), hdc in each st across, turn.
Row 3: Ch 1, sc in 1st ch from hook, dc in next ch, *(sc in next ch, dc in next ch), repeat from * across, turn.
Rows 4 - 26: Repeat rows 2 - 3, 11 times, then repeat row 2 once more.
Fasten off leaving a long tail.
Fold Glove in half with WS facing outward, sew together the first 22 sts of row 1 and 26 for seam. Fasten off. Starting from other end, sew together the 1st 3 sts of row 1 and 26 for seam. Fasten off, leaving 11 sts not seamed for thumbhole.
Thumbhole
Rnd 1: With glove still inside out, attach yarn with a sl st to st closest to seam, ch 1, hdc in each st around thumbhole, join with sl st to 1st hdc.
Rnd 2: Ch 1, hdc in front loop only of each st around, join with a sl st to front loop of 1st hdc.
Rnd 3: Ch 1, hdcdec in front loop only of 1st 2 sts, repeat with each pair of sts around, join with a sl st to back loop of 1st hdc
Edging
Invert glove to be right side out, and attach fun fur yarn in any stitch at the bottom of the glove with a sl st. sc in each each st around. Working in continuous rounds, make 5 rows of scs. Fasten off.
I hope you guys enjoy these projects, and hopefully they will make the winter a little more bearable, not to mention cozier and warmer.
Labels:
cowl,
crocheting,
gloves,
patterns,
snowflakes,
winter,
yarn
Saturday, October 8, 2011
Halloween Project # 6: Viking Hat and Beard
Well guys, here you go. As promised, one full-on amazingly badass Viking get-up. As I write this, my eyes are drooping and my whole body feels numb with exhaustion. I'm finished with day 7 of a 9 day work week, and I can honestly say that this project got me through most of it. It kept my spirits pretty high, my hands busy and my mind occupied on other things besides...well, work.
This whole project took about 6 days, and I'd say overall it cost me about $25 to do (although worth every penny when Gabe put it on and the thing actually fit). I'm sure one could also do it for cheaper, but I used Caron Simply Soft, which runs about $4.50/skein. You could easily use Red Heart for $2.90/Skein, I just wanted it to be as nice as I could make it (I tend not to skimp on yarn when it's a gift).
Unfortunately, $6.50 of that expense was purchasing the pattern, so unfortunately I can not provide it for you here, it would not be fair to anyone, especially the creator of the hat.
If you would like the pattern of the hat, it can be purchased through Etsy here.
If you would like the pattern for the beard, you can get that for free on Ravelry here. However, as I stated in my last entry, throughout the beard I used long rows of fringe to make the beard more realistic, then added 'sideburns' so they could properly connect to the hat.
If you're looking for something to get you through a long week, or something to keep you warm and silly through the winter, I definitely recommend both the hat, as well as the beard. Both of these pieces were equally fun to make, and I had a ton of fun getting a laugh out of my co-workers by explaining to them that I spent my day crocheting a beard :)
Here are some more detail shots:
| I added a button to the inside of the hat, and a loop at the end of the 'sideburns' so the beard can be attached or detached whenever you want. |
| Hat, sans beard. |
| I'd never used 'fun fur' yarn before, and although it looked quite sparse and difficult to use at first, it ended up being rather easy and fuzzy. |
Hopefully next project will be something great, but I'm not sure what yet! I hope you guys got a little bit of inspiration from these pictures, and I can't wait to take more 'action shots' of this as Halloween approaches :)
Monday, October 3, 2011
Viking Beard
 |
| Gabe being a fantastic model |
While this beard may seem as though it's in the spirit of Halloween, it really isn't. My lovely boyfriend had his birthday last week (it was the 1st anniversary of his 29th birthday!), and while a sushi dinner was probably sufficient, I still felt as though his 30th should be bigger and better. For my 22nd birthday, he spent 50+ hours making me a digital painting of Mermaid Fairy Princesses, so I thought I should make him something, too.
The idea came about on the night of his birthday when we were looking through Ravelry patterns together, and it all came to me in a beautiful clear picture when a friend of mine posted a picture of a 2' long crocheted Viking beard to a crocheted Viking hat on my Facebook wall. So we decided that was what was going to be made.
I used the beard from this pattern as a kind of 'face cozy", then proceeded to take groups of 4 strands of yarn and pulled them through like fringe on a scarf throughout the beard. I used about 160 groups of this 'fringe' to make different layers of 'hair' on the beard. I used a little over a 315 yard skein of Caron Simply Soft to make this, but I think it was completely worth it.
The Viking Hat will be next, probably done in a few days or so :)
Tuesday, September 27, 2011
Halloween Project #5: Severed Monster Finger Chapstick Cozy
Well, Chapstick, you lose. I've been saying for years that you guys should make a keychain holder so I (and everybody else in the world) don't have to buy chapstick every 4 days (or maybe that's exactly what you want us to do...).
Well, now it's too late. Not only do I have a keychain holder to keep my chapstick in so I'll never lose it, BUT IT'S IN THE SHAPE OF A SEVERED FINGER. BEAT THAT.
This took almost no time, and even less materials. You can find the pattern here. I omitted the button clasp, as it's very snug, and there's no way that chapstick is coming out on it's own, and I used black for the fingernail and knuckle instead of brown...other than that, the pattern is easy to read, very accurate and really fun.
Enjoy!
Friday, September 23, 2011
Halloween Project #2: Amigurumi Candy Corn
So as you may, or may not, remember, back in June, I decided to do 31 Halloween-related projects before Halloween. I did one, and there was nothing for a long while (not because I didn't want to...you know how it is when your car breaks and you get 25 commissions to help pay for it, and then you move and simultaneously decide to write a novel. Or maybe you don't...but that's what happened, either way).
Well things are calming down a bit, and so I can finally move forward. It's finally Autumn, and so I think we're all in the mood for Halloween, anyway.
These little candy corn are, for lack of a better word, FREAKING ADORABLE. They are about 3" high, and take about 30 minutes to make (so you can make a million of them!). I can't wait to make a bunch to put in candy dishes, or possibly put on string to make a festive candy corn garland. Either way, this is a quick project, and you can get 2 - 3 finished in an hour.
You can find the pattern on the Lion Brand website here.
The next pattern involves ghosts! It's another crochet one, and I'm excited for it.
Thursday, September 15, 2011
My Favorite Little Crochet Project.
After making this necklace for the 3rd time last night, I've realized this is definitely one of my favorite things to crochet. It only take a little over an hour, a few buttons, and minimal yarn. You can find the original pattern here.
The pattern calls to 'improvise' a flower, but I wasn't able to do so. I have a pattern for a flower, that you guys are more than welcome to use if you'd like.
Ch 5, sl st to join.
R1: Ch 1, 10 sc in ring, join with sl st to 1st sc.
R2: Ch 1, sc in same st as joining, ch 2, skip next sc *sc in next sc, ch 2, skip next sc. Repeat from * around, join with sl st to 1st sc.
R3: Ch 1 (sc, hdc, 3dc, hdc, sc) in each ch-2, sp around join with sl st to 1st sc.
R4: Ch 1, sc in same st as joining, ch 3, placing ch behind petals (sc in 1st sc of next petal, ch 3) around. Join with sl st to 1st sc.
R5: Ch 1. (sc, hdc, dc, 3 tr, dc, hdc, sc) in each ch-3 sp around, join with sl st to 1st sc. Finish off or...**
**Optional R6: Ch 1, sc in same st as joining, ch 3, placing ch behind petals (sc in 1st sc of next petal, ch 3) around. Join with sl st to 1st sc.
**R7: Ch 1, (sc, hdc, 2 dc, 4 tr, 2 dc, hdc, sc) in each ch-4 sp around, join with sl st to 1st sc. finish off.
(I did the 3rd round of petals on the blue flower, but only did 2 rounds of petals on the green one, so you guys can get an idea of the difference.)
On a related note, can I just say that I just discovered Bernat yarn (the beautiful Aqua yarn I used for the blue necklace), and I am incredibly impressed! For about $0.30 more than Red Heart Yarn, you get the same amount of yarn, but it feels softer, works better and looks nicer. It doesn't even feel like acrylic yarn. I would really recommend looking into it. I just discovered it at Wal Mart, and it seems to be pushing Red Heart out of the picture a bit. So don't be frightened! Give into the unusually cheap, yet somehow, high quality yarn. I can't wait to buy more so I can make more projects with it!
Subscribe to:
Posts (Atom)
